


P
P
P
C
C
C
F
F
F
r
r
r
e
e
e
e
e
e
—
—
—
U
U
U
s
s
s
e
e
e
r
r
r
M
M
M
a
a
a
n
n
n
u
u
u
a
a
a
l
l
l
– 8 –
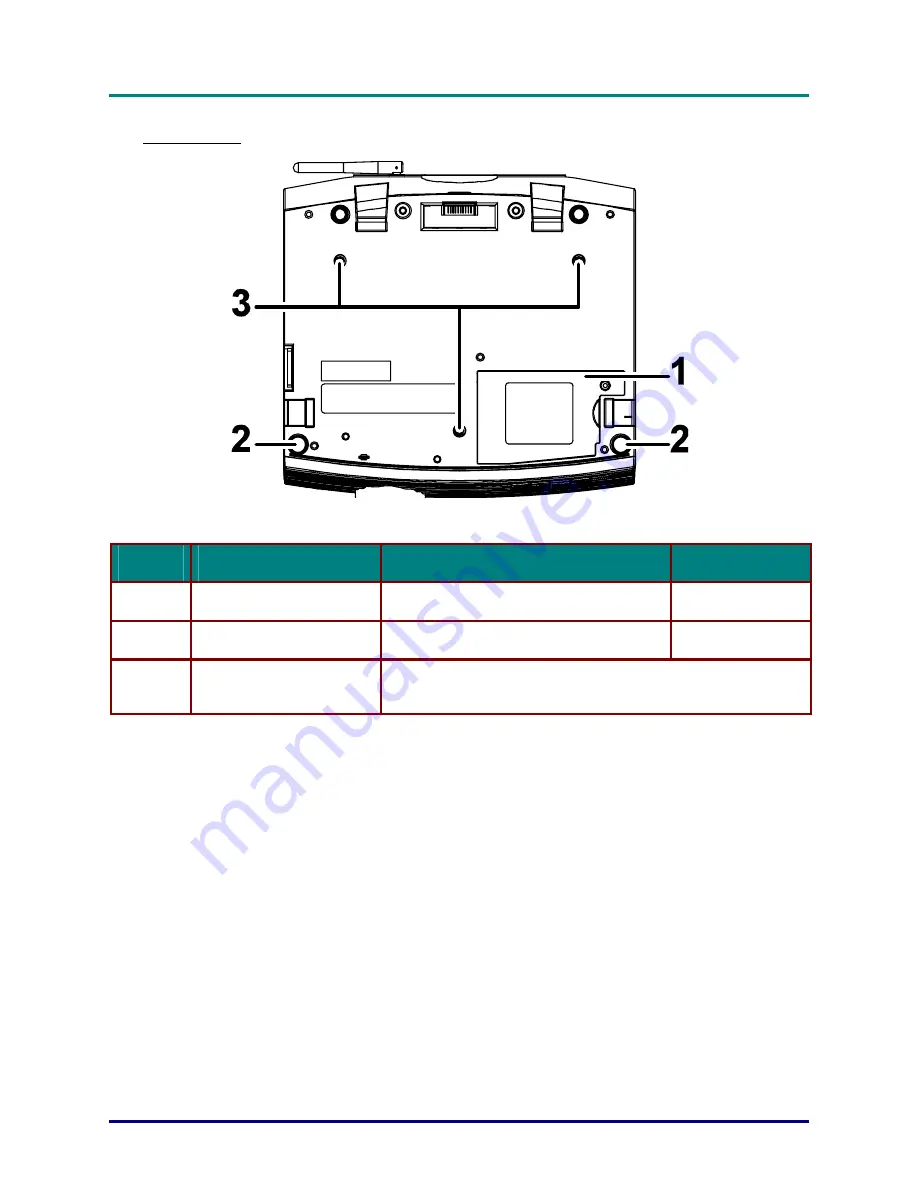
Bottom view
I
TEM
L
ABEL
D
ESCRIPTION
S
EE PAGE
:
1
Projection lamp cover
Remove when changing the lamp
40
2
Height adjuster
Adjust the level of the PC Free
20
3
Ceiling support holes
Contact your dealer for information on mounting the PC Free on
a ceiling.
Содержание D512PF
Страница 1: ......
Страница 7: ......
Страница 56: ...S S Sp p pe e ec c ci iif f fi iic c ca a at tti iio o on n ns s s 49 Dimensions ...


