


4. LUMIFORGE SET UP
IMPORTANT: LumiForge has to be set up:
On a flat solid surface parallel to the floor, the spirit level (n.11) will help you find the
correct position.
In a well ventilated area since resin odour may cause headaches and nausea.
Away from direct sunlight contact or any kind of light exposure which may cause the resin
to cure improperly!
4.1 Software download and installation
-
Visit the following webpage: http://www.lumindustries.com/lumiforge-downloads
-
Download LumiForge software (LumiCreator) and resin.ini file on your computer.
-
Unpack the software into a folder of your choosing.
-
Now copy the resin.ini file inside the LumiForgeCreator folder
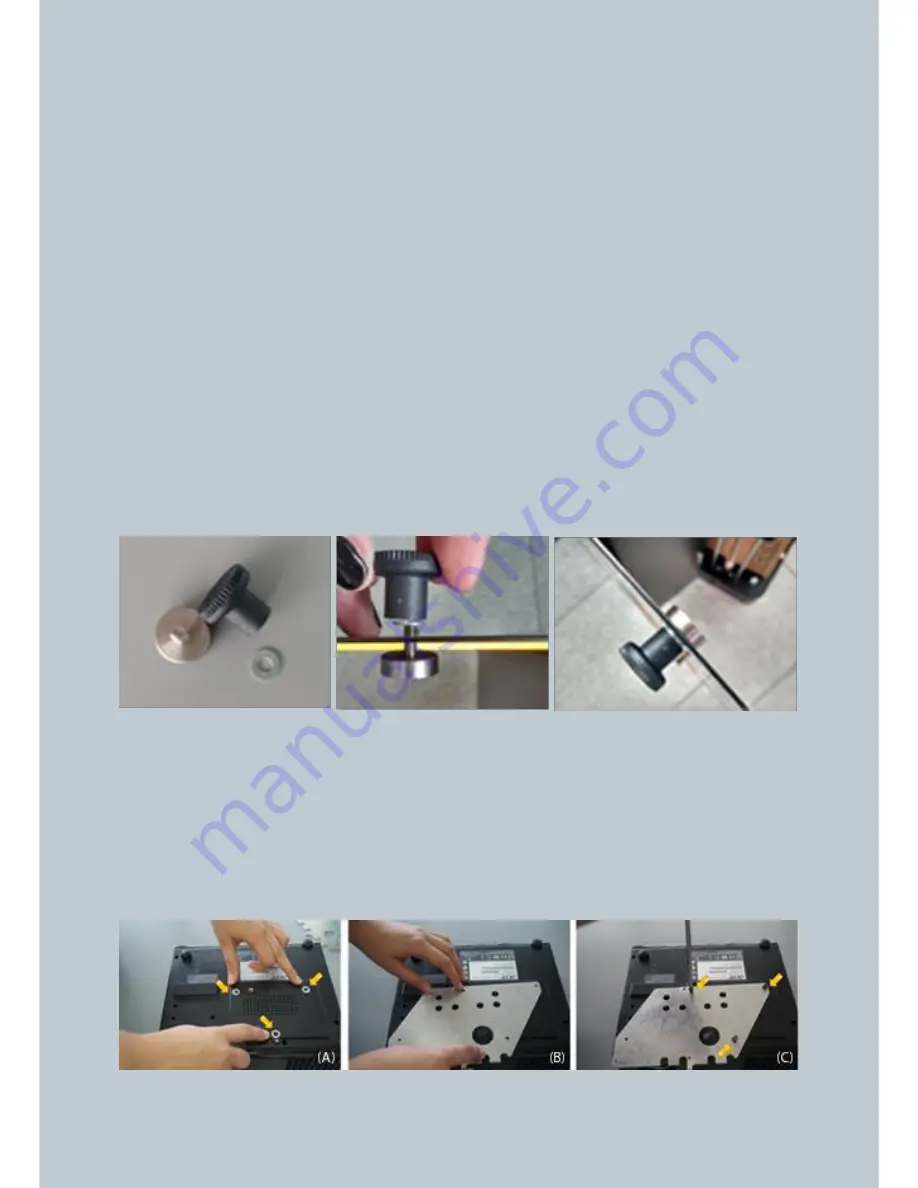
4.2 Installing door handles
-
Take one black handle, one washer and one magnet screw
-
Insert the magnet screw at the door back
-
On the front part place the washer and screw the handle
Img.1 Install Lumiforge door handles
-
Repeat this process for the following three handles
4.3 Installing DLP projector
-
Extract the projector from its own shipping box.
-
Remove the lamp cover.
-
Install the projector-holder plate (n.9), start placing the provided washers (img 2.a) on top
of the three treaded holes, place the plate in the right position (img 2.b), tighten the screws
into the three threaded holes on the projector bottom as per image (img 2.c).
Img.2 Install the projector-holder plate
Содержание LumiForge
Страница 1: ...CRAFTER MANUAL...


