


3
3 Instruction for installation and setting
3.1 Confirm and set the VC-A20P network configuration
z
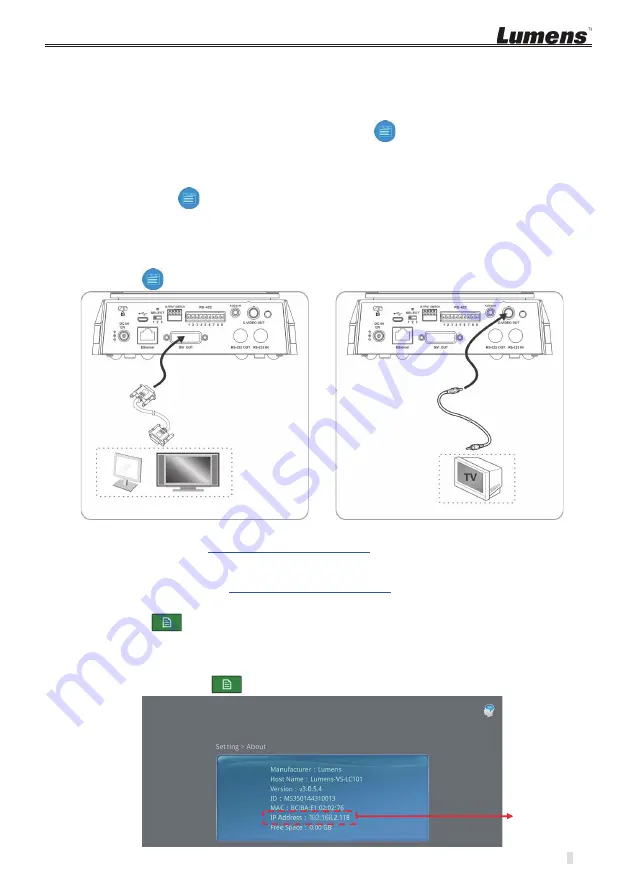
Use a C-Video cable or a DVI cable to connect VC-A20P and the monitor (refer to the
figure below for the connection method)
z
After the power is switched on, press the [MENU]
button on the VC-A20P remote to
open the OSD menu.
z
Move down to [Ethernet]; press [
] to enter
z
Press [
] to enter the [DHCP] setting; confirm [DHCP] to be in [Close] state.
z
Press [MENU]
to exit the [DHCP] setting
z
Confirm the [IP Address] is the preset [192.168.100.150]
[Remark]
If there are more than one VC-A20P to be connected, please modify the IP
address to [192.168.100.x]
Ǵ
e.g. [192.168.100.151], [192.168.100.152]…etc.
z
After complete the confirmation of the address and modification, repeat pressing the
[MENU]
button to exit OSD menu.
/
[Remark]
For VC-A20P relevant use and operation method, please visit Lumens website;
download and read the
VC-A20P operation manual
.
Ô
Before begin the following settings, please confirm that the connection has been
completed according to
2 instruction of connection
.
3.2 Confirm the VS-LC101 IP Address
z
Press the
button on the VS-LC101 remote control; open OSD menu
z
Move rightward to [Setting]; press [OK]; and enter the setting page.
z
Move downward to [About]; press [OK]; and enter the setting page to confirm the IP
address.
z
Repeat pressing the
button to exit OSD menu
DVI cable
Monitor or HDTV
C-Video Cable
TV
VS-LC101
IP Address


