background image

10

NVR Quick Start Guide

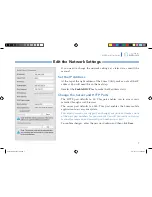
Set Up Dynamic DNS

This allows you to connect to your surveillance system from anywhere, via the Internet, 
using a web address that’s easy to remember.

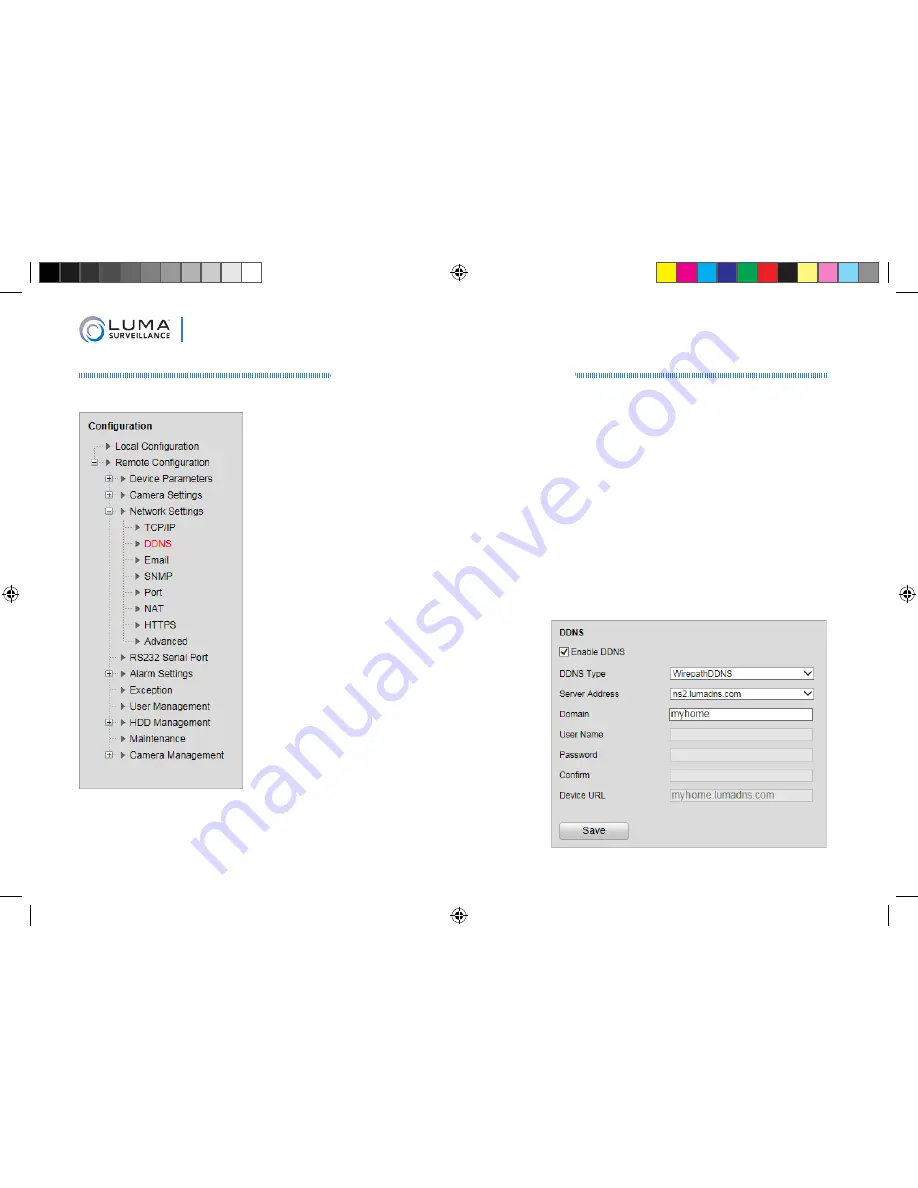
Click on 

Remote Configuration 

Network Settings 

DDNS

.

Click the box labeled 

Enable DDNS

, then choose a type from the 

DDNS Type 

menu. Next, 

choose a server address. 

We recommend WirepathDDNS and ns2.lumadns.com.

Enter your desired domain in the 

Domain

 box. This creates a personalized server address, 

which is shown under 

Device URL

If someone has already registered your desired domain, the system adds a unique ID 
(typically two to four digits) to your domain. If you do not like these digits, try another 
domain or server address.

Example: If you choose the domain 

myhome


(as shown), your system’s URL would be 

myhome.LumaDNS.com. If someone already 

had myhome, then your system’s URL would 

be something like myhome13.LumaDNS.

com. 

Click 

Save

 to finalize the settings here. 

Luma NVR QSG pilot.indd   10

7/10/2015   11:13:25 AM

Содержание LUM-500-NVR Series

Страница 1: ...LUM 500 NVR Series NVR Surveillance Recorder Web Interface Quick Start Guide Luma NVR QSG pilot indd 1 7 10 2015 11 13 24 AM ...

Страница 2: ...al reference manual for this product which has a chapter that steps you through installation without using the web interface Required Equipment The NVR and all cameras to be installed Network connection for the NVR Admin rights to a network computer that can access the surveillance system Phillips screwdriver Two AAA batteries for the remote control Additional Resources You can acquire a PDF of th...

Страница 3: ...tilation Do not block ventilation openings The performance and lifespan of the hard drive is affected by temperature Use this device in temperatures ranging from 14 131 F Handle the hard drive with care You can damage the hard drive if this device is moved while the hard drive is still spinning If you must move the device even just to reposition it follow the shutdown procedure in the technical re...

Страница 4: ...NVR Rack ears for installing your NVR into a rack Screws for attaching the rack ears to the NVR USB mouse Remote control Power cord Stick on rubber feet for the unit if you will not be installing it in a rack Please note that distributing copying disassembling reverse compiling reverse engineering or exporting the software provided for this product is expressly prohibited and in violation of inter...

Страница 5: ...SB unused and accessible for later use 3 If desired connect a local monitor to the VGA HDMI or video out port 4 Connect your IP surveillance cameras to the camera ports To connect your cameras through your local network consult the technical reference manual available online for additional setup 5 Connect your network cable to the Ethernet port 6 Connect the power cord and turn on the power switch...

Страница 6: ...e click on the Luma Utility icon to run the installer You can click through and accept the defaults Locate the NVR Run the Luma Utility It searches the local network for all Luma Surveillance devices If your NVR does not appear ensure that the network connections are secure and that the unit is powered up then click the button Click on the entry for your NVR to view its details Double clicking on ...

Страница 7: ... the Server and HTTP Ports The HTTP port defaults to 80 This port enables you to access your recorder through a web browser The server port defaults to 8000 This port enables the Luma mobile application to access your system For security reasons we suggest you change your ports and make a note of the new port numbers for your records Consult your server or router manual for common and reserved por...

Страница 8: ...nd Install the LumaWebComponents plug in Restart your browser and return to your recorder s login window Enter admin for both the user name and password You might get a pop up message that asks you whether you want to run the Luma Web Components plug in You must allow the plug in to access your system Google Chrome does not have a pop up message Instead look in the right end of the address bar for...

Страница 9: ...left column This displays a table of all IP cameras configured for the NVR In the rightmost column is a link to each such IP camera This link opens a new tab in your browser for your camera s local interface menu see your camera manual for details It can only be used from within the network Reinstalling Network Cameras If you are taking cameras that were previously attached to a network and pluggi...

Страница 10: ...ur desired domain in the Domain box This creates a personalized server address which is shown under Device URL If someone has already registered your desired domain the system adds a unique ID typically two to four digits to your domain If you do not like these digits try another domain or server address Example If you choose the domain myhome as shown your system s URL would be myhome LumaDNS com...

Страница 11: ...r device s URL e g MyHome LumaDNS com gets you to the login page of your NVR no matter where you are If you changed your HTTP port from the default location 80 add a colon and the new port number to the URL e g MyHome LumaDNS 8042 Port Forwarding for Attached Cameras If your cameras are attached directly to your NVR you ll also need to set up port forwarding for them The cameras are accessed with ...

Страница 12: ...erface Click on Camera Management IP Camera At the top of the window click on the POE Password button This opens up a dialog box that lets you change the admin password for all of your cameras simultaneously it has no effect on other accounts passwords Camera passwords cannot be longer than 31 characters The camera password can only contain numbers and letters no spaces or special characters For a...

Страница 13: ...member than a password like P4S w rD Add Additional Users Click the Add button Enter the new account s user name and password Account names can be up to 32 characters long and can contain numbers and letters only We recommend that you add accounts by individual users names so that if someone reboots the system or erases a log you know which user did it Choose the account s level There are two leve...

Страница 14: ...ol NTP to synchronize your system to Coordinated Universal Time We strongly recommend using NTP to keep your system well calibrated If you want to use manual time sync or if your system is isolated from the Internet see the technical reference manual available online Disable DST if Necessary If you are in a location that does not observe daylight saving time click the Enable DST checkbox to desele...

Страница 15: ... to the surveillance system Change the cameras frame rates to manage hard disk space Set a custom recording schedule Arrange for the system to send alert emails when an alarm is triggered Create privacy masks Set up alarms to trigger from the camera and vice versa and more To learn more about these capabilities go to the product page at SnapAV com and download the technical reference manual Luma N...

Страница 16: ...on all components found to be defective in material or workmanship under normal conditions of use This warranty shall not apply to products that have been abused modified or disassembled Products to be repaired under this warranty must be returned to SnapAV or a designated service center with prior notification and an assigned return authorization RA number Copyright 2015 by SnapAV All rights rese...

Отзывы: