| 39
AIS menu |
Link-9 User Guide
2.
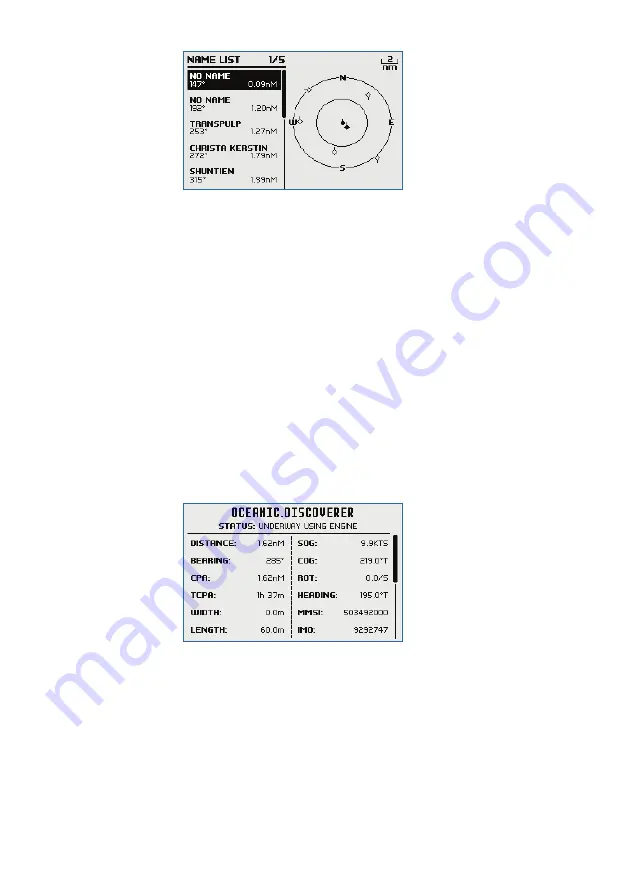
AIS target details will be displayed on the left of the screen. Either
the vessels name or MMSI will be displayed (if the information is
available) depending on the setting you selected in Section “6-2
AIS data display format (AIS DISPLAY)”. Also the target’s bearing and
distance to you are displayed.
¼
Note:
It could take some time before AIS targets are displayed.
3.
A simple plotter PPI on the right hand side of the LCD shows the
geographical location of the AIS targets with respect to your
position which is in the center of the plotter PPI.
4.
Press the Zoom In (TRI) or Zoom Out (Scan) keys to change the scale
of the plotter. The scales available are 1, 2, 4, 8, 16, 32 nm.
5.
Press the AIS/IC key again to change the display to T/CPA Approach
screen.
6.
Rotate the knob to highlight any AIS target shown on the plotter
screen. The selected target will have the target symbol filled in.
7.
Press ENT to view full details of the highlighted target such as MMSI,
Vessel name, distance, bearing, heading, ROT, COG, SOG, status and
other vessel information.
T/CPA approach screen
1.
When in AIS mode, press the AIS/IC key again to toggle between the
standard AIS screen and the T/CPA Approach screen.
2.
In TCPA Approach mode, the approaching AIS target’s details are
listed on the left side along with it’s geographical position on the
plotter PPI.


