background image

I271 

GB 

02 

17

                                         31100324

G

B

8

INPUTS, OUTPUTS, INTERNAL VARIABLES, COUNTERS
–   The inputs and outputs of the expansion modules are identified by a code and a sequence number. For instance, the digital inputs are identified by code INPx, where x is the number of the input. In the same way,

digital outputs are identified by code OUTx.

–   The sequence number of I/Os is simply based on their mounting position, with a progressive numbering from left to right. For instance the input INP1 is the first input terminal of the leftmost module, while the

subsequent inputs will be named INP2, INP3 and so on.

–   The DMG700 supports a maximum of 8 digital inputs and 8 outputs that will thus be numbered INP1…8 and OUT1…8. For every I/O, there is a dedicated setting menu that allows to specify functionality and

properties.

–   In a similar way, there are some internal bit-variables (markers) that can be associated to the outputs or combined between them. For instance, it is possible to apply some limit thresholds to the measurements

done by the multimeter (voltage, current, power, etc.). In this case, an internal variable named LIMx will be activated when the measurements go out of limits defined by the user through the dedicated setting
menu.

–   Finally, it is possible to manage up to 4 counters (CNT1..CNT4) that can count pulses coming from an external source (through a digital input INPx) or the number of times that a certain condition has occurred. For

instance, defining a limit threshold LIMx as the count source, it will be possible to count how many times one measurement has exceeded a certain limit.

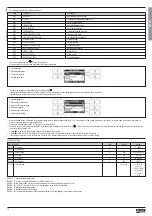
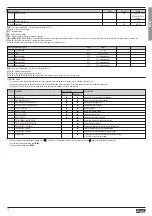
–   The following table groups all the I/O and the internal variables managed by the DMG700.

 Cod.           DESCRIPTION                                                                                                                                                                                                                                                                                    Range (x)

 INPx           Digital inputs                                                                                                                                                                                                                                                                                          1...8

 OUTx         Digital outputs                                                                                                                                                                                                                                                                                       1...8

 LIMx          Limit thresholds                                                                                                                                                                                                                                                                                     1...8

 BOOx         Boolean logic                                                                                                                                                                                                                                                                                         1...8

 REMx         Remote-controlled variables                                                                                                                                                                                                                                                                  1...8

 ALAx          Alarms                                                                                                                                                                                                                                                                                                   1...8

 PULx          Energy count pulses                                                                                                                                                                                                                                                                              1...5

 CNTx          Counters                                                                                                                                                                                                                                                                                                1...4

–   The status of each I/O or internal variable can be shown on the display in the dedicated page.

LIMIT THRESHOLDS (LIM)
–   The LIMn thresholds are internal variables whose status depends on the out-of-limits of one particular measurement set by the user (e.g. total active power higher than 25kW) among all those measured.
–   To make the setting of the thresholds easier, since the limits can span in a very wide range, each of them can be set using a base number and a multiplier (for example: 25 x 1k = 25000).
–   For each LIM, there are two thresholds (upper and lower). The upper threshold must always be set to a value higher than the lower threshold.
–   The meaning of the thresholds depends on the following functions:


Min function:

the lower threshold defines the trip point, while the upper threshold is for the resetting. The LIM trips when the selected measurement is less than the Lower threshold for the programmed delay.

When the measured value becomes higher than the upper setpoint, after the delay, the LIM status is reset.


Max function: 

the upper threshold defines the trip point, while the lower threshold is for the resetting. The LIM trips when the selected measurement is more than upper threshold for the programmed delay. When

the measured value decreases below the lower setpoint, after the delay,  the LIM  status is reset. 


Max+Min function:

both thresholds are for tripping. When the measured value is less than lower or more than upper setpoints, then, after the respective delays, the LIM will trip. When the measured value returns

within the limits, the LIM status will be immediately reset.

–   Trip denotes either activation or de-activation of the LIM variable, depending on “Normal status” setting.
–   If the LIM latch is enabled, the reset can be done only manually using the dedicated command in the commands menu.
–   See set-up menu M08.

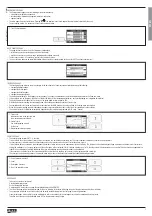
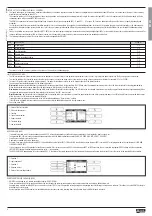
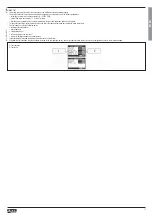
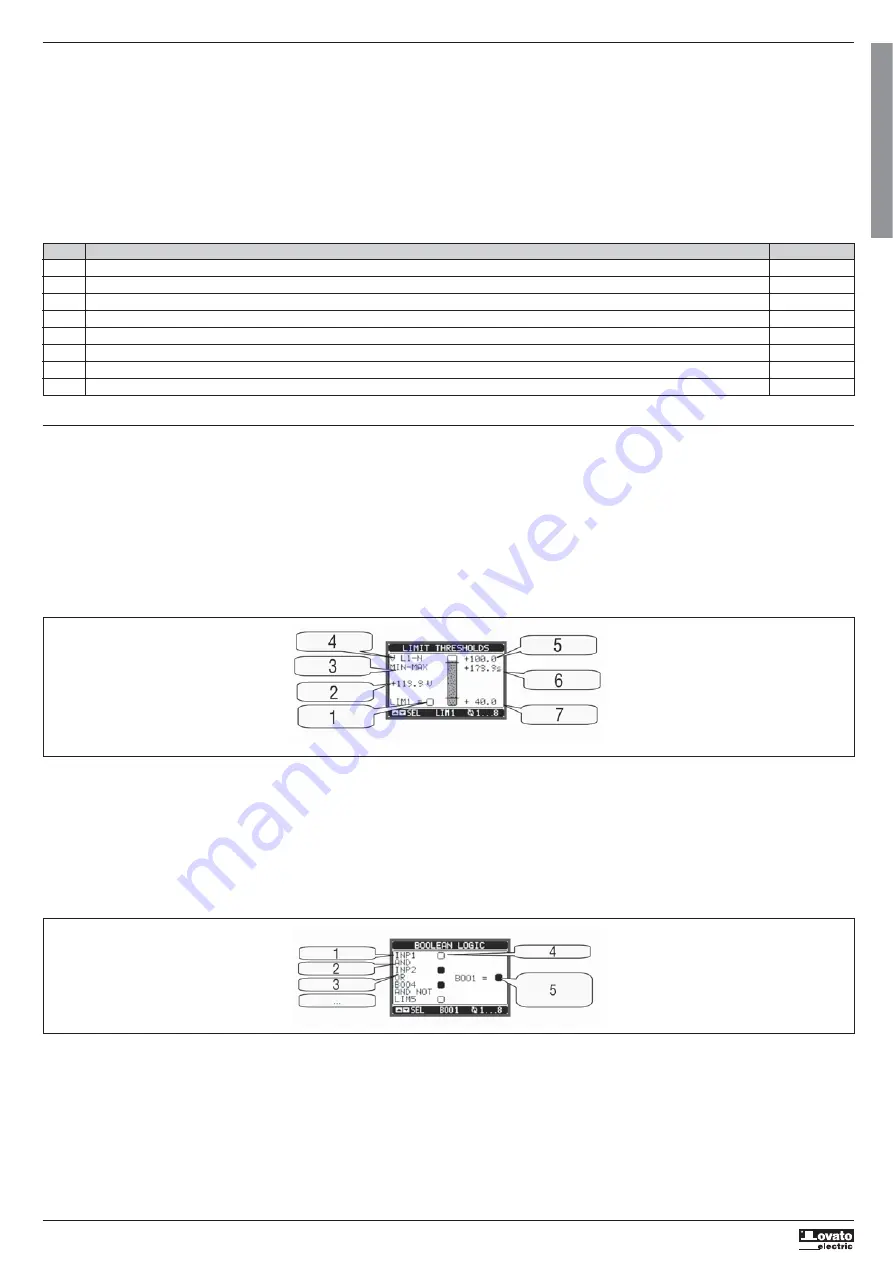
1 - Status of the limit variable

2 - Value of measurement

3 - Function

4 - Type of measurement

5 - Upper threshold

6 - Threshold delay

7 - Lower threshold

BOOLEAN LOGIC (BOO)
–   It is possible to create max. 8 internal variables named BOO1..8, whose status depends on the Boolean logic combination of limit thresholds, inputs, outputs, etc.
–   The operands (INP, LIM etc) can be combined between each other with the following Boolean operators: AND, OR, EXOR, AND NOT, OR NOT, EXOR NOT.
–   Every Boolean variable is the result of max 

4 operands combined with 3 logic operations.

–   Example: if one wants the Boolean variable BOO1 to be activated when the limits LIM1, LIM2 and LIM3 are all active or when the input INP1 is active, BOO1 must programmed as the combination of LIM2 AND

LIM3 AND LIM4 OR INP1.

–   It is not necessary to use all 4 operands for one Boolean variable. If for instance, one wants BOO2 to be active when INP1 or INP2 are active, then it is possible to program BOO2 settings with the combination

INP1 OR INP2, leaving the following logic operations set to --- (no operation).

–   The BOOLEAN LOGIC page displays, for every variable BOO1..8, the status of the single operands that are involved in the logic operation and the final result, that is the status of the selected Boolean variable. 

REMOTE-CONTROLLED VARIABLES (REM)
–   DMG700 can manage up to 8 remote-controlled variables (REM1…REM8).
–   These are variables which status can be modified by the user through the communication protocol and used in combination with outputs, Boolean logic, etc. 
–   Example: using a remote variable (REMx) as a source for an output (OUTx), it will be possible to freely energise or de-energise one relay through the supervision software. This allows to use the DMG700 relays to

drive lighting or similar loads. 

–   Another possible use of REM variables is to enable/disable other functions remotely, inserting them into a Boolean logic in AND with inputs or outputs.  

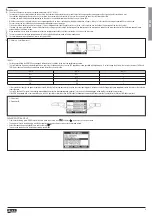
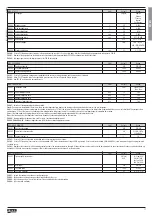
1 - Operand 1

2 - Logic operation 1

3 - Operand 2

4 - Operand status 1

5 - Status of the resulting variable

Содержание DMG700 DMG800

Страница 1: ...tion aufmerksam lesen Zur Vermeidung von Personen und Sachsch den d rfen diese Ger te nur von qualifiziertem Fachpersonal und unter Befolgung der einschl gigen Vorschriften installiert werden Vor jede...

Страница 2: ...9 Table of parameters 10 Commands menu 14 Wiring test 15 Technical characteristics 16 Installation 17 Terminal arrangement 17 Mechanical dimensions 17 Wiring diagrams 18 INTRODUCTION The DMG700 multim...

Страница 3: ...west peak for the selected readings The sub page viewed is indicated in the status bar on the bottom of the display by one of the following icons IN Instantaneous value Actual instantaneous value of t...

Страница 4: ...LO AV GR 12 ENERGY METERS kWh TOT kWh TOT kvarh TOT kvarh TOT kVA TOT PARTIAL 13 ENERGY TARIFFS TAR1 TAR4 14 TREND GRAPH 15 HOUR COUNTER Hr TOT Hr Partial 16 EXPANSION MODULES 17 COUNTERS CNT1 CNT4 1...

Страница 5: ...enable has been set to OFF see hour counter menu 1 Time scale Indicates the time in the past to which the measurements are referred 2 Vertical scale Can be autoranging or fixed by the user 3 Measureme...

Страница 6: ...password first specifying the numeric code through the keypad To enable password management and to define numeric codes see set up menu There are two access levels depending on the code entered User L...

Страница 7: ...f the expansion slots Insert the upper hook of the module into the fixing hole Rotate the module body downwards inserting the connector on the bus Push until the bottom clip snaps into place Re instal...

Страница 8: ...an the Lower threshold for the programmed delay When the measured value becomes higher than the upper setpoint after the delay the LIM status is reset Max function the upper threshold defines the trip...

Страница 9: ...that has been programmed with latch use the dedicated command in the commands menu For alarm programming and definition refer to set up menu M09 TARIFFS For the energy billing the DMG700 can manage 4...

Страница 10: ...be modified with and keys The screen shows the new setting a graphic bar that shows the setting range the maximum and minimum values the previous setting and the factory default Pressing simultaneous...

Страница 11: ...ith a total length equal to integration time setting Sync Like fixed mode but the integration intervals are started by an external digital input programmed with Synchronisation function Bus Like fixed...

Страница 12: ...umber x referred to the previous parameter P09 n 03 Defines if the alarm remains latched and has to be reset manually ON or if it automatically resets OFF P09 n 04 If the alarm has high priority when...

Страница 13: ...ntity of energy for each pulse e g 10Wh 100Wh 1kWh etc P11 n 03 Pulse duration M12 BOOLEAN LOGIC Default Range P12 n 01 Operand 1 OFF OFF LIMx INPx OUTx REMx BOOx P12 n 02 Channel number x 1 1 8 P12 n...

Страница 14: ...ome occasional operations like reading peaks resetting counters clearing alarm reset etc If the Advanced level password has been entered then the commands menu allows executing the automatic operation...

Страница 15: ...t is a normal plant where the inductive load draws power from the grid To launch test execution enter commands menu and select the required command per commands menu instructions The test allows to ve...

Страница 16: ...htening Torque 4 5lb in Current Input AWG Range 26 10 AWG stranded or solid Field Wiring Terminals Tightening Torque 7lb in For use on a flat surface of a Type 1 Enclosure Compliant with standards IEC...

Страница 17: ...ng and or access to the screw terminals impossible To install the terminal covers insert the side hooks in place and apply slight pressure until they snap in place Make sure to match the terminal bloc...

Страница 18: ...URRENT S2 S1 S1 D L A O CT1 3 phase without neutral ARON connection P01 07 L1 L2 L3 AUX SUPPLY L2 L3 L1 A I1 S2 VOLTAGE V1 VN V2 V3 S1 I2 CURRENT S1 S2 I3 S1 S2 D CT1 CT2 L O A2 A1 100 440VAC 110 250V...

Страница 19: ...ion aufmerksam lesen Zur Vermeidung von Personen und Sachsch den d rfen diese Ger te nur von qualifiziertem Fachpersonal und unter Befolgung der einschl gigen Vorschriften installiert werden Vor jedem...

Страница 20: ...ione dei parametri set up 27 Tabella dei parametri 28 Menu comandi 32 Test di collegamento 33 Caratteristiche tecniche 34 Installazione 35 Disposizione morsetti 35 Dimensioni meccaniche 35 Schemi di c...

Страница 21: ...sotto pagine ad esempio per visualizzare i valori massimi e minimi registrati per la misura selezionata La sottopagina visualizzata correntemente indicata in basso a sinistra da una delle seguenti ic...

Страница 22: ...ATORI DI ENERGIA kWh TOT kWh TOT kvarh TOT kvarh TOT kVA TOT PARZIALE 13 TARIFFAZIONE ENERGIA TAR1 TAR4 14 GRAFICO TREND 15 CONTAORE Hr TOT Hr Parziale 16 MODULI ESPANSIONE 17 CONTATORI CNT1 CNT4 18 S...

Страница 23: ...viene impostata su OFF vedere menu Contaore 1 Scala dei tempi Indica il tempo nel passato al quale si riferiscono le misure 2 Scala verticale Pu essere automatica o fissa 3 Misura rappresentata Measur...

Страница 24: ...e definire i codici di accesso fare riferimento al capitolo impostazione parametri Esistono due livelli di accesso a seconda del codice inserito Accesso livello utente consente l azzeramento dei valo...

Страница 25: ...modulo nella apposita feritoia ruotare il modulo verso il basso inserendo il connettore sul bus premere fino a che l apposita clip sul lato inferiore del modulo si aggancia a scatto Re installare la m...

Страница 26: ...re della misura maggiore della soglia superiore dopo il ritardo si ha il ripristino Funzione Max con la funzione Max la soglia superiore d intervento quella inferiore di ripristino Quando il valore de...

Страница 27: ...osito comando nel menu comandi Per la definizione degli allarmi vedere menu di impostazione M09 TARIFFE Per il conteggio dell energia il DMG700 ha la possibilit di gestire 4 tariffe indipendenti oltre...

Страница 28: ...nche una barra grafica che indica il range di impostazione i valori minimi e massimi possibili il valore precedente e quello di default Premendo contemporaneamente e l impostazione viene riportata al...

Страница 29: ...imi 15 valori calcolati di lunghezza totale equivalente al tempo impostato Sincronismo Come modalit fisso ma gli intervalli di integrazione sono scanditi da un ingresso digitale esterno programmato co...

Страница 30: ...inisce se l allarme rimane memorizzato e va azzerato manualmente ON o se si ripristina automaticamente OFF P09 n 04 Se l allarme ha priorit alta al suo verificarsi provoca lo spostamento automatico de...

Страница 31: ...antit di energia per ogni impulso esempio 10Wh 100Wh 1kWh ecc P11 n 03 Durata dell impulso M12 LOGICA BOOLEANA Default Range P12 n 01 Operando 1 OFF OFF LIMx INPx OUTx REMx BOOx P12 n 02 Numero canale...

Страница 32: ...vanzato allora tramite il menu comandi anche possibile effettuare delle operazioni automatiche utili ai fini della configurazione dello strumento Nella seguente tabella sono riportate le funzioni disp...

Страница 33: ...cio in un comune impianto dove il carico induttivo assorbe energia dalla fornitura Per lanciare l esecuzione del test entrare nel menu comandi e selezionare il comando appropriato secondo le istruzio...

Страница 34: ...lb in Circuito misura correnti AWG Range 26 10 AWG stranded or solid Field Wiring Terminals Tightening Torque 7lb in For use on a flat surface of a Type 1 Enclosure Conformi a norme IEC EN 61010 1 IEC...

Страница 35: ...amento Per montare i coprimorsetti inserire i ganci nell apposita sede ed esercitare una lieve pressione fino a che si agganciano Attenzione all abbinamento fra la morsettiera ed il relativo coprimors...

Страница 36: ...A O CT1 Connessione ARON 3 fasi senza neutro P01 07 L1 L2 L3 AUX SUPPLY L2 L3 L1 A I1 S2 VOLTAGE V1 VN V2 V3 S1 I2 CURRENT S1 S2 I3 S1 S2 D CT1 CT2 L O A2 A1 100 440VAC 110 250VDC Connessione ARON 3...

Страница 37: ...ation aufmerksam lesen Zur Vermeidung von Personen und Sachsch den d rfen diese Ger te nur von qualifiziertem Fachpersonal und unter Befolgung der einschl gigen Vorschriften installiert werden Vor jed...

Страница 38: ...glage des param tres set up 45 Tableau des param tres 46 Menu Commandes 50 Test de connexion 51 Caract ristiques techniques 52 Installation 53 Disposition des bornes 53 Dimensions m caniques 53 Sch m...

Страница 39: ...r les valeurs maximum et minimum enregistr es pour la mesure s lectionn e La sous page courante est indiqu e en bas gauche par l une des ic nes suivantes IN Valeur instantan e Valeur instantan e actue...

Страница 40: ...D ENERGIE kWh TOT kWh TOT kvarh TOT kvarh TOT kVA TOT PARTIAL 13 TARIFICATION ENERGIE TAR1 TAR4 14 GRAPHE A TENDANCE 15 COMPTEUR HORAIRE Hr TOT Hr Partial 16 MODULES D EXTENSION 17 COMPTEURS CNT1 CNT4...

Страница 41: ...disposant l activation g n rale du compteur d heures sur OFF voir le menu Compteur horaire 1 Echelle des temps Indique le temps dans le pass les mesures se rapportent 2 Echelle verticale Peut tre aut...

Страница 42: ...num rique Pour activer la gestion des mots de passe et de d finir les code num riques consulter la section r glage des param tres set up Il y a deux niveaux d acc s selon le code valid Acc s niveau u...

Страница 43: ...rieur du module dans la fente appropri e tournez le module vers le bas en ins rant le connecteur sur le bus enfoncez jusqu ce que s enclenche la patte situ e au bas du module Remettez en place le born...

Страница 44: ...le seuil sup rieur celle ci est r tablie au terme du retard Fonction Max avec la fonction Max le seuil sup rieur est celui de d clenchement tandis que le seuil inf rieur est celui de r tablissement Q...

Страница 45: ...mmandes Pour d finir des alarmes voir le menu de programmation M09 TARIFS Pour le d compte de l nergie le DMG700 peut g rer 4 tarifs ind pendants outre les tarifs total et partiel La s lection des tar...

Страница 46: ...rre graphique indiquant la plage de r glage les valeurs minimum et maximum possibles la valeur pr c dente et la valeur par d faut Si vous enfoncez simultan ment et le param tre est ramen la valeur par...

Страница 47: ...ur le mode fixe mais les intervalles d int gration sont cadenc s par une entr e num rique externe programm avec la fonction synchronisme Bus Comme le mode fixe mais les intervalles d int gration sont...

Страница 48: ...l alarme reste m moris e et doit tre r arm e manuellement ON ou si elle est r tablie automatiquement OFF P09 n 04 Si l alarme a une priorit lev e quand elle se v rifie l afficheur passe automatiquemen...

Страница 49: ...Quantit d nergie pour chaque impulsion ex 10Wh 100Wh 1kWh etc P11 n 03 Dur e de l impulsion M12 LOGIQUE BOOLE Default Range P12 n 01 Op rande 1 OFF OFF LIMx INPx OUTx REMx BOOx P12 n 02 Num ro canal...

Страница 50: ...passe pour l acc s avanc vous pouvez l aide du menu Commandes effectuer des op rations automatiques utiles pour configurer l appareil Le tableau suivant montre les fonctions disponibles dans le menu C...

Страница 51: ...ir dans une installation courante o la charge inductive absorbe l nergie du r seau Pour lancer l ex cution du test entrez dans le menu commandes et s lectionnez la commande appropri e selon les instru...

Страница 52: ...mesure courants AWG Range 26 10 AWG stranded or solid Field Wiring Terminals Tightening Torque 7lb in For use on a flat surface of a Type 1 Enclosure Conformes aux normes IEC EN 61010 1 IEC EN 61000...

Страница 53: ...monter les cache bornes ins rez les crochets dans le logement appropri et exercer une l g re pression jusqu ce qu ils s enclenchent Veillez mettre le bon couvre borne sur la borne appropri e INSTALLA...

Страница 54: ...2 S1 S1 D L A O CT1 Connexion ARON 3 phases sans le neutre P01 07 L1 L2 L3 AUX SUPPLY L2 L3 L1 A I1 S2 VOLTAGE V1 VN V2 V3 S1 I2 CURRENT S1 S2 I3 S1 S2 D CT1 CT2 L O A2 A1 100 440VAC 110 250VDC Connex...

Страница 55: ...ion aufmerksam lesen Zur Vermeidung von Personen und Sachsch den d rfen diese Ger te nur von qualifiziertem Fachpersonal und unter Befolgung der einschl gigen Vorschriften installiert werden Vor jedem...

Страница 56: ...Tarifas 63 Configuraci n de los par metros set up 63 Tabla de los par metros 64 Men mandos 68 Test de conexi n 69 Caracter sticas t cnicas 70 Instalaci n 71 Disposici n terminales 71 Dimensiones mec n...

Страница 57: ...imos y m nimos registrados para el par metro seleccionado La subp gina visualizada en el momento est indicada abajo a la izquierda con uno de los siguientes iconos IN Valor Instant neo Valor Instant n...

Страница 58: ...ONTADORES ENERG A kWh TOT kWh TOT kvarh TOT kvarh TOT kVA TOT PARCIAL 13 TARIFAS ENERG A TAR1 TAR4 14 GR FICO TREND 15 CUENTAHORAS Hr TOT Hr Partial 16 M DULOS DE EXPANSI N 17 CONTADORES CNT1 CNT4 18...

Страница 59: ...arse por completo si la habilitaci n general cuentahoras est configurada en OFF v ase men Cuentahoras 1 Escala de tiempos Indica el tiempo pasado al que se refieren las medidas 2 Escala vertical Puede...

Страница 60: ...cons ltese el cap tulo configuraci n par metros Existen dos niveles de acceso que dependen del c digo ingresado Acceso nivel usuario Permite poner a cero los valores registrados pero no modificar la...

Страница 61: ...del m dulo en la ranura correspondiente Girar el m dulo hacia abajo introduciendo el conector en el bus Presionar hasta que se enganche la pinza colocada en el lado inferior del m dulo Volver a instal...

Страница 62: ...ado es mayor al l mite superior tras el retardo se obtiene el restablecimiento Funci n M x Con la funci n M x el umbral superior provoca la activaci n y el inferior la restablece Cuando el valor del p...

Страница 63: ...o que se halla en el men de mandos Para la definici n de las alarmas v ase el men de configuraci n M09 TARIFAS Para contar la energ a DMG700 puede controlar 4 tarifas independientes adem s de los valo...

Страница 64: ...arra gr fica que indica el alcance de configuraci n los valores m nimos y m ximos posibles el valor anterior y el predefinido Si se pulsan simult neamente las teclas y la configuraci n vuelve a ser la...

Страница 65: ...alores calculados Sincronismo Igual que el modo Fijo pero los intervalos de integraci n son definidos por una entrada digital externa programada con la funci n sincronismo Bus Igual que el modo Fijo p...

Страница 66: ...ar metro anterior P09 n 03 Determina si la alarma debe quedar memorizada y hay que borrarla manualmente ON o si se restablece autom ticamente OFF P09 n 04 Si la alarma tiene una prioridad alta al pres...

Страница 67: ...por pulso ejemplo 10Wh 100Wh 1kWh etc P11 n 03 Duraci n del pulso M12 L GICA BOOLEANA Default Range P12 n 01 Operando 1 OFF OFF LIMx INPx OUTx REMx BOOx P12 n 02 N mero canal X 1 1 8 P12 n 03 Operaci...

Страница 68: ...dos tambi n es posible efectuar algunas operaciones autom ticas que sirven para configurar el instrumento En la tabla que sigue se indican las funciones disponibles en el men de mandos subdivididas en...

Страница 69: ...as es decir una instalaci n com n donde la carga inductiva absorbe energ a de la red de suministro Para iniciar la ejecuci n del test acceder al men de mandos y seleccionar el mando apropiado en base...

Страница 70: ...ening Torque 4 5lb in Circuito medici n corrientes AWG Range 26 10 AWG stranded or solid Field Wiring Terminals Tightening Torque 7lb in For use on a flat surface of a Type 1 Enclosure Conforme a norm...

Страница 71: ...s terminales de conexi n Para colocar los cubrebornes introducir los ganchos en el sitio correspondiente y ejercer una ligera presi n hasta que queden asegurados Prestar atenci n a la combinaci n de l...

Страница 72: ...A O CT1 Conexi n ARON trif sica sin neutro P01 07 L1 L2 L3 AUX SUPPLY L2 L3 L1 A I1 S2 VOLTAGE V1 VN V2 V3 S1 I2 CURRENT S1 S2 I3 S1 S2 D CT1 CT2 L O A2 A1 100 440VAC 110 250VDC Conexi n ARON trif si...

Отзывы: