background image

8

Getting Started 

Getting Started

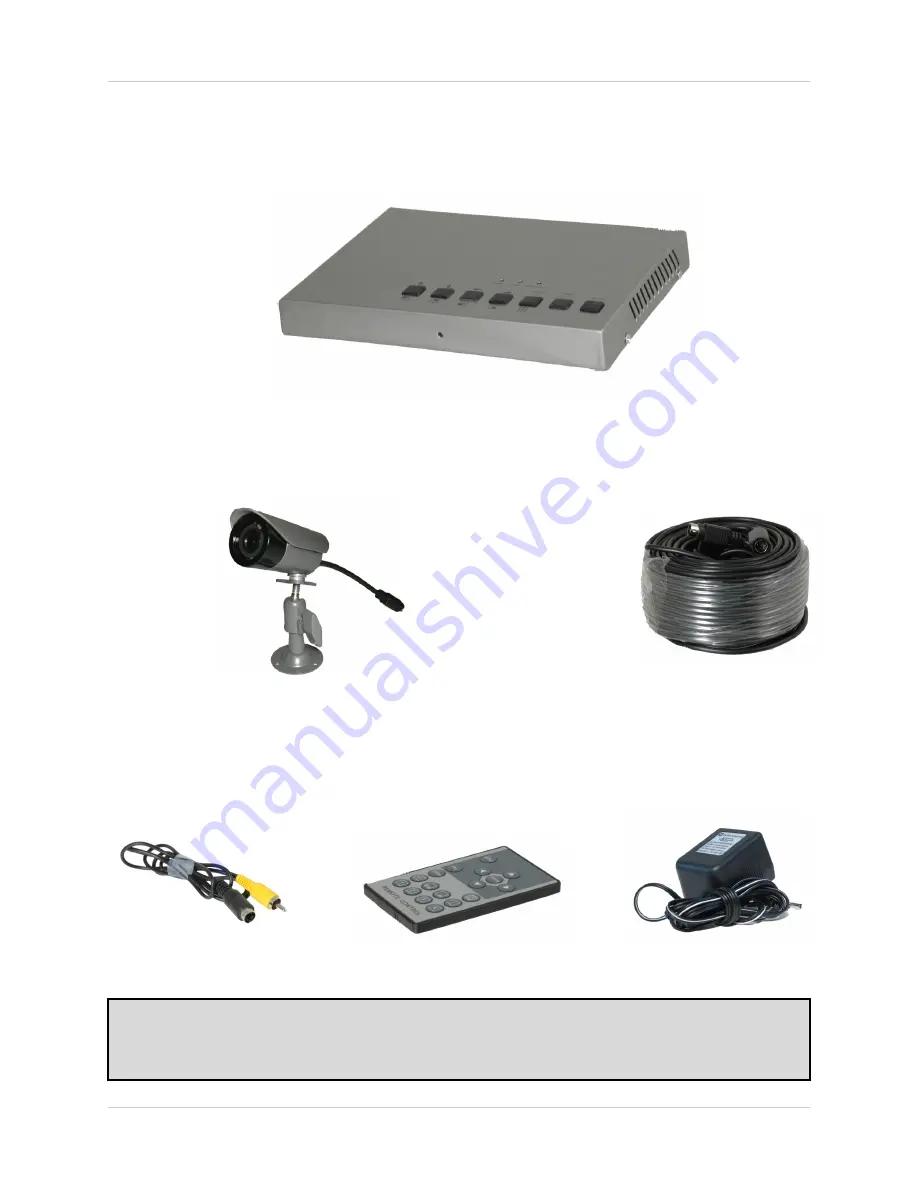
The SHS-4QM comes with the following components:

CHECK YOUR PACKAGE TO CONFIRM THAT YOU HAVE RECEIVED THE COMPLETE 

SYSTEM, INCLUDING ALL COMPONENTS SHOWN ABOVE. 

Swticher Power Adapter

DIN Video Cable

Quad Processor / 

Switcher

4 x 60’ DIN Extension 

Cables

Remote Control

4

 x Weatherproof Color 

Day/Night IR Cameras 

with Stands

Содержание SHS-4QM Series

Страница 1: ...4 Camera Video Surveillance System with Multi Camera Viewing Instruction Manual English Version 1 0 MODEL SHS 4QM Copyright 2006 LOREX Technology Inc www lorexcctv com...

Страница 2: ...K HAZARD DO NOT EXPOSE THIS UNIT TO RAIN OR MOISTURE CAUTION TO PREVENT ELECTRIC SHOCK MATCH WIDE BLADE OF PLUG TO WIDE SLOT FULLY INSERT Thank you for purchasing the SHS 4QM Lorex is committed to pro...

Страница 3: ...ord and if its appearance indicates damage or deteriorated insulation have it replaced by your service technician 7 Power Cord Protection Power supply cords should be routed so that they are not likel...

Страница 4: ...can prevent fire electric shock or other hazards 16 Safety Check Upon completion of any service or repairs to this video product ask the service technician to perform safety checks recommended by the...

Страница 5: ...ted z Consult the dealer or an experienced radio or television technician for assistance LOREX TECHNOLOGY INC http www lorexcctv com NOTE This equipment has been certified and found to comply with the...

Страница 6: ...on up to 5 meters Support various display modes QUAD Split Mode Full Screen Mode PIP Screen Mode System with remote control for easy operation Easily connects to your TV or VCR Multi camera viewing al...

Страница 7: ...Cameras 13 Camera Installation 14 Installation Warnings 14 Camera Stand Installation 14 Connecting Cameras 15 Connecting the SHS 4QM Video Cable 16 Connectivity Diagram 16 Menu Setup 17 System Setup 1...

Страница 8: ...ents CHECK YOUR PACKAGE TO CONFIRM THAT YOU HAVE RECEIVED THE COMPLETE SYSTEM INCLUDING ALL COMPONENTS SHOWN ABOVE Swticher Power Adapter DIN Video Cable Quad Processor Switcher 4 x 60 DIN Extension C...

Страница 9: ...n FREEZE AUTO SEQUENCE Mode 2 CHANNEL 1 UP BUTTON Changes the view to CAM 1 in Viewing Mode Navigates UP in MENU Mode 3 CHANNEL 2 DOWN BUTTON Changes the view to CAM 2 in Viewing Mode Navigates DOWN i...

Страница 10: ...to QUAD in Viewing Mode Press and hold for 3 seconds to Enter or Exit MENU mode 8 FREEZE AUTOSCAN BUTTON Press and briefly hold to freeze the onscreen image Press the FREEZE button again to return to...

Страница 11: ...Rear View SHS 4QM Rear View 1 DIN OUTPUT Connects the DIN Video cable to a TV Monitor 2 CAM1 CAM4 DIN INPUTS Camera inputs for cameras with 4 pin DIN connection 3 DC 12V Connects the 12V DC Power ada...

Страница 12: ...ra display Press the FRZ button to unfreeze the current display ZOOM BUTTON Press to Zoom in the current display Use the NAVIGATION BUTTONS to select an area and press ZOOM to exit AUTO BUTTON Auto se...

Страница 13: ...e changes from Color to B W under low light conditions on Night Vision Cameras INPUT CABLE BACK Connects Video Power from the SHS 4QM switcher to the Camera STAND Metal stand connects to the Camera fo...

Страница 14: ...fere with the system Select a location for the camera that has an ambient temperature between 14 F 122 F 10 C 50 C If you plan to install the camera in a location that has conditions not recommended i...

Страница 15: ...nsion cable are pointed together when connecting the cable If the pins in the DIN Cable are bent the Camera will NOT function 2 Connect the male end of the supplied 60 extension cable to an open DIN c...

Страница 16: ...able to the SHS 4QM Connect the RCA VIdeo cable to the TV VCR or Monitor Connectivity Diagram TV VCR MONITOR Connect the Yellow Video Cable to an available video SHS 4QM Connect the DIN Cable end to t...

Страница 17: ...press the buttons to adjust the setting KEYLOCK Locks out the keys on the SHS System Press the buttons to enable or disable the KEYLOCK SYSTEM ID Displays the System ID This menu function cannot be c...

Страница 18: ...navigate to the desired selection Press Enter to select ONE color Press the MENU button to EXIT All settings will be saved Auto Sequence QUAD CAMERA 1 4 Press the buttons to navigate to the desired s...

Страница 19: ...and press the buttons to set to ON or OFF Press the MENU button to EXIT All settings will be saved Motion Setup SWITCH BETWEEN CAMERAS Use the buttons to switch between CAMERA 1 4 DETECTION TIME Turn...

Страница 20: ...A report is generated when a camera has Signal Loss MOTION A report is generated when a camera detects motion BUZZER HOLD TIME Sets the audible buzzer time when motion is detected between 0 99 seconds...

Страница 21: ...ports can be deleted by selecting the LIST CLEAR option and setting to YES Press any button on the SHS 4QM except the OK button to stop the Audible Alarm EVENT REPORT 1 6 PAGE SELECT SELECT PG MENU EX...

Страница 22: ...tter Speed 1 60 1 100 000 sec S N Ratio 48 db Video Output 1 0 Vp p 75 ohm Lens 3 6mm Fixed IR LEDs 11 Power Consumption 12V DC 100mA LED OFF 200mA LED ON Operating Temperature 14 122 F 10 50 C SHS 4Q...

Страница 23: ...It s all on the web Product Information User Manuals Quick Start Guides Specification Sheets Software Upgrades Firmware Upgrades Lorex Technology Inc VISIT wwwlorexcctv com www lorexcctv com...

Отзывы: