


BUSINESS & HOME SECURITY
www.lorexcctv.com
L3104000 Series
Page 3
Version 1.01
STEP 2
SETTING UP REMOTE SECURITY MONITORING
(continued)
Information in this document is subject to change without notice. As our products are subject to continuous improvement, Lorex Technology and our subsidiaries reserve the right to modify product design, specifications and prices, without notice and without incurring any obligation. E&OE © 2006 LOREX. All rights reserved.
7
An Automated Confirmation email will be sent
to you. Record the information below
9
8
On your DVR,
Press the Menu
Button. Select
the Network Set
Option.
10
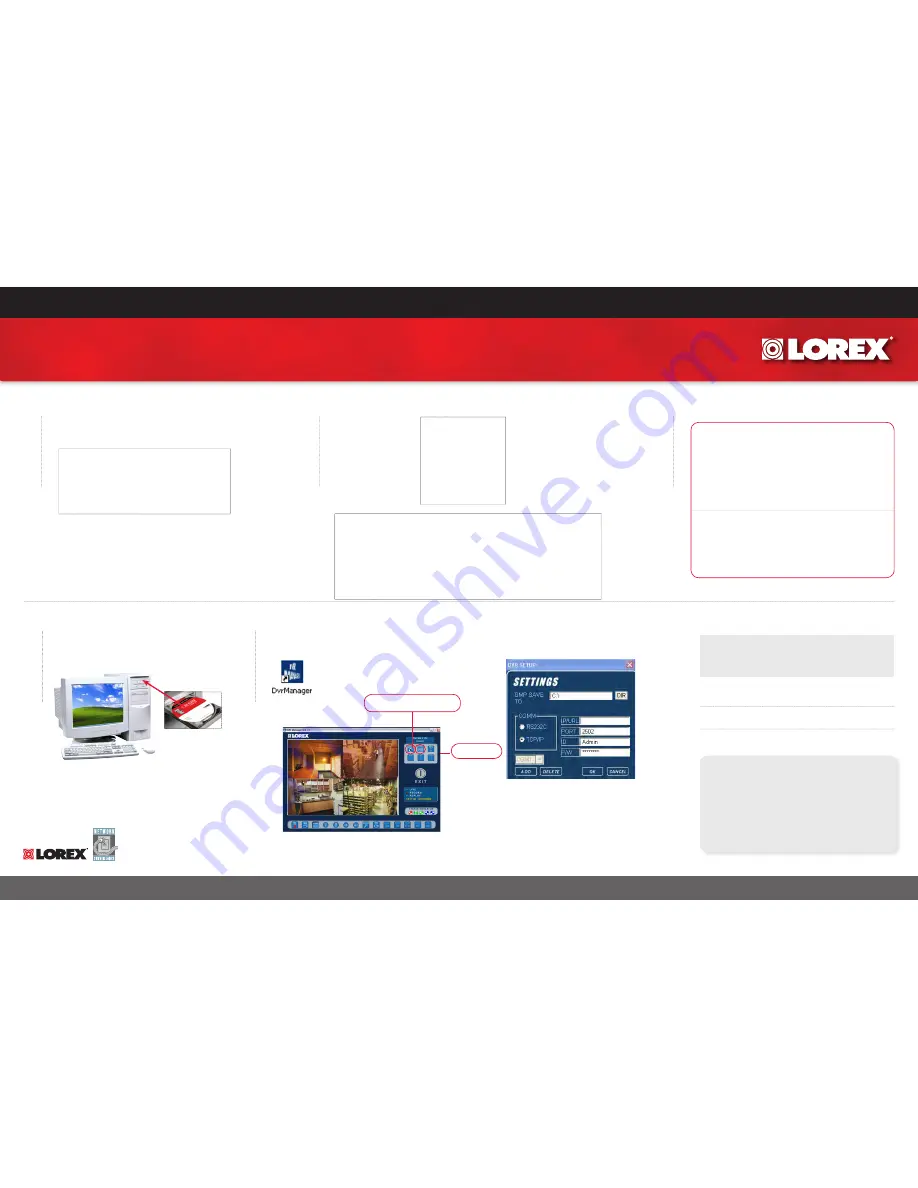
Insert CD into the computer’s
CD ROM
It’s all on the web
FOR ADDITIONAL INFORMATION OR TROUBLESHOOTING HELP,
REFER TO YOUR OWNERS MANUAL FOR ASSISTANCE. YOU
CAN ALSO CALL OR EMAIL FOR FURTHER SUPPORT.
TOLL FREE TECHNICAL SUPPORT: 1-888-42 LOREX
(1-888-425-6739)
EMAIL SUPPORT: [email protected]
WEBSITE: WWW.LOREXCCTV.COM
Product Information
User Manuals
Quick Start Guides
Specification Sheets
Software Updates
Firmware Upgrades
Note: The information sent to you is CASE SENSITIVE
Port Forward your Router. You will need to
Forward ports 250
5
and 80.
All routers are different. To Port Forward your
Router:
Refer to your Router’s manual for specific in-
structions on port forwarding (or)
Check the Router configuration guide support
document in the consumer guide section on our
website
http://lorexstore.strategicvista.com/ar-
ticle.aspx?aid=3
and select Router Configuration
Guide
COMPUTER NOT INCLUDED
Service Provider:
ddns.strategicvista.net
Domain name:
house.strategicvista.net
User name:
John Doe
Password:
<enter the password>
11
Select the DVR Manager Icon on the Computer Desktop to launch the DVR Manager Application. Click
the CONFIG button to enter DVR SET-UP.
• Set DDNS to Yes
• Set up the Domain Name, User Name & Password (from Step 6)
• Set Use Public IP to Yes
• Select the Apply Option & Press Enter
The NOT CONNECTED message should change to CONNECTED upon successful completion.
DDNS: NO
Domain:
Username:
Password:
Use Public IP: YES
DDNS Status:
APPLY
a.
CONFIG
Press the Connect / Disconnect
Button to view the Camera images
b.
CONNECT/ DISCONNECT
• BMP SAVE TO: Specify the Save Location for the Image files
• COMM: Specify the connection type as TCP/IP for network connection
• IP: Enter the IP address of the DVR
• PORT: Enter PORT 2505
• ID: Enter the user name Admin
• PW: Enter the default password 11111111
• Click OK to save the settings.
c.