


BUSINESS & HOME SECURITY
www.lorexcctv.com
L3104000 Series
Page 2
Version 1.01
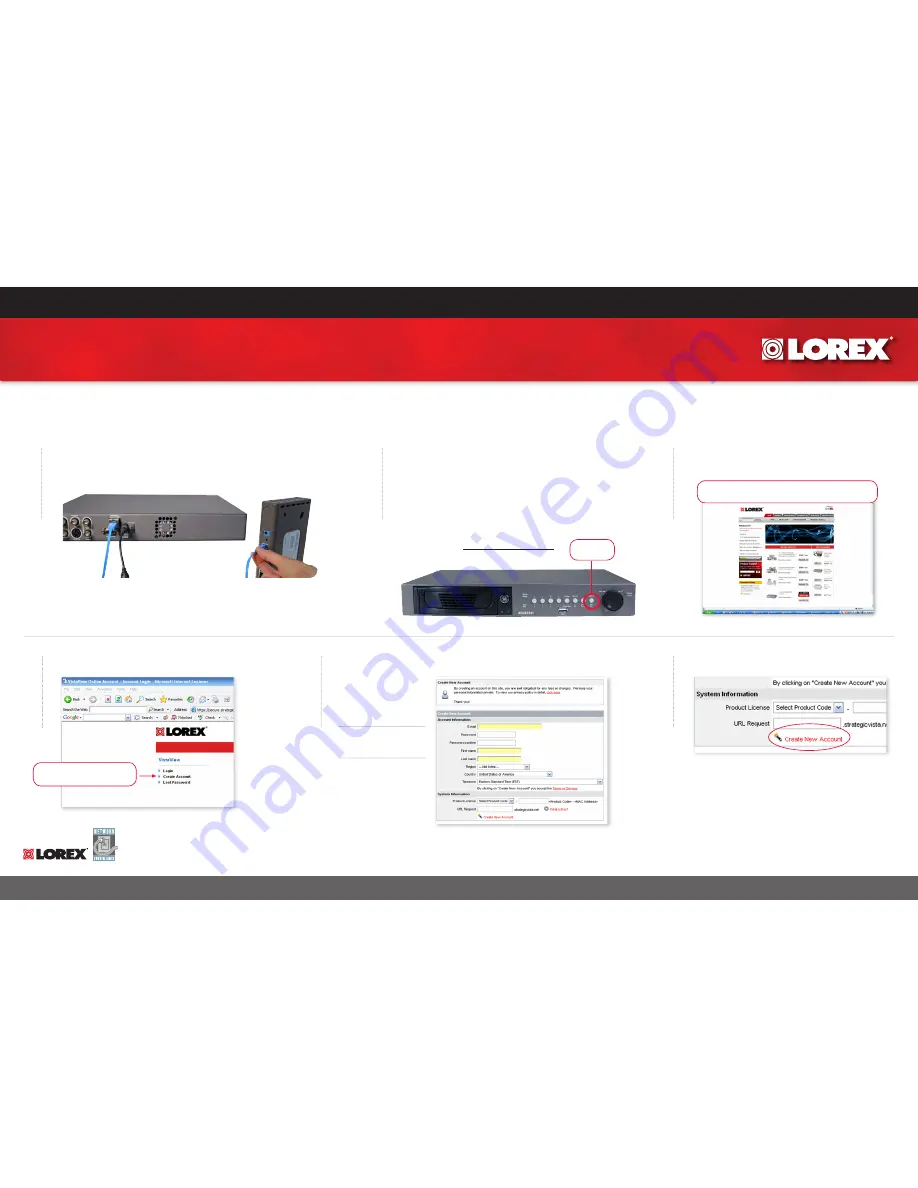
STEP 2
SETTING UP REMOTE SECURITY MONITORING
Information in this document is subject to change without notice. As our products are subject to continuous improvement, Lorex Technology and our subsidiaries reserve the right to modify product design, specifications and prices, without notice and without incurring any obligation. E&OE © 2006 LOREX. All rights reserved.
1
Connect one end of ethernet cable (not supplied) to the
DVR, the other end to the broadband router (not included)
3
5
2
4
6
Port forwarding Your Router and the Creation of a DDNS Account with Lorex is required in order for you to have Remote Internet Access.
Select the Create New Account Link
Record the MAC Address
To obtain the DVR’s MAC address, press the Menu button on the
DVR. Use the UP, DOWN buttons and proceed to Network Setup.
Press the Enter button and select IP Setup. Press Enter.
Record the MAC Address below. Press the ESC button until you
EXIT all menu’s.
Complete Account Information
a. For Product License: Select
your Product Model Number
from the drop down menu
(L3104000 Series)
b. For Product Code enter the
MAC address recorded earlier
c. For URL Request choose a
URL Name (not to exceed 15
characters) (e.g. your name,
your comanpy etc.)
1
2
3
Open your Web Browser. Enter
http://ddns.strategicvista.net
http://ddns.strategicvista.net
BACK OF THE DVR
BACK OF A ROUTER (NOT INCLUDED)
Select the Create Account Option
Create Account
MAC ADDRESS:
MENU