


21
4.10 ADVANCED MENU ___REMOTE
4.10 ADVANCED MENU ___REMOTE
Move the cursor to “REMOTE” and press ”ENTER”. The screen will show the
following options.
REMOTE
REMOTE
TITLE
DEVICE
ID
PROTOCOL
RATE
01
PTZ
001
P - D
02400
02
CAMERA
002
NORMAL
02400
03
CAMERA
003
NORMAL
02400
04
CAMERA
004
NORMAL
02400
1)
TITLE:
Title of each camera.
2)
DEVICE:
Select to control a normal camera or a PTZ camera for each channel.
3)
ID:
Set the ID number (0 ~ 255) of PTZ camera.
Note: After connecting to a PTZ camera correctly, the
default ID
of PTZ camera will be
shown on the screen
.
4)
PROTOCOL:
Select NORMAL (our protocol) or PELCO-D protocol.
5)
RATE:
Set the baud rate of each channel (2400, 4800, 9600, 19200, 57600). For the
connected cameras, such as PTZ and speed dome cameras, etc., please make
sure the baud rate setting is the same as the setting here.
PTZ Camera Connection:
PTZ Camera Connection:
1)
Connect the PTZ camera with indicated power supply.
2)
Connect the PTZ camera video output to the DVR video input port with a coaxial cable
and BNC connector.
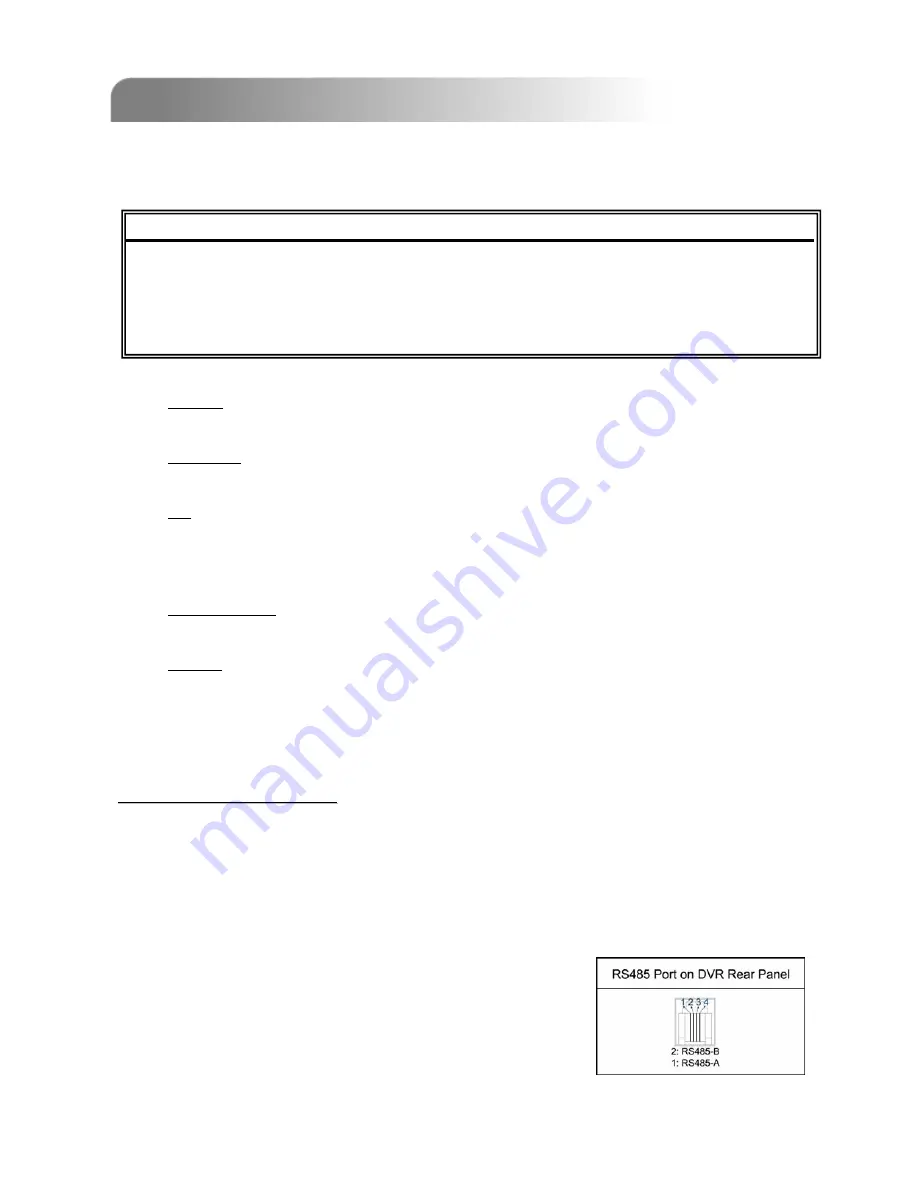
3)
Connect “RS485-A” line (brown color) to RS485-A port on the rear panel of the DVR.
Connect “RS485-B” line (orange color) to RS485-B port on the rear panel of the DVR.
Note: For detailed camera ID, protocol and baud rate setup at
DVR side, please refer to the description above. For
detailed camera ID, protocol and baud rate setup at
remote AP software side, please refer to “Device” at
page 39 (AP software system configuration). For
detailed PTZ control instructions, please refer to “Digital
Device Control Panel ~ PTZ” at page 35.