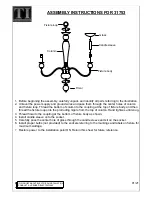
background image


Page 9 of 27

Step 13

Using a Phillips Screw Driver attach the 
Left General Slide (19) and Right General 
Slide (17) to the 2 each Box Drawer Side 
Panels (L) with 6 each 4X10 Screws (10). 
Note the hole location to be used on the 
drawing for placement of General Slide.

Step 14

Attach the Box Drawer Front and Back 
Panel (M) to the Bottom Panel (N) 
making sure that the Bottom Panel (N) 
fits securely into the groove located in the 
Back Panel (M).

Attach the Box Drawer Side Panels (L) 
with 8 each 4X40 Screws (5) to the Box 
Drawer Front and Back Panel (M).

Attach the Box Drawer Face Panel (K) to 
the Box Drawer Front Panel (M) with 2 
each 6X21 Bolt (12) and Washer (13).

Insert the completed File Drawer from 
step 12 into the Computer Desk as shown. 

Insert the 2 each File Bar (21) in the 
File Drawer as shown on the drawing. 
Ensure that the lock mechanism functions 
properly and adjust the Lock Plate (8) as 
needed.

Insert the completed Box Drawer into the 
Computer Desk as shown.

YOU HAVE SUCCESSFULLY COMPLETED THE ASSEMBLY OF THIS COMPUTER DESK. 
THANK YOU FOR PURCHASING THIS PRODUCT!

LLR44311_F.indd   9

LLR44311_F.indd   9

3/4/11   12:51 PM

3/4/11   12:51 PM

Содержание LLR44311

Страница 1: ...Computer Desk Bureau d ordinateur Escritorio de c mputo LLR44311 LLR44311_F indd 1 LLR44311_F indd 1 3 4 11 12 51 PM 3 4 11 12 51 PM...

Страница 2: ...s are to have these parts via overnight next day please provide your designated carrier and account number Replacement panels are not available If damaged has occurred during shipment please return th...

Страница 3: ...Page 2 of 27 HARDWARE IDENTIFICATION LLR44311_F indd 2 LLR44311_F indd 2 3 4 11 12 51 PM 3 4 11 12 51 PM...

Страница 4: ...Page 3 of 27 PANEL IDENTIFICATION LLR44311_F indd 3 LLR44311_F indd 3 3 4 11 12 51 PM 3 4 11 12 51 PM...

Страница 5: ...each Wood Dowels in the holes shown on the drawing Tap securely into position with a Rubber Mallet or Hammer Step 2 Using a Phillips Screw Driver install the Left Side General Slide 20 to the Middle S...

Страница 6: ...the Support Panel G insert 4 each Wood Dowel 6 in the position shown Tap lightly into place using a Rubber Mallet or Hammer Step 5 Install the Fixed Shelf Panel F onto the Middle Side Panel E so that...

Страница 7: ...h Adjustable Foot 14 in the position shown in the drawing Step 7 With the Left Side Panel B laying on a non abrasive surface insert the 3 each Cam Screws 1 in the position shown on the drawing Insert...

Страница 8: ...Panel D The Fixed Shelf Panel F should be facing the bottom as the Adjustable Foot 14 are on the Right Side Panel C Additionally the 2 Cam Locks located on the Fixed Shelf Panel F will engage with th...

Страница 9: ...4X10 Screw 10 Install the Lock Plate 8 on the left side File Drawer Side Panel I with 2 each 4X10 Screws 10 Step 12 Install the File Drawer Front and Back Panel J by sliding the Drawer Bottom Panel N...

Страница 10: ...nels L with 8 each 4X40 Screws 5 to the Box Drawer Front and Back Panel M Attach the Box Drawer Face Panel K to the Box Drawer Front Panel M with 2 each 6X21 Bolt 12 and Washer 13 Insert the completed...

Страница 11: ...tre transporteur ainsi que votre num ro de compte si vos exigences sont d avoir ces pi ces livr es pendant la nuit le lendemain Des panneaux de remplacement ne sont pas disponibles Si des dommages son...

Страница 12: ...Boulon 6 x 21 21mcx 13 Rondelle 4mcx 9 Rail de suspension 2mcx 10 Vis 4 x 10 30mcx 14 Patin ajustable 4mcx 19 20 Glissi re g n rale de gauche 1mc 21 Barre de dossier 2mcx 15 16 Glissi re pleine exten...

Страница 13: ...Page 12 of 27 IDENTIFICATION DES PANNEAUX LLR44311_F indd 12 LLR44311_F indd 12 3 4 11 12 51 PM 3 4 11 12 51 PM...

Страница 14: ...rez 2 chevilles de bois dans les trous montr s sur le dessin Tapez les solidement en position l aide d un maillet de caoutchouc ou d un marteau tape 2 l aide d un tournevis Phillips installez la glis...

Страница 15: ...ns rez 4 chevilles de bois 6 dans la position montr e Tapez les doucement en place en utilisant un maillet de caoutchouc ou un marteau tape 5 Installez le panneau de la tablette fixe F sur le panneau...

Страница 16: ...z les 2 patins ajustables 14 dans la position montr e sur le dessin tape 7 Pendant que le panneau de gauche B est couch sur une surface non abrasive ins rez les 3 vis de cames 1 dans la position montr...

Страница 17: ...as lorsque les patins ajustables 14 sont sur le panneau de droite C En plus les 2 verrous came localis s sur le panneau de la tablette fixe F vont s engager dans les vis de came localis es sur le pann...

Страница 18: ...raux du gros tiroir I avec 6 vis 4X10 10 Installez la plaque de serrure 8 sur le panneau lat ral de gauche du gros tiroir I avec 2 4X10 10 tape 12 Installez les panneaux avant et arri re du tiroir do...

Страница 19: ...oir bo tes L avec 8 vis 4x40 5 sur les panneaux avant et arri re M du tiroir bo tes Attachez le panneau de face K du tiroir bo tes sur le panneau avant du tiroir bo tes M avec 2 boulons 6X21 et deux r...

Страница 20: ...s incluyen tener estas partes con un env o nocturno o al d a siguiente s rvase proporcionar su transportista asignado y n mero de cuenta No se cuenta con tableros de repuesto Si la unidad sufri alg n...

Страница 21: ...Page 20 of 27 IDENTIFICACI N DE TORNILLER A Y ACCESORIOS LLR44311_F indd 20 LLR44311_F indd 20 3 4 11 12 51 PM 3 4 11 12 51 PM...

Страница 22: ...Page 21 of 27 IDENTIFICACI N DE TABLEROS LLR44311_F indd 21 LLR44311_F indd 21 3 4 11 12 51 PM 3 4 11 12 51 PM...

Страница 23: ...dera en los orificios como se muestra en el dibujo Golpee ligeramente con un Martillo de goma o normal hasta asegurarlas en su posici n Paso 2 Usando un Desarmador Phillips instale la Corredera izquie...

Страница 24: ...sujeci n En el Tablero de soporte G inserte 4 Clavijas de madera 6 en la posici n que se muestra Golpee ligeramente con un Martillo de goma o normal hasta asegurarlas en su posici n Paso 5 Instale la...

Страница 25: ...e las 2 Patas ajustables 14 en la posici n que se muestra en el dibujo Paso 7 Con el Tablero izquierdo B recostado sobre una superficie no abrasiva inserte los 3 Tornillos de sujeci n 1 en los orifici...

Страница 26: ...debe ver hacia la parte inferior debido a que las Patas ajustables 14 se encuentran en el Tablero derecho C Adem s los 2 Seguros de ajuste en la Repisa fija F deben embonar con los Tornillos de sujeci...

Страница 27: ...caj n I con 6 Tornillos de 4 x 10 10 Instale la Placa del cerrojo 8 en el lado izquierdo del Tablero grande del caj n I con 2 Tornillos de 4 x 10 10 Paso 12 Instale los Tableros frontal y posterior d...

Страница 28: ...Tornillos de 4 x 40 5 a los Tableros frontal y posterior de la cajonera M Una el Frente de la cajonera K al Tablero frontal de la cajonera M con 2 Pernos de 6 x 21 12 y Arandelas 13 Inserte la Cajoner...

Отзывы: