


15
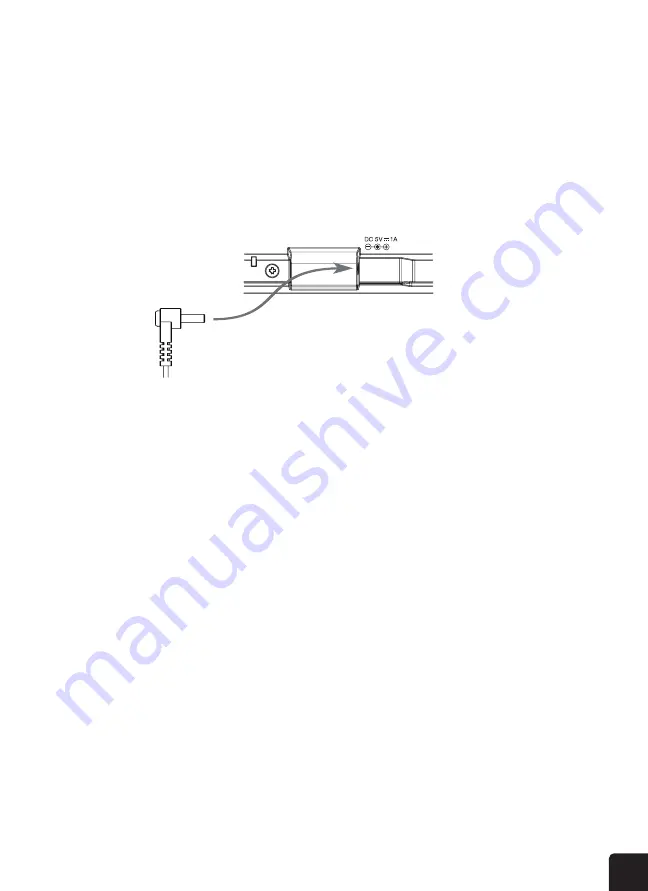
1. Connect the power adapter to the integrated power cord of the console.
2. Plug the power adapter into a power outlet to turn on the console.
3. Once the console is turned on, the segments on the LCD display will light up.
NOTE: Once the console is powered on, the console will automatically enter AP mode and show
the "AP" icon on the screen.
POWERING UP THE CONSOLE
12
3.3
RECOMMENDATION FOR BEST WIRELESS COMMUNICATION
Effective wireless communication is susceptible to noise interference in the environment, and
distance and barriers between the sensor transmitter and the display console.
1. Electromagnetic interference (EMI) – these may be generated by machinery, appliances,
lighting, dimmers and computers, etc. So please keep your display console 1 or 2 meters
away from these items.
2. Radio-frequency interference (RFI) – if you have other devices operating on 868 / 915 / 917
MHz, you might experience communication intermittent. Please re-located your transmitter or
display console to avoid signal intermittent problem.
3. Distance. Path loss occurs naturally with distance. This device is rated to 150m (450 feet)
by line of sight (in interference free environment and without barriers). However, typically
you will get 30m (100 feet) maximum in real life installation, which includes passing through
barriers.
4. Barriers. Radio signal are blocked by metal barriers such as aluminum cladding. Please align
the sensor array and display console to get them in clear line of sight through window if you
have metal cladding.
The table below show a typical level of reduction in signal strength each time the signal passed
through these building materials
Materials
Signal strength reduction
Glass (untreated)
10 ~ 20%
Wood
10 ~ 30%
Plasterboard / drywall
20 ~ 40%
Brick
30 ~ 50%
Foil insulation
60 ~ 70%
Concrete wall
80 ~ 90%
Aluminum siding
100%
Metal wall
100%
Remarks: RF signal reduction for reference
3.4
SETUP THE CONSOLE
Follow the procedure to setup the console connection with sensor(s) and WI-FI.
3.4.1 POWER UP THE DISPLAY CONSOLE
1. Install the back-up CR2032 battery
2. Connect the display console power jack to AC power with the adaptor included.
DATA CLEARING
1. Once your display console powers on, it should automatically search for and connect to the
wireless weather sensor. If the console does not connect within the first 15 minutes, press the
SENSOR/WIFI button to manual pair the sensor and console.
2. Once the pairing process is complete, the antenna icon will appear solid (not blinking), and the
readings for outdoor temperature, humidity, wind speed, wind direction, UV, light intensity, and
rainfall will appear in their designated sections of the LCD display.
1. Sensors within the 7-in-1 outdoor sensor may activate incorrectly during installation. Press the
RESET button once to restart the console and clear all erroneous data.
PAIRING THE CONSOLE WITH THE WIRELESS 7-IN-1 SENSOR