Framer’s Edge Elite Mat Cutter
Instruction Manual
Model 650-1 / 655-1 / 660-1
10
Logan Graphic Products Inc., 1100 Brown St, Wauconda, IL 60084 847-526-5515 [email protected]
LoganGraphic.com
Cutting Board Adjustments
Re-Squaring the Squaring Arm
Tools needed: Screwdriver, Carpenter’s Square
Before making any adjustments to the squaring arm, make sure that the machine is truly
out of square, not the mat board, by using the squareness test.
ATTENTION: It is common for 32” x 40” sheets of mat board to be un-square when
bought. Take this into account before making any adjustments to the squaring arm.
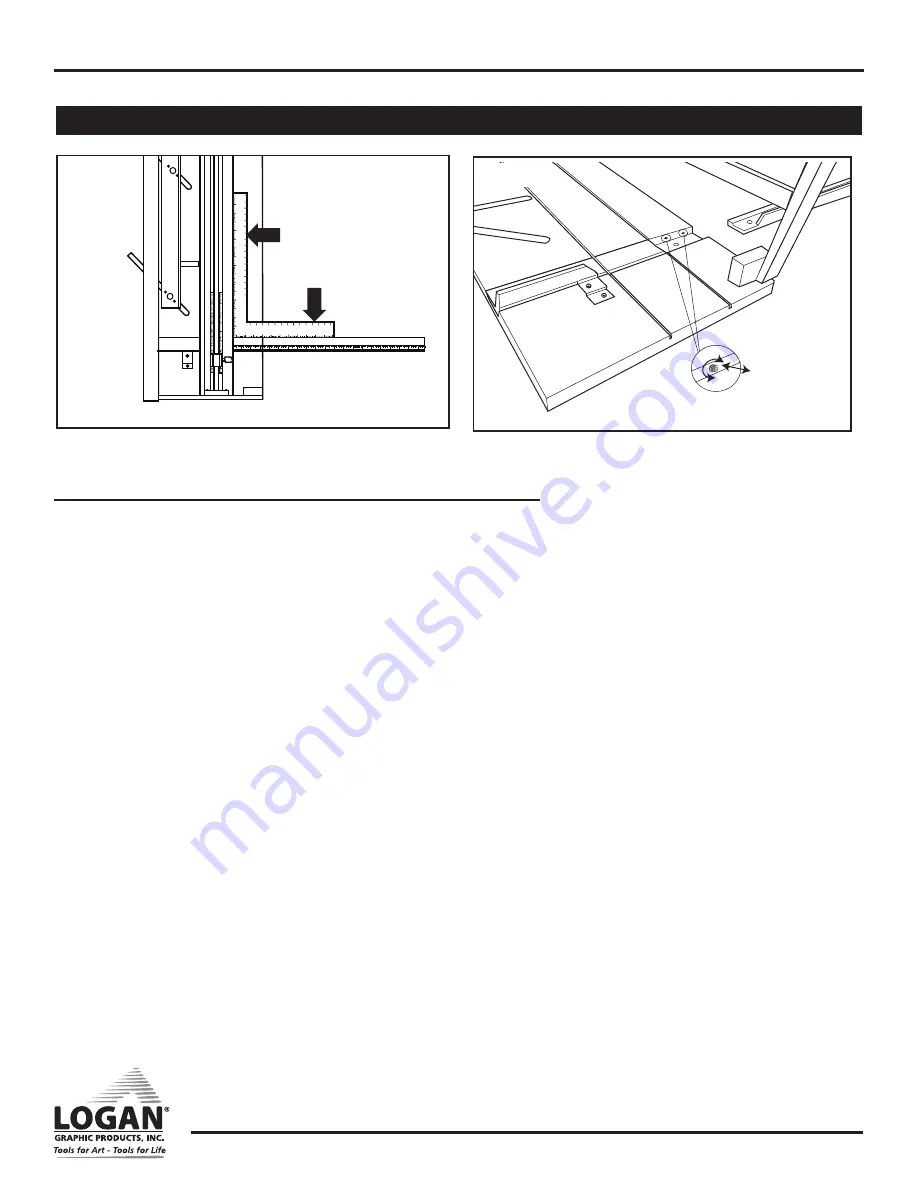
Squareness Test
1. Place the carpenter’s square against the right hand side of the guide rail and
down against the squaring arm.
(Fig. 35)
Lock to see if there are any gaps
between the framing square and the squaring arm. If so, the squaring arm needs
to be adjusted.
To Re-Square
1. By looking at where the gap is, you can determine which way the squaring arm needs
to go, in order to be square again.
2. Remove the squaring arm and locate the two screws inside of the slot.
3. To adjust, you must turn screws A & B in equal but opposite directions. To move the
far right end of the squaring arm towards the top end of the machine, turn adjust-
ment screw B inward (clockwise) about a quarter turn, and turn adjustment screw A
outward (counter-clockwise) a quarter turn.
(Fig. 36)
4. Re-install the squaring arm and check for square. This is a trial and error method.
In some cases more than a quarter turn is needed, in some cases, less.
Fig. 35
Fig. 36
PLACE
SQUARE HERE


