background image

11

HIFI

F1

TU

HIFI

HIFI

HIFI

F2

CD

F4

F1

F2

F3

HIFI

TU  AUX  T12

|

F4

F1

F2

F3

TAPE 1-2

T1   T2     

|

F4

F3

MR

E

F2

T+

F1

T-

HIFI

F4

2x

F2

B+

F1

B-

F2

SW+

F1

SW-

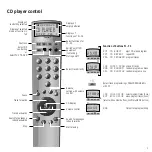
Volume

 quieter / louder 

 .

Press once to display the actual
volume level. Press again or
repeatedly to adjust the volume.

Hold the button down for fast adjustment,
«volume» in the display.
Tap   or   to switch back to the track display for
CDs or the program display for tuners.

Volume mute: «mute».
Touching   or 

 / 

 turns the

volume back on.

Balance

Activate balance setting
(within 6 seconds).

Adjust the balance (press twice)
between the speakers for your
location.

Tone control

Press HIFI button.

Switch to the third operating level
«HIFI SOUND» using F4.

Reduce bass with  F1 «B-/BASS
DOWN» or boost bass with F2
«B+/BASS UP».

Using F4 go to F1 «T-/TREBLE
DOWN» to reduce treble or boost
it with F2 «T+/TREBLE UP».

With F4 go to F1 «SW-/SUB
DOWN» to reduce subwoofer level
or boost it with F2 «SW+/SUB
UP».

Press once to display the current setting. To
adjust press again or repeatedly. Hold the but-
ton down for fast adjustment.

Playback source

Select the hi-fi component you want to listen
to, «listen» in the display:

Press HIFI button

F1: «TU/TUNER» for listening
to and operating radio.

Press HIFI button

F2: «CD/CDPLAYER» for
listening to and operating CD.

Press HIFI button

F3 «MR/MULTIROOM» has no
function

Press HIFI button

With F4 switch to the second
operating level. Then you have
the following choices:
F1: «TV/TV=A1/TELEVISION» to

play back from the TV(A1)
socket.

F2: «AUX/AUX=A2/AUXILIARY»

to play back from the
AUX2 socket.

F3: «T12/TAPE1-2» switches

between:

F1: «T1/TAPEDECK 1» playback

of tape 1

F2: «T2/TAPEDECK 2» playback

of tape 2

Recording source

Select the signal source that you want to listen
to and record. Press the HIFI button and then
F4 until «HIFI RECORD» (level 6) is given in the
remote control display. Then the unit display
changes from «listen» to «record».

If you now try to switch to a different signal
source, the unit display shows «Loc».

For Legro CA, with F2 «T2/TAPEDECK» you can
switch to the MONITOR input e.g. for tape
monitoring, «t2/listen» in the display.

After completing the recording, you will have to
remove the block again to be able to select
another signal source. Press the HIFI button and
then F4 until «HIFI RECORD» (level 6) is given
in the remote control display. Then the unit
display changes from «record» to «listen».

Содержание BA-HiFi27616.031-GB

Страница 1: ...1 233 27616 031 Printed in Germany The system The Operation HiFi...

Страница 2: ...empty batteries Display of funcions of F1 F4 Select functions for F1 F3 Switch on off hifi equipment to standby Muting on off Balance setting with volume control Volume control Function of buttons F1...

Страница 3: ...teries Display of functions of F1 F4 Select functions for F1 F3 Switch on off hifi equipment to standby Muting on off Select track directly Balance setting with volume control CD display Volume contro...

Страница 4: ...t radio program or frequency directly Balance setting with volume control Display frequency preset location Volume control Station search up Function of buttons F1 F3 AUT AUTO STORE auto pragramming 4...

Страница 5: ...ntrol Playback source Recording source CD mode 12 13 Listening to a CD Scanning tracks Tracks passages Random play CD displays CD program Skipping tracks Deleting program Repeating CD Repeating passag...

Страница 6: ...ee covers normal usage of the equipment Your hi fi system can be damaged by lightning strikes via the aerial connection or power sup ply During thunderstorms and in long periods of absence disconnect...

Страница 7: ...nctions with just a few buttons F4 switches to several operating levels for the variable F1 F3 buttons e g in TUNER mode F1 is AUT on first level and SIG SIGNAL on second level To change from tuner to...

Страница 8: ...Loewe active subwoofer Signal sources The many different connection options mean this hi fi system can be expanded to create a state of the art audio video system both now and in the future open to ne...

Страница 9: ...the loudspeakers and connect one supplied bridge between the two red sockets and one between the two black sockets Screw the cable ends tightly into the sockets Make sure that red is to red and black...

Страница 10: ...to the right If the tuner is switched on put the entire sys tem to standby mode rocker switch to right so that you can switch the system on and again to standby using the remote control switches the r...

Страница 11: ...component you want to listen to listen in the display Press HIFI button F1 TU TUNER for listening to and operating radio Press HIFI button F2 CD CDPLAYER for listening to and operating CD Press HIFI b...

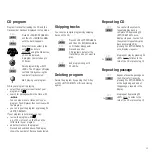
Страница 12: ...play shows the selection then endless play starts With F2 SFL CD SHUFFLE all the tracks on the CD inserted will be played once in random order Opening the CD tray or using the mains switch will delete...

Страница 13: ...n the CD and the third track in your program add other tracks to the program Proceed as described above The display shows the number of tracks already stored Skipping tracks You can also compile progr...

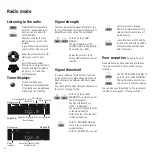
Страница 14: ...go to F1 SIG SIGNAL The signal strength of the selected station is displayed for 20 seconds e g S29 Values range from 1 to 50 Strong stations should show at least 44 Signal threshold If you are search...

Страница 15: ...h Intro scan SCAN scan flashing plays every station for five seconds then goes on to the next one Press F2 SCN SCAN SEARCH scan and frequency in the display Select the direction for searching upwards...

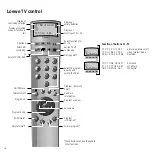
Страница 16: ...cture Picture format Display of empty batteries Display of functions of F1 F4 Select functions for F1 F3 Switch TV off to standby Muting on off Select TV program directly and switch the TV on Program...

Страница 17: ...batteries Display of functions of F1 F4 Select functions for F1 F3 Switch on off VTR to standby Muting on off Select program directly Menu off Record play Call Store Confirm Cursor right Fast forward...

Страница 18: ...n tracks Favourite track no function Resume play Subtitles Select sound language Menu selection To switch DVD on off in standby Muting Remove OSD menu bar Slow motion To confirm menu selection PLAY Ne...

Страница 19: ...ncorrectly Miscellaneous Turn off the hi fi system and turn it on again after a few seconds to reset the system It will now default to its standard settings i e the signal source is Cd volume is 15 fo...

Страница 20: ...l 7 Pause 12 Playback 11 Playing time 12 Playing 12 Poor reception 14 Power supply 8 Power switch 10 PRE OUT 8 Preamplifier amplifier 8 Program 13 Programming tracks 13 Rack 7 19 Radio control 4 14 15...

Страница 21: ...ore replacing the plug top ensure that the cable restraint is holding the outer sheath of the cable firmly and that the wires are correctly connected Technical Data Tuner TU Legro 3 Power supply 230 V...

Страница 22: ...22 Printed in Germany 2 04 01 1 0 Subject to modifications...

Отзывы: