


INSTALLATION
19
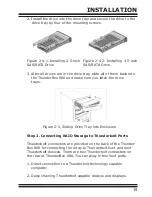
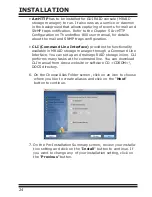
2. Install t
he drive into the drive tray and secure the drive to the
drive tray by four of the mounting screws.
Figure 2-5, Sliding Drive Tray into Enclosure
3. After all drives are in the drive tray, slide all of them back into
the ThunderBox 800 and make sure you latch the drive
trays.
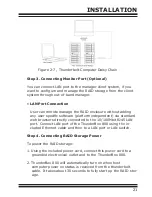
Step 2. Connecting RAID Storage to Thunderbolt Ports
Thunderbolt connectors are provided on the back of the Thunder-
Box 800 for connecting the array to Thunderbolt host and next
Thunderbolt devices. There are two Thunderbolt connectors on
the rear of ThunderBox 800. You can plug-in two host ports.
1.
Direct connection to a Thunderbolt technology capable
computer.
2.
Daisy chaining Thunderbolt capable devices and displays.
Figure 2-4-1. Installing 2.5-inch
SAS/SATA Drive
Figure 2-4-2. Installing 3.5-inch
SAS/SATA Drive


