background image

32

2

1

3

6

7

8

10

9

6

7

8

4

5

Содержание LS5.9IC

Страница 1: ...LS5 9IC INDOOR CYCLE OWNER S MANUAL MANUEL DU PROPRIÉTAIRE DU CARDIOVÉLO ...

Страница 2: ...against cancer Join them at LIVESTRONG org INTRODUCTION Congratulations and thank you for your purchase of this LIVESTRONG indoor cycle Purchases of this product ensure that a minimum of 4M will go to the LIVESTRONG Foundation and the fight against cancer Whether your goal is to win races or simply enjoy a fuller healthier lifestyle a LIVESTRONG indoor cycle can help you attain it adding club qual...

Страница 3: ...the following Read all instructions before using this indoor cycle It is the responsibility of the owner to ensure that all users of this indoor cycle are adequately informed of all warnings and precautions If you have any questions after reading this owner s manual contact Customer Tech Support at the number listed on the back panel ...

Страница 4: ...anism or other potentially moving part of the cycle Do not use any equipment that is damaged or has worn or broken parts Use only replacement parts supplied by LIVESTRONG Fitness or the authorized dealers Do not operate where aerosol spray products are being used or when oxygen is being administered Close supervision is necessary when used near children invalids or disabled people When the cycle i...

Страница 5: ...e and may cause irritating noises To prevent damage to the indoor cycle the assembly instructions must be reviewed and corrective actions should be taken Before proceeding find your indoor cycle s serial number located on the rear base frame of the cycle and enter it in the space provided below ENTER YOUR SERIAL NUMBER IN THE BOX BELOW Refer to the SERIAL NUMBER and MODEL NAME when calling for ser...

Страница 6: ...6 2 1 3 6 7 8 10 9 6 7 8 4 5 ...

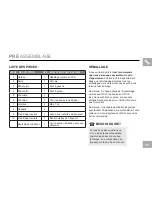
Страница 7: ...d bolts are in place and partially threaded in before completely tightening any ONE bolt NOTE A light application of grease may aid in the installation of hardware Any grease such as lithium bike grease is recommended NEED HELP PRE ASSEMBLY ASSEMBLY PARTS LIST ITEM DESCRIPTION QTY SPECIFICATION 1 Handlebar 1 Chrome PVC dipping 2 Saddle Post 1 Chrome 3 Pedal L 1 Left threaded 4 Pedal R 1 Right thre...

Страница 8: ...8 ASSEMBLY STEP 1 2 1 Install the handlebar 1 into the frame receptor and secure with the knob 2 Install the saddle post 2 into the frame receptor and secure with the knob 1 2 ...

Страница 9: ...eds to be turned counter clockwise to tighten Thread the right pedal 4 that has R on the spindle to the right side arm of the cycle using the Combination Wrench 5 Please note that the R pedal is right hand threaded which needs to be turned clockwise to tighten 4 Attach the Front Base Frame 9 to the frame using two Allen bolts 7 and two Washers 8 and secure firmly by Allen Wrench 6 5 4 3 6 7 8 9 ...

Страница 10: ...10 ASSEMBLY STEP 5 5 Attach the rear stabilizer 10 to the frame using two Allen bolts 7 and two Washers 8 and secure firmly by Allen Wrench 6 6 7 8 10 ASSEMBLY COMPLETE ...

Страница 11: ...11 INDOOR CYCLE OPERATION ...

Страница 12: ...12 A H I B C D A F G E ...

Страница 13: ...g E CRANK initiates movement to the flywheel F SADDLE POST allows vertical adjustment to customize height for any user G SADDLE SLIDER allows fore aft adjustment to customize for any user H SADDLE extra padding to provide a comfortable ride I TENSION CONTROL EMERGENCY BRAKE friction brake with micro adjustable knob and push down emergency stop NOTE In case of emergency you may press directly down ...

Страница 14: ...n is eliminated Leveling Feet To reduce the risk of injury use extreme caution while moving the indoor cycle Do not attempt to move it over uneven surfaces and make sure there s a safety space of 20 inch minimum to the nearest equipment is recommended WARNING LOCATION OF THE INDOOR CYCLE Place the Indoor Cycle on a level surface There should be 6 feet 183 cm of clearance behind the Indoor Cycle 3 ...

Страница 15: ...ddle height helps ensure maximum exercise efficiency and comfort while reducing the risk of injury Adjust the saddle height to make sure it s in proper position one that keeps a slightly bend in your knee while your legs are in the extended position HANDLEBAR ADJUSTMENT Proper position for the handlebar is based primarily on comfort Typically the handlebar should be positioned slightly higher than...

Страница 16: ...t tightens TO ADJUST THE SADDLE LIVESTRONGTAL POSITION Unscrew the saddle slider pin and pull out the knob to slide the saddle forward or backward as desired Re apply the quick release lever and screw clockwise to lock Test the saddle slide for proper operation Do not adjust the saddle position beyond the stop marks on the saddle slider Do not adjust saddle height beyond the stop mark on the stem ...

Страница 17: ...ce each foot ankle on the pedal and in the toe clip that the foot ankle is centered over the pedal spindle center of the pedal Rotate one foot to arms reach and pull up on the toe clip strap Repeat for the other foot Keep your knees over your feet as you pedal To remove your foot from the toe clip loosen the strap and pull out Do not adjust the handlebar height beyond the stop mark on the stem The...

Страница 18: ...ly come to a complete stop Make sure your shoes are fixed into the toe clip Apply full resistance load when the bike is not in use to prevent injuries due to moving drive gear components Tension control knob Emergency brake The Indoor Cycle does not have a free moving flywheel the pedals will continue to move together with the flywheel until the flywheel stops Reducing speed in a controlled manner...

Страница 19: ...ng even after the user stops pedaling or if the user s feet slip off DO NOT ATTEMPT TO REMOVE YOUR FEET FROM THE PEDALS OR DISMOUNT THE MACHINE UNTIL BOTH THE PEDALS AND THE FLYWHEEL HAVE COMPLETELY STOPPED Failure to follow these instructions may lead to loss of control and the potential for serious injury WARNING ...

Страница 20: ...20 ...

Страница 21: ...21 TROUBLESHOOTING MAINTENANCE ...

Страница 22: ...ness products seem quieter in a large store showroom because there is generally more background noise than in your home Also there will be less reverberation on a carpeted concrete floor than on a wood overlay floor Sometimes a heavy rubber mat will help reduce reverberation through the floor If a fitness product is placed close to a wall there will be more reflected noise HOW LONG WILL THE CHAIN ...

Страница 23: ...ack What kind of noise is it thumping grinding squeaking chirping etc Has the machine been lubricated and maintained per the MAINTENANCE schedule Answering these and other questions will give the technicians the ability to send proper replacement parts and the service necessary to get you and your Indoor Cycle running again If this does not remedy the problem you may CONTACT CUSTOMER TECH SUPPORT ...

Страница 24: ...here rust and corrosion may develop Use a small wire brush to remove rust build up in small crevasses such as leveling feet quick release levers and other bolt assemblies Inspect all wear items for adjustments or possible part replacement Give particular attention to the following A Inspect brake pad for wear Excessive wear or dryness indicates replacement is required B Inspect seat pad for wear R...

Страница 25: ...25 LIMITED HOME USE WARRANTY ...

Страница 26: ...l cover the labor cost for the repair of the device for a period of 1 year from the date of the original purchase so long as the device remains in the possession of the original owner Product failures due to negligent handling or improper use may void warranty Frequent service and maintenance according to the procedures described in the owner s manual are pre requisite to uphold warranty ...

Страница 27: ...oval or replacement of the covered unit Any attempt to repair this equipment creates a risk of injury LIVESTRONG Fitness is not responsible or liable for any damage loss or liability arising from any personal injury incurred during the course of or as a result of any repair or attempted repair of your fitness equipment by other than an authorized service technician All repairs attempted by you on ...

Страница 28: ... eux à LIVESTRONG org INTRODUCTION Félicitations et merci d avoir acheté ce cardiovélo LIVESTRONG Les achats de ce produit assurent qu un minimum de 4 M seront transmis au LIVESTRONGMD Foundation et la lutte contre le cancer Que votre objectif soit de gagner des courses ou simplement d apprécier un mode de vie plus riche et plus sain cet exerciseur elliptique peut vous aider à l atteindre grâce au...

Страница 29: ...directives avant d utiliser ce vélo d appartement Il incombe au propriétaire de veiller à ce que tous les utilisateurs de ce vélo d appartement soient adéquatement informés de tous les avertissements et mesures préventives Pour toute question après la lecture du présent manuel du propriétaire communiquer avec le soutien technique à la clientèle au numéro indiqué au verso du manuel ...

Страница 30: ...re pièce mobile du vélo N utilisez pas d équipement endommagé ou ayant des pièces usées ou cassées Utilisez uniquement les pièces de rechange fournies par LIVESTRONG Fitness ou les détaillants autorisés Ne vous servez pas du vélo si des générateurs d aérosol des pulvérisateurs sont utilisés ou lorsqu on administre de l oxygène Une surveillance étroite est nécessaire en cas d utilisation près d enf...

Страница 31: ... bruits irritants Pour éviter les dommages au vélo d appartement relisez les instructions d assemblage et prenez les mesures correctives qui s imposent Avant de continuer cherchez le numéro de série de votre vélo d appartement sur le cadre de base arrière et inscrivez le dans l espace prévu ci dessous INSCRIVEZ VOTRE NUMÉRO DE SÉRIE DANS LA CASE CI DESSOUS Référez vous au NUMÉRO DE SÉRIE et au NOM...

Страница 32: ...32 2 1 3 6 7 8 10 9 6 7 8 4 5 ...

Страница 33: ...issez les partiellement avant de serrer CHACUN d entre eux fermement Remarque Une légère application de graisse peut faciliter l installation de la quincaillerie Toute graisse comme la graisse au lithium pour vélos est recommandée BESOIN D AIDE PRÉ ASSEMBLAGE LISTE DES PIÈCES PIÈCE DESCRIPTION QTÉ INDICATION PARTICULIÈRE 1 Guidon 1 Habillage chrome et PVC 2 Selle 1 Chrome 3 Pédale G 1 Filet à gauc...

Страница 34: ... guidon 1 au cadre en introduisant la tige du guidon dans son support et en la fixant avec le bouton de réglage 2 Assemblez la selle 2 au cadre en introduisant la tige de la selle dans son support et en la fixant avec le bouton de réglage 1 2 ...

Страница 35: ...uche et doit être vissée dans le sens antihoraire Avec la clé mixte 5 fixez la pédale droite 4 marquée d un R à la manivelle du pédalier droit La pédale droite est dotée d un filet à droite et doit être vissée dans le sens horaire 4 Attachez le pied d appui avant 9 au cadre avec deux vis Allen 7 et deux rondelles 8 puis serrez les avec la clé Allen 6 5 4 3 6 7 8 9 ...

Страница 36: ...36 ASSEMBLAGE ÉTAPE 5 5 Attachez le pied d appui arrière 10 au cadre avec deux vis Allen 7 et deux rondelles 8 puis serrez les avec la clé Allen 6 ASSEMBLAGE TERMINÉ 6 7 8 10 ...

Страница 37: ...37 UTILISATION DU VÉLO D APPARTEMENT ...

Страница 38: ...38 A H I B C D A F G E ...

Страница 39: ...roue d inertie F TIGE DE LA SELLE possède un réglage vertical pour un ajustement personnalisé de la hauteur G TIGE DE RÉGLAGE LIVESTRONGTAL DE LA SELLE permet d ajuster la position avant et arrière pour un réglage personnalisé H SELLE rembourrage renforcé pour une assise confortable I RÉGLAGE DE LA RÉSISTANCE ET FREIN D URGENCE frein à friction avec un bouton microréglable et un arrêt d urgence RE...

Страница 40: ... de blessure faites très attention lorsque vous déplacez le vélo d appartement N essayez pas de le bouger au dessus de surfaces non planes et assurez vous d avoir un espace de sécurité d au moins 50 8 cm 20 po entre le vélo et un autre équipement AVERTISSEMENT EMPLACEMENT DU VÉLO D APPARTEMENT Placez le vélo d appartement sur une surface plane Un espace libre de 183 cm 6 pi doit se trouver derrièr...

Страница 41: ...Une hauteur adéquate de la selle optimise le confort et l efficacité de l exercice tout en réduisant le risque de blessure Ajustez la hauteur de la selle de sorte que vos genoux soient légèrement pliés lorsque vos jambes sont tendues RÉGLAGE DU GUIDON La position adéquate du guidon est basée principalement sur le confort Habituellement il est conseillé aux débutants de régler le guidon légèrement ...

Страница 42: ...e la tige de réglage LIVESTRONGtal de la selle et retirez le bouton pour glisser la selle vers l avant ou l arrière à votre convenance Remettez le levier de serrage rapide et vissez dans le sens horaire Essayez la tige de réglage LIVESTRONGtal de la selle pour en contrôler le bon fonctionnement Ne positionnez pas la selle au delà des repères placés sur la tige de réglage LIVESTRONGtal de la selle ...

Страница 43: ...t bien dans le cale pied de telle sorte que votre pied soit positionné au dessus de la manivelle du pédalier au centre de la pédale Levez votre pied et fixez la sangle du cale pied Faites de même pour l autre pied Gardez vos genoux au dessus de vos pieds lorsque vous pédalez Pour sortir votre pied du cale pied desserrez la sangle et retirez Ne réglez pas la hauteur du guidon au delà des repères pl...

Страница 44: ...rrêter rapidement Assurez vous de bien positionner vos chaussures dans le cale pied Lorsque le vélo n est pas utilisé enclenchez la pleine résistance pour éviter que les composants mobiles de l entraînement ne blessent quelqu un Bouton du réglage de la résistance frein d urgence Le vélo d appartement ne possède pas de roue d inertie libre les pédales continueront de bouger selon le mouvement de la...

Страница 45: ...rner même si l utilisateur s est arrêté de pédaler ou si ses pieds glissent des pédales N ESSAYEZ PAS DE RETIRER VOS PIEDS DES PÉDALES OU DE DESCENDRE DE L APPAREIL AVANT L ARRÊT COMPLET DES PÉDALES ET DE LA ROUE D INERTIE Ne pas suivre ces directives peut vous faire perdre le contrôle du vélo et provoquer de graves blessures AVERTISSEMENT ...

Страница 46: ...46 ...

Страница 47: ...47 DÉPANNAGE ET ENTRETIEN ...

Страница 48: ... Les appareils de conditionnement physique semblent plus silencieux dans une grande salle de montre parce qu il y a généralement un niveau de bruit de fond plus élevé que chez vous La réverbération du bruit est également moindre sur un sol en béton recouvert d une moquette que sur un parquet Un tapis épais en peut aider à minimiser la réverbération du bruit dans la pièce La réflexion du bruit est ...

Страница 49: ...bruit s agit il bourdonnement grincement couinement bruit strident etc La machine a t elle été lubrifiée et entretenue selon le calendrier D ENTRETIEN Les réponses à ces questions et à d autres permettent aux techniciens d envoyer les pièces de rechange adéquates et de mobiliser les services d entretien nécessaires à la réparation du vélo d appartement Si le problème n est pas résolu vous pouvez C...

Страница 50: ... trouver les zones pouvant être rouillées et corrodées Servez vous d une petite brosse métallique pour retirer la rouille accumulée dans les petites fissures comme les patins de nivèlement les leviers de serrage rapide et tout autre assemblage à boulons Inspectez tous les éléments d usure à des fins de réglage ou de remplacement Soyez particulièrement attentif aux éléments suivants A L usure du pa...

Страница 51: ...51 GARANTIE LIMITÉE POUR USAGE RÉSIDENTIEL ...

Страница 52: ...couvre les coûts de main d œuvre pour la réparation de l appareil pendant un an à compter de la date de l achat initial tant que le propriétaire initial possède l appareil Les pannes de produit dues à une manipulation négligente ou une mauvaise utilisation peuvent annuler la garantie Pour conserver la garantie il est nécessaire d effectuer les services et les entretiens fréquents selon les procédu...

Страница 53: ...ent ou au remplacement de l unité couverte Toute tentative de réparation de cet équipement crée un risque de blessure LIVESTRONG Fitness n est pas responsable des dommages pertes ou responsabilités découlant de toute blessure subie lors de ou du fait de toute réparation ou tentative de réparation de l équipement de conditionnement physique par quiconque autre qu un technicien accrédité Toutes les ...

Страница 54: ...54 ...

Страница 55: ...55 ...

Страница 56: ...e Des renseignements supplémentaires sur le produit sont disponibles sur notre site Web NO VUELVA AL VENDEDOR MINORISTA si tiene problemas durante el ensamblaje o si faltan piezas Para obtener un servicio rápido y grato comuníquese con uno de nuestros técnicos capacitados para la atención de clientes vía teléfono correo electrónico o nuestro sitio web Queremos saber si tiene un problema y queremos...

Отзывы: