background image

47 

NL/BE

Legenda van de gebruikte  

pictogrammen

 .....................................................................Pagina 48

Inleiding

 ...................................................................................Pagina 48

Correct gebruik ...........................................................................Pagina 48
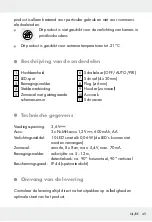
Beschrijving van de onderdelen .................................................Pagina 49
Technische gegevens ..................................................................Pagina 49
Omvang van de levering ............................................................Pagina 49

Algemene veiligheidsinstructies

 ..........................Pagina 50

Veiligheidsinstructies  voor  batterijen / accu‘s ............................Pagina 51

Werking

....................................................................................Pagina 52

Voor de eerste ingebruikname

 ............................Pagina 52

Accu‘s opladen ...........................................................................Pagina 52

Montage

 ...................................................................................Pagina 53

Hoofdeenheid monteren .............................................................Pagina 53
Zonnecel monteren .....................................................................Pagina 54
Zonnecel verbinden met de hoofdeenheid ...............................Pagina 54

Ingebruikname

 ..................................................................Pagina 55

Onderhoud / accu‘s  vervangen

 ............................Pagina 56

Gebruik in de winter

 .....................................................Pagina 56

Reiniging en onderhoud

 .............................................Pagina 57

Storingen oplossen

 .........................................................Pagina 57

Afvoer

 ........................................................................................Pagina 58

Garantie

 ...................................................................................Pagina 59

Содержание 282514

Страница 1: ...ty instructions PROJETOR SOLAR LED Indica es de montagem utiliza o e seguran a IAN 282514 FOCO SOLAR LED Instrucciones de montaje de uso y de seguridad LED SOL RN REFLEKTOR Pokyny k mont i obsluze a b...

Страница 2: ...19 FR BE Instructions de montage d utilisation et consignes de s curit Page 33 NL BE Montage bedienings en veiligheidsinstructies Pagina 47 CZ Pokyny k mont i obsluze a bezpe nostn pokyny Strana 61 ES...

Страница 3: ...B C D 7 9 7 8 8 A 1 4 5 2 3 6 4...

Страница 4: ...E F 10 11...

Страница 5: ...erheitshinweise f r Batterien Akkus Seite 9 Funktion Seite 10 Vor der ersten Inbetriebnahme Seite 10 Akkus aufladen Seite 10 Montage Seite 11 Haupteinheit montieren Seite 11 Solarzelle montieren Seite...

Страница 6: ...kts Sie enth lt wichtige Hinweise f r Sicherheit Ge brauch und Entsorgung Machen Sie sich vor der Benutzung des Produkts mit allen Bedien und Sicherheitshinweisen vertraut Benutzen Sie das Pro dukt nu...

Страница 7: ...n Technische Daten Betriebsspannung 3 6V Akku 3xNi MH Akku 1 2V 600mAh AA Leuchtmittel 10 LEDs mit je 0 06W die LEDs sind nicht austauschbar Solarzelle amorph 8x8cm max 5 4V max 70mA Bewegungsmelder R...

Страница 8: ...n wenn sie beaufsichtigt oder bez glich des sicheren Gebrauchs des Produkts unterwiesen wurden und die daraus resultierenden Gefahren verstehen Kinder d rfen nicht mit dem Produkt spielen Reinigung un...

Страница 9: ...rahlung Vermeiden Sie den Kontakt mit Haut Augen und Schleimh uten Sp len Sie bei Kontakt mit Batteries ure die betroffenen Stellen sofort mit klarem Wasser und suchen Sie umgehend einen Arzt auf SCHU...

Страница 10: ...im Sommer bei regelm i ger Sonneneinstrahlung etwa 2 bis 4 Tage Vor der ersten Inbetriebnahme des Produkts m ssen die Akkus geladen sein siehe Akkus aufladen Vor der ersten Inbetriebnahme Akkus auflad...

Страница 11: ...chten Sie dass Sie die Gelenkschraube des LED Spots etwas l sen bevor Sie den LED Spot bewegen Ziehen Sie die Gelenkschraube hinterher wie der an siehe Abb F 2 Der Bewegungsmelder 3 hat abh ngig von d...

Страница 12: ...beiliegende Montagematerial ist zur Befestigung im normalen Mauerwerk geeignet F r andere Untergr nde ben tigen Sie m glicherweise andere Befestigungsmaterialien Im Zweifelsfall ziehen Sie eine Fachkr...

Страница 13: ...der Haupteinheit 1 Abb A verf gt ber folgende Funktionen Position OFF Bewegungsmelder 3 und LED Spot 2 sind au er Betrieb Die Akkus werden bei Sonneneinstrahlung durch die Solarzelle 5 geladen Verwen...

Страница 14: ...5 zu gew hrleisten muss die Solar zelle in regelm igen Abst nden gereinigt werden siehe Reinigung und Pflege Gehen Sie zum Akkuwechseln folgenderma en vor Entfernen Sie die Haupteinheit 1 von der Wand...

Страница 15: ...s aufladen bzw Akkus wechseln Reinigung und Pflege Schalten Sie das Produkt zur Reinigung aus Verwenden Sie zur Reinigung ein leicht angefeuchtetes fusselfreies Tuch mit einem milden Reinigungsmittel...

Страница 16: ...Akkus wechseln Das Produkt enth lt empfindliche elektronische Bauteile Daher ist es m g lich dass es durch Funku bertragungsger te in unmittelbarer N he gest rt wird Sollten Funktionsst rungen beim Be...

Страница 17: ...Umweltschutzes nicht in den Hausm ll sondern f hren Sie es einer fachgerechten Entsorgung zu ber Sammelstellen und deren ffnungszeiten k nnen Sie sich bei Ihrer zust ndigen Verwaltung informieren Defe...

Страница 18: ...Kaufdatum dieses Produkts ein Mate rial oder Fabrikationsfehler auf wird das Produkt von uns nach unserer Wahl f r Sie kostenlos repariert oder ersetzt Diese Garantie verf llt wenn das Produkt besch d...

Страница 19: ...ries rechargeable batteries Page 23 Function Page 24 Before use Page 24 Charging the rechargeable batteries Page 24 Assembly Page 25 Mounting the main unit Page 25 Mounting the solar cell Page 26 Conn...

Страница 20: ...ntain important information concerning safety use and disposal Before using the product please familiarise yourself with all of the safety information and instructions for use Only use the product as...

Страница 21: ...g 6mm 9 Bracket solar cell 10 Rechargeable battery compartment 11 Locking screws Technical Data Operating voltage 3 6V Rechargeable battery 3 x Ni MH battery 1 2V 600mAh AA Light bulb 10 LEDs 0 06W ea...

Страница 22: ...nd above and persons with reduced physical sensory or mental capabilities or lack of experience and knowledge if they have been given supervision or instruction concerning use of the product in a safe...

Страница 23: ...ators direct sunlight Avoid contact with the skin eyes and mucous membranes In the event of contact with battery acid thoroughly flush the affected area with plenty of clean water and seek immediate m...

Страница 24: ...take about 2 to 4 days to fully recharge in constant sunlight The rechargeable batteries must be charged prior to initial use see Charging rechargeable batteries Before use Charging the rechargeable b...

Страница 25: ...loosen the swivel screw before moving the LED spotlight Tighten the swivel screw afterwards see Fig F 2 Depending on the mounting height ideally between 1 80m 2 00m the motion detector 3 has a detecti...

Страница 26: ...ting verify the solar cell 5 is fitted securely by the bracket 9 Then attach the solar cell as shown in Fig C Next adjust the solar cell to face south Connecting the solar cell to the main unit After...

Страница 27: ...n or off once the solar cell 5 detects dusk or dawn To en sure a long life the LEDs will not be fully powered in this setting but only provide approx 20 of their full light power eco mode When fully c...

Страница 28: ...e with new rechargeable batteries with the same technical data Be sure to insert the rechargeable batteries in the correct direction The correct polarity is shown inside the recharge able battery comp...

Страница 29: ...in winter Troubleshooting Problem Cause Solution Product doesn t come on Switch 6 set to OFF position Set switch to AUTO PIR position Dirty motion detector 3 Clean motion detector Rechargeable batteri...

Страница 30: ...roduct failing to work remove the rechargeable batteries for a short while and then replace them Disposal The packaging is made entirely of recyclable materials which you may dispose of at local recyc...

Страница 31: ...f used rechargeable batteries through your mu nicipal collection site Warranty The product has been manufactured to strict quality guidelines and meticu lously examined before delivery In the event of...

Страница 32: ...efects in material or manufacture This warranty does not cover product parts subject to normal wear thus possibly consi dered consumables e g batteries or for damage to fragile parts e g switches rech...

Страница 33: ...s aux piles aux piles rechargeables Page 37 Fonctionnement Page 38 Avant la premi re mise en service Page 38 Charger les piles Page 38 Montage Page 39 Montage de l unit principale Page 39 Montage de l...

Страница 34: ...mploi fait partie int grante de ce produit Il contient des indications importantes pour la s cu rit l utilisation et la mise au rebut Veuillez lire consciencieusement toutes les indications d utilisat...

Страница 35: ...aire avec capteur de cr puscule int gr 6 Interrupteur OFF AUTO PIR 7 Vis 4x30mm 8 Cheville 6 mm 9 Support cellule solaire 10 Compartiment pile 11 Vis de fermeture Caract ristiques techniques Tension d...

Страница 36: ...galement lui transmettre tous les documents s y rappor tant Ce produit peut tre utilis par des enfants g s de 8 ans et plus ainsi que par des personnes ayant des capacit s physiques sensorielles ou m...

Страница 37: ...des piles piles rechargeables au feu ou dans l eau Ne pas soumettre les piles piles rechargeables une charge m canique Risque de fuite des piles piles rechargeables vitez d exposer les piles piles re...

Страница 38: ...e solaire 5 convertit l nergie lumineuse du soleil en nergie lectrique La cellule solaire charge les piles install es dans le comparti ment piles 10 avec le c ble de connexion fourni Ces piles emmagas...

Страница 39: ...lior e apr s la charge voir ill E Montage Remarque Choisir l emplacement de la cellule solaire 5 et de l unit principale 1 avant de commencer le montage Veuillez noter que le c ble de connexion pr sen...

Страница 40: ...fix e Montage de la cellule solaire La cellule solaire 5 doit autant que possible tre expos e au rayonne ment solaire direct Une orientation plein sud de la surface de la cellule so laire est optimal...

Страница 41: ...vice du produit raccordez l unit principale 1 la cellule solaire 5 La cellule solaire 5 fonctionne galement comme capteur de cr puscule tandis que le d tecteur de mouvement 3 r a git uniquement la pr...

Страница 42: ...it au cr puscule ou dans l obscurit d s que le d tecteur de mouvement 3 rep re une activit La dur e d clairage est pr r gl e et com prend env 1 5 minutes Si un autre mouvement est d tect pendant ces 1...

Страница 43: ...vice nocturne V rifiez donc galement en hiver que malgr une position basse du soleil la cellule solaire 5 reste prot g e de l ombre tout au long de la journ e et retirez au besoin la neige ou la glace...

Страница 44: ...argent en peu de temps La cellule solaire est encrass e Nettoyer la cellule solaire L orientation de la cellule solaire est d favorable R orienter la cellule solaire voir Montage de la cellule solaire...

Страница 45: ...te Le produit et les mat riaux d emballage sont recyclables mettez les au rebut s par ment pour un meilleur traitement des d chets Le logo Triman n est valable qu en France Votre mairie ou votre munic...

Страница 46: ...achat La dur e de garantie d bute la date d achat Veuillez conserver le ticket de caisse original Il fera office de preuve d achat Si un probl me mat riel ou de fabrication devait survenir dans 3 ans...

Страница 47: ...ligheidsinstructies voor batterijen accu s Pagina 51 Werking Pagina 52 Voor de eerste ingebruikname Pagina 52 Accu s opladen Pagina 52 Montage Pagina 53 Hoofdeenheid monteren Pagina 53 Zonnecel monter...

Страница 48: ...gekozen De gebruiksaanwijzing is een deel van het product Deze bevat belangrijke aanwijzingen voor veiligheid gebruik en verwijdering Maakt U zich voor de ingebruikname van het product met alle bedie...

Страница 49: ...rde schemersensor 6 Schakelaar OFF AUTO PIR 7 Schroef 4x30mm 8 Plug 6mm 9 Houder zonnecel 10 Accuvak 11 Schroeven Technische gegevens Voedingsspanning 3 6V Accu 3xNi MH accu 1 2V 600mAh AA Verlichting...

Страница 50: ...igheden of een gebrek aan ervaring en kennis worden gebruikt als zij onder toezicht staan of ge nstrueerd werden met betrekking tot het veilige gebruik van het product en zij de hieruit voortvloeiende...

Страница 51: ...ct met huid ogen en slijmvliezen Spoel in geval van contact met batterijzuur de desbetreffende plekken direct af met voldoende schoon water en raadpleeg onmiddellijk een arts DRAAG VEILIGHEIDSHANDSCHO...

Страница 52: ...urt in de zomer bij regelmatig zonlicht ongeveer 2 tot 4 dagen Voor de eerste ingebruikname van het product moeten de accu s opgeladen zijn zie Accu s opladen Voor de eerste ingebruikname Accu s oplad...

Страница 53: ...en gedraaid voordat u de LED spot beweegt Draai de scharnier schroef naderhand weer vast zie afb F 2 De bewegingsmelder 3 heeft afhankelijk van de montagehoogte ideaal is een hoogte van 1 80m 2 00m ee...

Страница 54: ...heeft u mogelijk ander bevestigingsmateriaal nodig Raadpleeg in geval van twijfel een expert Controleer na de montage of de houder 9 en zonnecel 5 goed vast zit Plaats vervolgens de zonnecel zoals wee...

Страница 55: ...l worden de accu s via de zonnecel gela den Het product gaat automatisch aan of uit zodra de zonnecel 5 schemering of dageraad registreert Om een lange levensduur te bereiken worden de LED s in deze p...

Страница 56: ...ter hand Verwijder de accu s uit het accuvak 10 en vervang deze door nieuwe accu s met dezelfde technische eigenschappen Let tijdens het plaat sen op de juiste polariteit Deze staat in het batterijvak...

Страница 57: ...rgen Houd de zonnecel voornamelijk in de winter sneeuw en ijsvrij Storingen oplossen Probleem Oorzaak Oplossing Product gaat niet aan Schakelaar 6 staat op OFF Schakelaar op AUTO PIR zetten Bewegingsm...

Страница 58: ...storingen even de accu s en plaats ze vervolgens weer terug Afvoer De verpakking bestaat uit milieuvriendelijke grondstoffen die u via de plaatselijke recyclingcontainers kunt afvoeren De Gr ne Punkt...

Страница 59: ...k inzamelpunt Garantie Het product wordt volgens strenge kwaliteitsrichtlijnen zorgvuldig geprodu ceerd en voor levering grondig getest In geval van schade aan het pro duct kunt u rechtmatig beroep do...

Страница 60: ...van toepassing op productonderdelen die onderhevig zijn aan normale slijtage en hierdoor als aan slijtage onderhevige onderdelen gelden bijv batterijen of voor beschadigingen aan breekbare onderdelen...

Страница 61: ...rie a akumul tory Strana 64 Funkce Strana 66 P ed prvn m uveden m do provozu Strana 66 Nab jen akumul tor Strana 66 Mont Strana 67 Mont hlavn jednotky Strana 67 Mont sol rn ho l nku Strana 67 Spojen s...

Страница 62: ...sou st tohoto v robku Obsahuje d le it pokyny pro bezpe nost pou it a likvidaci P ed pou it m v robku se se znamte se v emi pokyny k obsluze a bezpe nostn mi pokyny Pou vejte v robek jen popsa n m zp...

Страница 63: ...dka na akumul tory 11 Uzav rac rouby Technick daje Provozn nap t 3 6V Akumul tor 3xNi MH akumul tor 1 2V 600mAh AA Osv tlovac prost edek 10 LED ka d 0 06W LED nelze vym nit Sol rn l nek amorfn 8 8 cm...

Страница 64: ...u pod dohledem nebo byly pou eny o bezpe n m pou v n v robku a ch pou nebezpe kter z jeho pou v n vypl vaj S v robkem si d ti nesm hr t D ti nesm bez dohledu prov d t i t n ani u ivatelskou dr bu D ti...

Страница 65: ...n m mno stv m ist vody a okam it vyhledejte l ka skou pomoc NOSTE OCHRANN RUKAVICE Vytekl i po kozen baterie nebo akumul tory mohou p i kontaktu s poko kou zp sobit jej polept n Noste proto vhodn ruk...

Страница 66: ...kumul tory nab t viz Nab jen akumul tor P ed prvn m uveden m do provozu Nab jen akumul tor Pozn mka V hlavn jednotce 1 zabudovan akumul tory jsou p i dod vce ji nabit P esto se mohou b hem p epravy od...

Страница 67: ...ka od 1 80m do 2 00m dosah maxim ln 12m p i hlu dosahu 90 vo dorovn a 90 svisle 3 D vejte pozor aby nebyl v noci pohybov senzor oza ov n pouli n m osv tlen m M e ovlivnit p soben pohybov ho senzoru P...

Страница 68: ...te spojovac kabel tak aby nebyl mechanicky nam han Abyste zabr nili po kozen pou ijte p i zav d n kabelu b n in stala n materi ly jako jsou nap obj mky nebo kabelov kan ly Spojte spojky 4 spojovac ho...

Страница 69: ...u sv tla budou akumul tory nab jeny pro st ednictv m sol rn jednotky Sol rn l nek 5 za p n v robek p i stm v n resp ve tm jakmile pohybov senzor 3 zaznamen pohyb Doba sv cen je p ednastaven na cca 1 5...

Страница 70: ...e doba sv cen v noci zkr tit Proto v zim zkontrolujte jestli nen sol rn l nek 5 p i n zko stoj c m slunci zast n n v p pad pot eby z n ho o ist te led nebo sn h Jestli e je doba sv cen p i patn m po...

Страница 71: ...je zne i t n Sol rn l nek vy istit Sol rn l nek nen spr vn nasm rovan Sol rn l nek znovu nasm rovat viz Mont sol rn ho l nku patn pov trnostn podm nky Viz Zimn provoz Akumul tory se vadn Akumul tory v...

Страница 72: ...ncii O mo nostech likvidace vyslou il ch za zen se informujte u spr vy va obce nebo m sta V z jmu ochrany ivotn ho prost ed vyslou il v robek nevyha zujte do domovn ho odpadu ale p edejte k odborn lik...

Страница 73: ...e origin l pokladn stvrzenky Tuto stvrzenku budete pot ebovat jako doklad o zakoupen Pokud se do 3 let od data zakoupen tohoto v robku vyskytne vada materi lu nebo v robn vada v robek V m dle na eho r...

Страница 74: ...er as P gina 78 Funci n P gina 79 Antes de la primera puesta en funcionamiento P gina 79 Cargar las bater as P gina 79 Montaje P gina 80 Montar la unidad principal P gina 80 Montar la placa solar P gi...

Страница 75: ...ucto Contiene importantes indicaciones sobre seguridad uso y elimi naci n Antes de usar el producto familiar cese con todas las indicaciones de manejo y de seguridad Utilice el producto nicamente como...

Страница 76: ...9 Soporte placa solar 10 Compartimento para bater a 11 Tapones roscados Caracter sticas t cnicas Tensi n de funcionamiento 3 6V Bater a 3x bater as Ni MH 1 2V 600mAh AA Bombillas 10 LED de 0 06W los...

Страница 77: ...idas o que cuenten con poca experiencia y o falta de conoci mientos siempre y cuando se les haya ense ado c mo utilizar el pro ducto de forma segura y hayan comprendido los peligros que pueden resulta...

Страница 78: ...e a la luz solar Evite el contacto con la piel ojos y mucosas En caso de que se pro duzca un contacto con el cido de las pilas lave las zonas afectadas y p ngase inmediatamente en contacto con un m di...

Страница 79: ...cargadas dura en verano con una radiaci n solar normal entre 2 y 4 d as Antes de la primera puesta en funcionamiento del producto las bater as deben estar cargadas ver apartado Cargar las bater as Ant...

Страница 80: ...forma flexible y debe alumbrar todo el espacio deseado Recuerde aflojar ligeramente el tornillo de la articulaci n antes de mover el foco LED Despu s vuelva a apretar el tornillo articulado ver fig F...

Страница 81: ...je suministrado es adecuado para la instalaci n en muros de mamposter a normales Para otro tipo de materiales deber n utilizarse elementos de fijaci n adecuados En caso de duda consulte a un especiali...

Страница 82: ...F El sensor de movimientos 3 y el foco LED 2 no es t n en funcionamiento Las bater as se cargan con la radiaci n solar a trav s de la placa solar 5 Utilice esta posici n para cargar las bater as desca...

Страница 83: ...a pared Ponga el interruptor 6 en la posici n OFF Con un destornillador de estrella afloje los tapones roscados 11 de la parte trasera de la unidad principal 1 ver fig E Retire la parte trasera desato...

Страница 84: ...pelusas junto con un limpiador suave Revise con regularidad que especialmente el sensor de movimientos 3 y la placa solar 5 se encuentren limpios Limpie el sensor de movimientos y la placa solar habi...

Страница 85: ...ximidad de aparatos de radiotransmisi n puede afectar al producto En caso de producirse interferencias en el sensor de movimientos aparte dichos aparatos del entorno del producto Las cargas electrost...

Страница 86: ...e residuos y sus horarios Las bater as defectuosas o usadas deben ser recicladas seg n lo indicado en la directiva 2006 66 CE y en sus modificaciones Recicle las bater as y o el producto en los puntos...

Страница 87: ...o fabricaci n en este producto repararemos el producto o lo sustituiremos gratuitamente por un producto nuevo seg n nuestra elec ci n La garant a quedar anulada si el producto resulta da ado o es util...

Страница 88: ...s s pilhas baterias P gina 92 Fun o P gina 93 Antes da primeira utiliza o P gina 93 Carregar pilhas P gina 93 Montagem P gina 94 Montar unidade principal P gina 94 Montar c lula solar P gina 95 Conect...

Страница 89: ...nstru es parte integrante deste produto Cont m indica es importantes referentes seguran a utiliza o e elimina o Familiarize se com todas as indica es de utiliza o e de seguran a do produto Utilize o p...

Страница 90: ...x30mm 8 Buchas 6mm 9 Suporte C lula solar 10 Compartimento das pilhas 11 Parafusos de fechamento Dados t cnicos Tens o de servi o 3 6V Pilha 3xPilha Ni MH 1 2V 600mAh AA L mpada 10 LEDs cada com 0 06W...

Страница 91: ...as sensoriais ou mentais reduzidas ou defici ncias na experi ncia e conhecimento se forem vigiadas ou instru das em rela o ao uso seguro do produto e se compreenderem os perigos que da possam resultar...

Страница 92: ...r ex elementos de batterie gli solar direta Evite o contacto com a pele olhos e mucosas Em caso de contacto com o cido das pilhas lave imediatamente as zonas afetadas com gua limpa e consulte um m dic...

Страница 93: ...de 2 horas de luz na posi o de interruptor AUTO por cerca de 8 horas O carregamento da bateria completamente descarregada demora no Ver o com radia o solar constante aprox 2 at 4 dias Antes da primeir...

Страница 94: ...m para a unidade principal 1 1 O foco LED 2 m vel e conectado com a unidade principal e deve iluminar a rea desejada Esteja atento para que soltes o parafuso de junta do foco LED antes de movimentar o...

Страница 95: ...ota o material de montagem fornecido adequado para a fixa o em paredes convencionais Para outras superf cies podem possivelmente ser necess rios outros materiais de fixa o Em caso de d vidas consulte...

Страница 96: ...ade principal 1 veja Fig A possui as seguintes fun es Posi o OFF Detector de movimentos 3 e foco LED 2 n o ope ram Com radia o solar as baterias s o carregadas atrav s da c lula solar 5 Utilize esta p...

Страница 97: ...teria Para garantir um bom desempenho da c lula solar 5 esta deve ser limpa regularmente ver Limpeza e cuidado Para substituir a bateria proceda da seguinte forma Remova a unidade principal 1 da pared...

Страница 98: ...rregue a bateria ou troque a ver Carregar bateria e Substituir bateria Limpeza e conserva o Desligue o produto para a limpeza Utilize para a limpeza um pano levemente mido livre de fios e com um deter...

Страница 99: ...ia Substituir baterias ver Manuten o Substituir bateria O produto cont m componentes eletr nicos sens veis Por isso poss vel que um aparelho que funcione com sinais via r dio na proximidade do rel gio...

Страница 100: ...Pode in formar se no seu munic pio sobre os locais de recolha adequa dos e o seu per odo de funcionamento As baterias avariadas ou gastas t m de ser recicladas de acordo com a diretiva 2006 66 CE e a...

Страница 101: ...bstitu do por n s segundo a nossa escolha e sem qualquer custo Esta garantia expira se o producto estiver danificado se n o for devida mente utilizado ou se n o for efectuada a devida manuten o A gara...

Страница 102: ...rsulm GERMANY Model No Z31999 Version 02 2017 Stand der Informationen Last Information Update Version des informations Stand van de informatie Stav informac Estado de las informaciones Estado das info...

Отзывы: