


14
Half Nuts
There are two adjustments for the half nuts. The half nut gibs take the play
out of the half nuts. The half nut closing limit stops the half nuts from closing
too tightly on the lead screw.
To adjust the half nut gibs:
Tighten the three setscrews in the back edge of the apron to remove play
from the half nuts.
To adjust the half nut limit:
1.
Loosen the lock nut on the bottom of the half nuts.
2.
Adjust the setscrew until the half nuts close without binding on the lead
screw.
3.
While holding the setscrew from turning, tighten the lock nut.
Lead Screw Mounting
The brackets that mount the lead screw can move slightly to ensure that the
lead screw does not bind in the half nuts.
To adjust the right lead screw mounting bracket:
1.
Remove the tailstock by sliding it off the end of the ways.
2.
Loosen the two mounting socket head cap screws on the right bracket.
3.
Move the carriage as far to the right as possible.
4.
Engage the half nuts on the lead screw.
5.
Tighten the bracket mounting socket head cap screws.
6.
Replace the tailstock.
To adjust the left lead screw mounting bracket:
1.
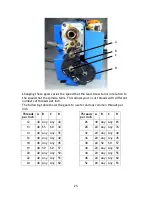
Remove the change gear cover.
2.
Loosen the locking nut on the change gear adjuster.
3.
Loosen the two mounting socket head cap screws on the left lead screw
bracket.
4.
Move the carriage as far to the left as possible.
5.
Engage the half nuts on the lead screw.
6.
Tighten the bracket mounting socket head cap screws.
7.
Tighten the locking nut on the change gear adjuster.
8.
Replace the change gear cover.
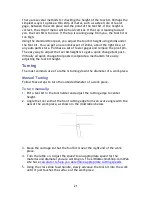
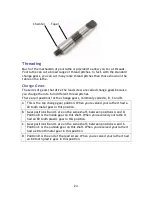
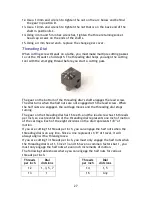
Drive Belt
The drive belt needs to be aligned correctly or it will wear on one side or the
other.


