background image


2862  Walnut  Avenue,  Suite  D  -  Tustin,  CA,  92780    


Phone:  1.949.313.6340  •  E

-mail: 

[email protected]


15 


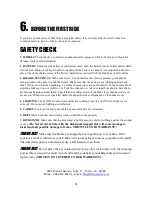
6. 

BEFORE THE FIRST RIDE


If you have purchased your bike from a specialist dealer, they must provide the electric bike in a 
condition ready to ride in order to ensure safe operation.  

SAFETY CHECK  

1. WHEELS

 Check the tires’ condition, alignment and air pressure. Check the tires and wheels for 

damage, cracks and deformation.  

2. BATTERY

 Check that the battery is inserted securely: push the battery into its holder until it clicks 

into the lock. Remove the key from the lock and pull the battery to check if it has indeed locked into 
place. Check the charge status of the battery. Familiarize yourself with the functions of all controls.  

3. BRAKES SYSTEM

 Pull both brake levers. You should feel an obvious pressure point and the 

levers should not be able to touch the handle. Make sure that the pads are not rubbing against each 
other. If they do rub at the beginning, it’s normal because they are not broken in. To learn more about 
adjusting brakes go on our website, our YouTube channel, or visit your local bike shop to have them 
professionally adjusted and tuned. Check that the configuration of the brake lever matches what you 
are used to. Otherwise your specialist dealer should adjust the configuration of the brake levers. 

4. LIGHTING

: Check if the front and rear lights are working properly and if the front light is set 

correctly. Do not cover lighting and reflectors.  

5. CABLES:

 Look out for any loose cables, ensure all cables are connected.  

6. DISPLAY:

 Check that your display turns on and functions properly  

7. KICKSTAND

: Make sure that the kick stand is tightly secured, and not rubbing against the ground 

or tires

. (

Do Not sit on the bike with the kickstand engaged this will cause damage to 

kickstand and possible damage to frame. THIS WILL VOID WARRANTY

)   

!WARNING!


Make sure the brakes are engaged prior to getting on to your bike. If the 

assistance mode is turned on, your E-Bike will start moving as soon as you push on the pedal. 
The unfamiliar push can otherwise cause a fall, hazard, or accident.  

!WARNING! 


Do not place the key inadvertently or any other metal object into the charging 

port as this can result in a short circuit and render your battery nonchargeable and in need of 
replacement. 

(THIS IS NOT COVERED UNDER WARRANTY)


Содержание Super73-V2

Страница 1: ...2862 Walnut Avenue Suite D Tustin CA 92780 Phone 1 949 313 6340 E mail info lithiumcycles com 1 Owner s Manual User manual Assembly Maintenance and Warranty Model Super73 V2...

Страница 2: ...Owner s Handbook with the Super73 and refer to it for information whenever necessary The information contained in this publication is based on the latest information available at the time of printing...

Страница 3: ...afety tips and maintenance recommendations to ensure the best experience For the latest information please refer to our website www lithiumcycles com pages owners PAGE Page 4 WELCOME Page 5 REGISTER Y...

Страница 4: ...nd skills necessary to ride a bicycle safely Please make sure you are familiar with your regions bicycle laws JOIN OUR COMMUNITY OF RIDERS Our relationship with you does not end with the purchase of a...

Страница 5: ...r73 has a unique serial number to help us track your purchase and guarantee the quality and service of your bike Record the following information for future reference Location or website of purchase D...

Страница 6: ...to the charger then connect to the AC wall outlet This will reduce or eliminate chance of sparking due to capacitordischarge The battery must then be turned on 1 in order for the battery to charge Whe...

Страница 7: ...EEDED Box Opening Brute Force Pedal Install Pedal wrench or 15mm open end wrench Zip Tie Cutting Flush Cutters Plastic Wrap Foam Cutting Scissors Front Wheel Install 15mm socket w socket wrench Handle...

Страница 8: ...x lay the box down with the Super73 logo facing up Opening the box in any other way may cause the inner contents to fall out resulting in damage 2 Remove the wheel box and set aside Use a pair of scis...

Страница 9: ...son assist with lifting the bike out of the box engage the kickstand and set the bike upright on a clutter free floor space 4 Remove the front wheel from its box this is where that welcome kit is loca...

Страница 10: ...cable ties holding the handlebar to the frame and a pair of scissors to remove all the protective foam 6 NOTE WE HIGHLY RECOMMENDED TO HAVE A SECOND PERSON PLACE HIS HER HAND UNDER HEADSET TO ENSURE...

Страница 11: ...and below the handlebar Tighten the riser clamp bolts and coupling nuts to a torque of 15 20 lb ft 8 Install the brake levers using a 4mm Allen wrench to tighten the clamp bolt Install the front brak...

Страница 12: ...ct the handlebar harness and all other connectors by aligning the alignment arrows stamped on each connector RED TO RED YELLOW TO YELLOW BLACK TO BLACK Double check all connections starting from the m...

Страница 13: ...pedal and install on corresponding crank The right pedal is installed in a clockwise direction The left pedal is installed by turning counter clockwise 11 Final step inflate the front and rear tires...

Страница 14: ...display panel by holding down the power button for a few seconds 1 3 seconds Make sure the battery switch is on The thumb display screen will light up The throttle is now live 3 SET YOUR LEVEL OF PEDA...

Страница 15: ...ouTube channel or visit your local bike shop to have them professionally adjusted and tuned Check that the configuration of the brake lever matches what you are used to Otherwise your specialist deale...

Страница 16: ...ehouse floor are tested to attain that speed Depending on the weight of the rider 160 200 lbs you should be able to go 25 27 miles while using the throttle only without pedaling Use of pedal assist in...

Страница 17: ...ules below before operating their Super73 bike When riding obey the same road laws as all other road vehicles including giving way to pedestrians and stopping at red lights and stop signs Foradditiona...

Страница 18: ...r cycling activities However tires need tobe checked before each useforproperinflation and condition Proper inflation careand timely replacement willhelp to ensurethat yourbikesoperational characteris...

Страница 19: ...s Bicycles and bicycle parts have strength and integrity limitations and extreme riding should not be performed or you risk damaging the components or becoming seriously injured or killed After any in...

Страница 20: ...ike any new brakes they need to be broken in There is a break in period If you notice a squeal like sound it snormal Thebrakesarenaturally adjusting Itwillgoaway Dependingonthefrequencyofuse youmaynee...

Страница 21: ...by phone or e mail within 3 working days from the date of delivery Please note that any damage caused by shipping is not covered by any warranty however a claim may be filed with the shipping company...

Страница 22: ...ged keys are not covered under warranty INFORMATION ON WEAR AND TEAR Some components of your bike are subject to wear owing to their function The extent of wear depends on the care maintenance and nat...

Отзывы: