background image


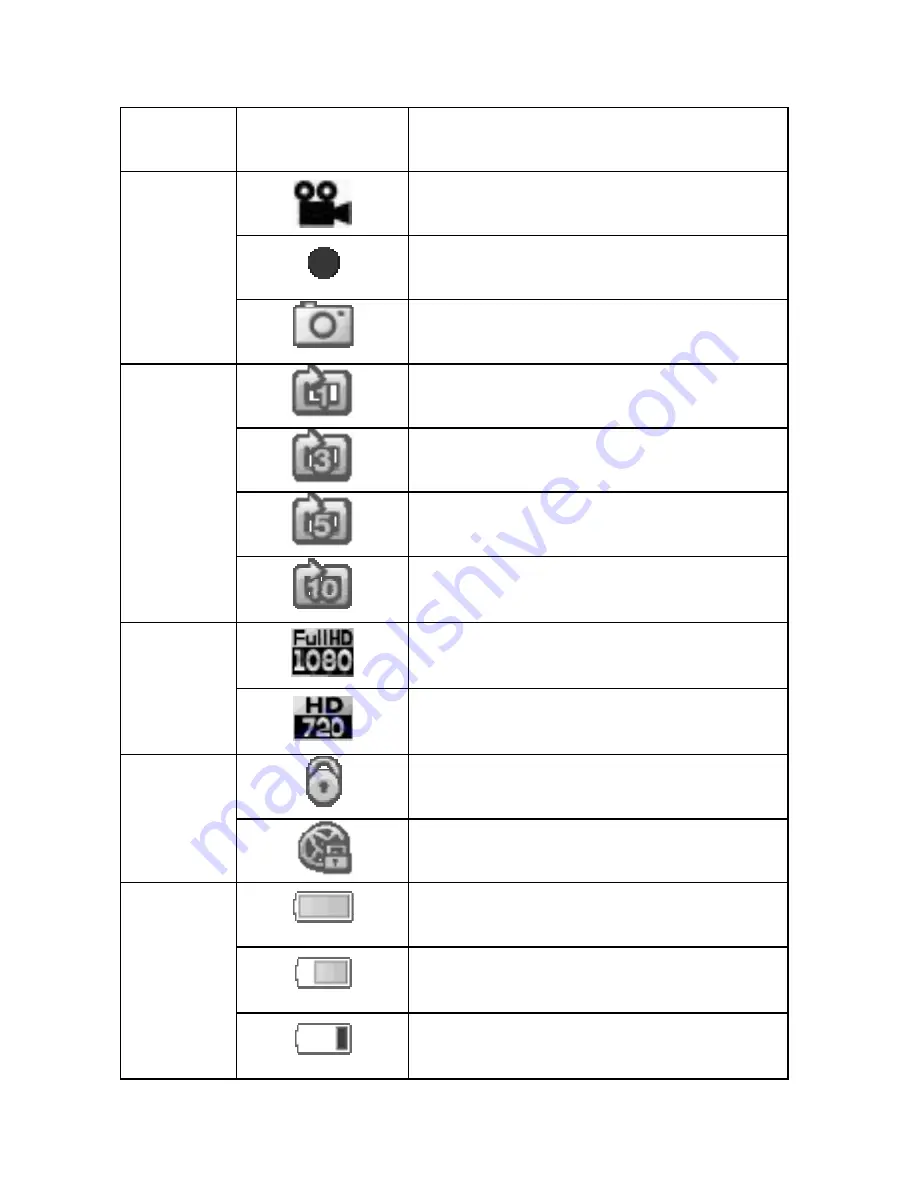
Zone ICON 

Description 


Recording Mode (Stand by) 


Recording 


Photo shot 


Loop Recording Period(1 min) 


Loop Recording Period(3 min) 


Loop Recording Period(5 min) 


Loop Recording Period(10 

min) 


Recording 

Resolution(1080)DISPLAY 


Recording 

Resolution(720)DISPLAY 


Manual File Lock activated 


Auto File Lock activated 


Battery indicator(Full charged) 


Battery indicator (2/3 

charged) 


Battery indicator (Low 

power) 

- 6 - 

Содержание HD 1080 Car Camcorder

Страница 1: ...HD 1080 Car Camcorder Use only original DC 5V car charger User s Guide Version 01...

Страница 2: ...eline setup 3 4 3 Display review 5 7 4 Quick installation guideline Installation 8 14 5 Setup Menu 15 16 6 Contents in package 17 7 Product specifications 18 19 8 Buttons and appearance 20 23 9 Produc...

Страница 3: ...ro SD card in the memory card slot before power on the product 2 For first time usage please enter the function menu and set up correct date and time before using 3 Make sure no obstacle is near the l...

Страница 4: ...accessories to the dealer where you bought your product or deliver it to QQLinx maintenance department for inspection 2 Quick installation guideline Setup Step 1 Insert the micro SD card Insert the m...

Страница 5: ...r or the memory card may be damaged 3 If the memory card cannot be detected by your Car Camcorder please remove and re insert the memory card or replace with a new memory card Step 2 Setup date and ti...

Страница 6: ...3 Display Review 5 DISPLAY HH MM HH MM SS A F B C D E G H I...

Страница 7: ...p Recording Period 3 min Loop Recording Period 5 min B Loop Recording Period 10 min Recording Resolution 1080 DISPLAY C Recording Resolution 720 DISPLAY Manual File Lock activated D Auto File Lock act...

Страница 8: ...7 Zone ICON Description External power F HH MM Recording period G HH MM SS Time indicator H Recording I Memory Card detected...

Страница 9: ...is to be attached Attach the suck disc to the preferred position on the windshield and push the latch toward yourself to fix it firmly Main unit Installation Attach knob1 to Car Camcorder s rear cove...

Страница 10: ...cription 1 Screw the top screw on the holder to Car Camcorder s screw hole on its upper side Tips 1 Turn knob1 clockwise to attach it to the screw hole on the top of your Car Camcorder Facing the Car...

Страница 11: ...be attached with soft clean cloth 2 Ensure that there is no dirt and debris in the sucking disc by cleaning it with soft cloth if necessary 3 Attach the sucking disc to the windshield and push the la...

Страница 12: ...connecting the car charger let the Car Camcorder stay in standby mode 2 Refer to the picture showed in the display adjust the holder s global joint to get a best shooting angle Recommended shooting An...

Страница 13: ...Insert the DC jack of your car charger to the DC input of your Car Camcorder 2 Loop the car charger cable around the connection rod of your rearview mirror or the holder 3 After 1 and 2 fix and hide...

Страница 14: ...4 Insert the charger s lighter connector into the cigarette lighter the installation is completed Cabling of your Car Camcorder 13...

Страница 15: ...tly this can help to firm the connection 2 Use Velcro strips to fix the car charger on the cigarette lighter In case of a cigarette lighter extension set is used to supply power for multiple devices p...

Страница 16: ...in Sound recording ON OFF G sensor sensitivity Level OFF Low Normal High Power off Delay Instant power off 15 sec 30 sec Recording Mode setup Motion Detection ON OFF Capture Mode Setting Image Size 3M...

Страница 17: ...YES NO Shake Power ON Sensitivity OFF Low Normal High Shaking Power ON Rec Time 1 min 3 min 5 min Language English Simplified Chinese Traditional Chinese Default setting Cancel Confirm Firmware versio...

Страница 18: ...6 Contents in Package 1 Main Unit x 1 5 User s Manual x 1 17 2 Cigarette power x 1 3 Camcorder Holder x 1 6 Quick Installation Guide x 1 4 8GB micro SD Memory card x 1...

Страница 19: ...D 1920x1080 30 frames per second Static resolution camera 4032x3024 12M 3264x2448 8M 2592x1944 5M 2048x1536 3M Display 2 5 TFT LCD Aspect ratio 16 9 Photo format JPEG Power supply Charger DC12V 24V to...

Страница 20: ...ording enabling Fast start up Auto power off after engine off Instant power off 15 sec 30 sec Computer transmission interface USB ver 2 0 TV output Yes HDMI out Recording when charging Yes Loop record...

Страница 21: ...8 Buttons and Appearance TOP FRONT 20...

Страница 22: ...SIDE BOTTOM DISPLAY 21...

Страница 23: ...ing disc D USB 1 Power supply 2 Connect to PC E Lens 6G Lens 2M sensor F Microphone Sound recording G Reset Default setting H Memory card slot For micro SD card I Power ON OFF switch J File lock butto...

Страница 24: ...M Mode button Enter Menu Mode In Menu mode the button is for options select N LED Indicator Stand by Red light up Recording Red light flashing Charging Green light up Full charged Green light off Ex...

Страница 25: ...engine turned off Motion detect recording Non stop recording by recording while charging Auto recording when car engine power up Auto power off when car engine power off Video Photo playback Loop reco...

Страница 26: ...inserted in the cigarette lighter 4 If the charger is properly connected the green indicator will light up 5 Make sure the charger s power connector is connected with the Car Camcorder s USB power in...

Страница 27: ...ur car may vibrate during idling and driving The vibration amplitude varies with engine and shock absorbers In certain cases the Car Camcorder may vibrate in sync with your car 2 Tighten each screws o...

Страница 28: ...usts 3 Improper installation location may lead to fuzzy images caused by too large bevel within the windshield Q Daytime recording is clear but the night recording shows coarser images A This is norma...

Страница 29: ...3 Restart your Car Camcorder and the recording function will be activated automatically when any motion in front of your car is detected 4 Recording will be stopped in 10 sec if no motion in front of...

Страница 30: ...changes with card formatting 2 If the problem remains after the card is formatted with your Car Camcorder please format your micro SD card with a computer in normal mode instead of fast format mode Q...

Страница 31: ...ly You can start accessing data in the card when the Car Camcorder prompts with message Computer connected Please do not remove the Car Camcorder from the windshield as the plastic sucking disc may at...

Страница 32: ...ield as the sucking disc may attract dirt and dust and lead to poor connection to the glass 4 If the plastic sucker does not connect to the glass firmly rinse it with water and detergent Then try to c...

Отзывы: