


7
6
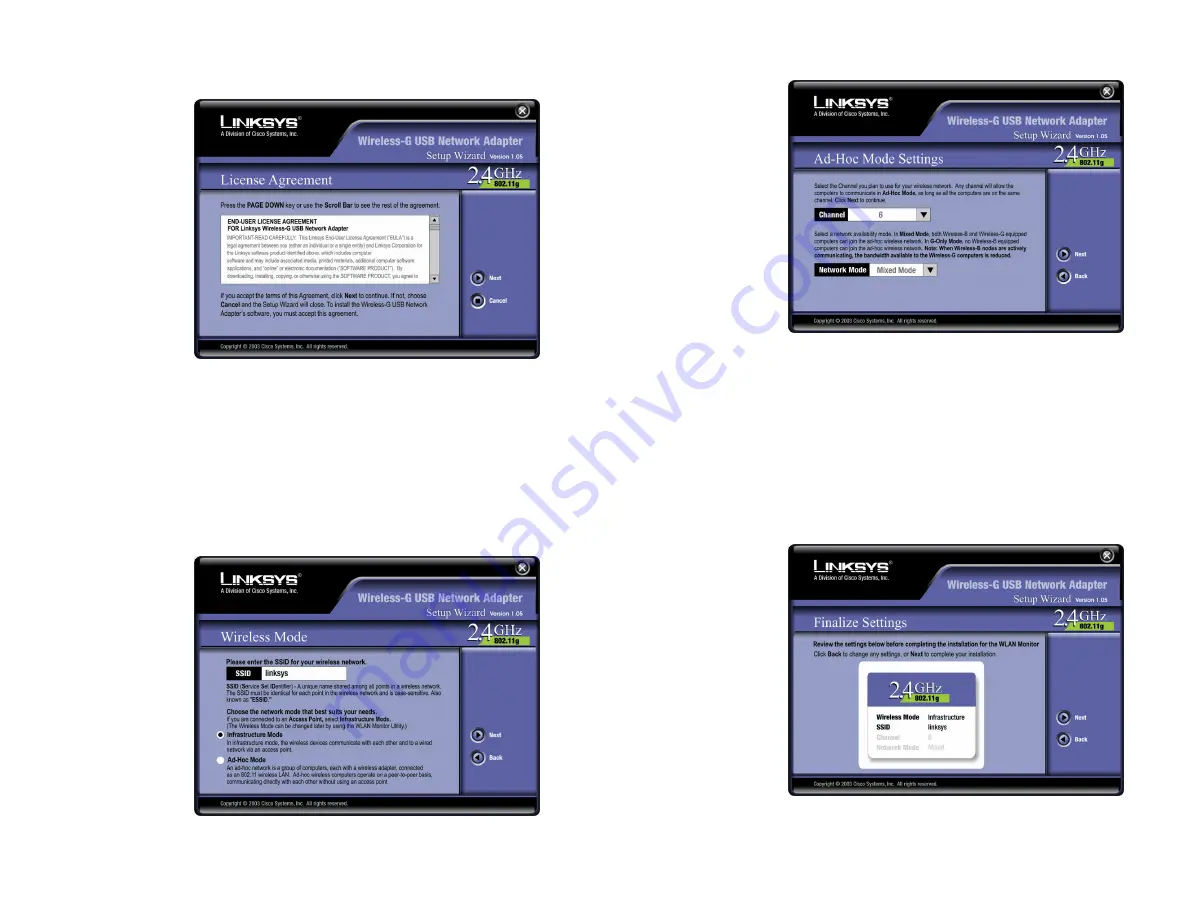
4. If you chose
I n f r a s t r u c t u r e
Mode, go to
Step
5
now. If you
chose Ad-Hoc
Mode, select the
correct operating
channel for your
network from the
Channel
drop-
down menu.
Then, select the
Network Mode
from the drop-
down menu.
Click the
Next
button, and go to
Step 5
. Click the
Back
button to change any settings.
Channel
- The channel you choose should match the channel set on the
other devices in your wireless network. If you are unsure about which chan-
nel to use, select the default channel (Channel 6).
Network Mode
- Keep the default setting,
Mixed
, if you have Wireless-G
and Wireless-B devices in your network. Select
G-Only
if you have only
Wireless-G devices in your network.
5. The Setup Wizard
will ask you to
review your set-
tings before it
starts to copy
files. Click the
Next
button to
save these set-
tings, or click the
Back
button to
change any set-
tings.
Figure 4-4
Figure 4-5
2. Read the License Agreement and click the
Next
button to continue the
installation. If
you click the
Cancel
button,
you will end the
installation.
3. The following screen, shown in Figure 4-3, will ask for some information
about your wireless network. In the
SSID
field, enter your network’s
SSID
(Service Set Identifier). The SSID is your network name and must be iden-
tical for all devices in the network. The default setting is
linksys
(all low-
ercase).
Next, choose a wireless mode. Click the
Infrastructure Mode
radio button
if you want your wireless computers to network with computers on your
wired network using a wireless access point. Click the
Ad-Hoc Mode
radio
button if you
want multiple
wireless com-
puters to net-
work directly
with each other.
Click the
Next
button to contin-
ue, or click the
Back
button to
return to the
previous page.
Figure 4-2
Figure 4-3


