9
Chapter 3: Connecting the Switch
Placement Options
Linksys One Ready Communications Solution
Chapter
3
Placement Options
Before connecting cables to the Ethernet switch, first you will physically install the Ethernet
switch. Either set the Ethernet switch on its four rubber feet for desktop placement, mount it in
a standard-sized, 19-inch wide for rack-mount placement, or mount it on a wall with the
wall-mount brackets provided.
Desktop Placement
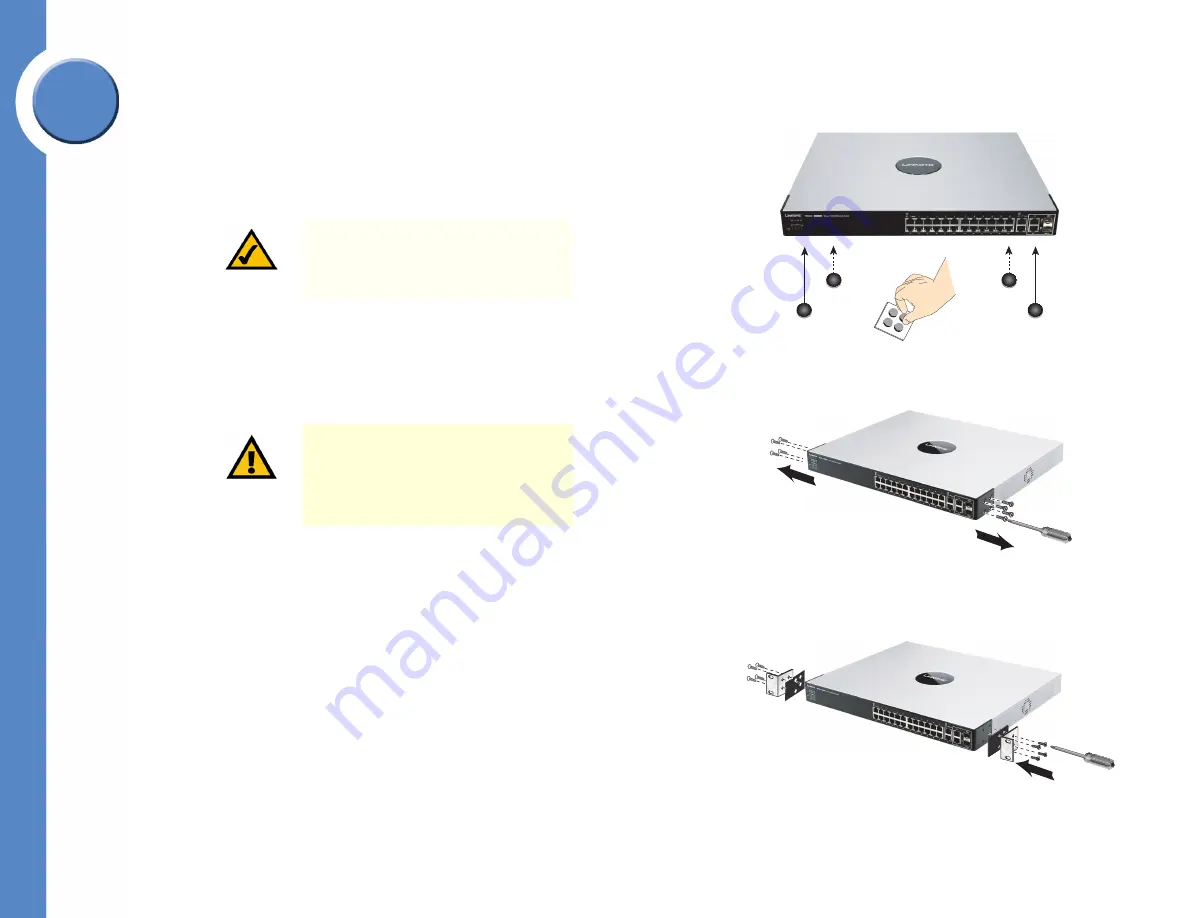
1. Attach the rubber feet to the recessed areas on the bottom of the Ethernet switch.
2. Place the Ethernet switch on a desktop near an AC power source.
Rack-Mount Placement
To mount the Ethernet switch in any standard-sized, 19-inch wide, (each Ethernet switch
requires 1RU of space in the rack), follow these instructions:
1. Remove the four front screws on one side of the Ethernet switch. Retain the screws for re-
installation.
2. Place one of the supplied spacers on the side of the Ethernet switch so the four holes
align to the screw holes.
3. Place a rack mount bracket next to the spacer and reinstall the four screws (removed in
step 1).
NOTE:
The four supplied mounting
brackets can be used for either wall
mount or rack mount installations.
CAUTION:
Keep enough ventilation
space for the Ethernet switch so it does
not exceed the environmental
restrictions mentioned in the
specifications.


