background image

Benutzerhandbuch 


Deutsch


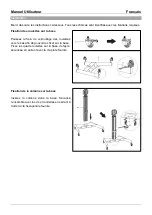
Montage des Displays auf der Stützplatte 

Hängen  Sie  die  Displayplatte  in  die  Stützplatte  und 
ziehen 

Sie 

alle 

Schrauben 

mit 

einem 

Schraubenzieher (nicht enthalten) und der drehbaren 
Radmutter fest. Stellen Sie sicher, dass eine Person 
beim Hochheben des Displays helfen kann. 
Vergewissern  Sie  sich,  dass  das  Display  fest 
verankert  und  korrekt  montiert  ist,  ehe  Sie  es 
loslassen.  


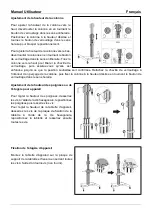
Neigen des Displays und Kabelmanagement 

 
Das Display kann von +10° bis -10° geneigt werden. 
Displaykabel 

können 

durch 

das 

Kabelmanagementsystem 

der 

Displayhalterung 

geführt werden (siehe Diagramm rechts. 


Содержание 40972

Страница 1: ...ON November 2019 Single Display Mount Trolley Stand Black User Manual English Benutzerhandbuch Deutsch Manuel Utilisateur Français Manuale Italiano No 40972 lindy com Tested to comply with FCC Standards For Home and Office Use ...

Страница 2: ......

Страница 3: ...perience for users in boardrooms or classrooms The 360 rotating wheels provide smooth mobility between locations ensuring simple portable use via secure handles with no requirement for repeated disassembly These casters can be securely locked in place for stationary use ideal for creating engaging presentations at tradeshows Safety Information Please ensure all instructions are read and understood...

Страница 4: ... Caster Wheels D Device Shelf E Display Plate F Left Display Bracket G Right Display Bracket H Trolley Column Cover I 5 x M8x30mm J 4 x 8mm Washer K 2 x M6x6mm L 2 x M6x16mm M 5mm Hex Key N Spanner Additional Fixings M A 4 x M5x14mm M B 4 x M6x14mm M C 4 x M6x30mm M D 4 x M8x30mm M E 4 x M8x50mm M F 4 x Rectangular Washer M G 8 x Small Spacer M H 8 x Large Spacer ...

Страница 5: ... the base Push down the locking brake of the casters to prepare for attaching them to the base Attach all four casters to the base and secure by tightening the nut with the included spanner Attaching the trolley column to the base Insert the trolley column to the base Secure into place with bolts and washers and tighten using the included Hex key ...

Страница 6: ... then ensure this is pushed in until the desired position is confirmed Release the locking peg when inside a hole of the column and then secure the column at the desired height by rotating the locking wheel clockwise Adjusting the height of the handles or device shelf To adjust the height of the handles loosen all bolts using the Hex key re position and then re tighten all bolts To adjust the heig...

Страница 7: ...s and tighten with a screwdriver not included Please use the washers to ensure there is no damage to the display Mounting for displays with a recessed back or for access to AV connections Attach the left and right display bracket with display plate to the displays VESA points as per the diagram here Right Fix into place with the included bolts and tighten with a screwdriver not included Please use...

Страница 8: ... the rotating wheel nut Please ensure another person can assist with lifting the display Please also ensure the display is fixed tightly and mounted correctly before releasing the display Tilting the display and cable management The display can be easily tilted 10 10 Display cables can be easily fed through the trolley mounts cable management system Please see the diagram here Right ...

Страница 9: ...les Sehvergnügen in Konferenzräumen oder Klassenzimmern Die Rollen rotieren um 360 und ermöglichen dass die Displayhalterung bequem zwischen verschiedenen Orten hin und hergeschoben werden kann Umständliches Auf und Abbauen wird dadurch vermieden Die Rollen können bei stationärem Einsatz verriegelt werden ideal für ansprechende Präsentationen auf Messen Sicherheitshinweise Stellen Sie sicher dass ...

Страница 10: ... Displayplatte F Linke Displayhalterung G Rechte Displayhalterung H Abdeckung Rollwagensäule I 5 x M8x30mm J 4 x 8mm Unterlegscheiben K 2 x M6x6mm L 2 x M6x16mm M 5mm Inbusschlüssel N Schraubenschlüssel Weiteres Befestigungsmaterial M A 4 x M5x14mm M B 4 x M6x14mm M C 4 x M6x30mm M D 4 x M8x30mm M E 4 x M8x50mm M F 4 x Rechteckige Unterlegscheibe M G 8 x Kleiner Abstandhalter M H 8 x Großer Abstan...

Страница 11: ...s Drücken Sie zunächst die Feststellbremse der Rollen nach unten Befestigen Sie dann alle 4 Rollen an der Basis indem Sie die Mutter mit dem beiliegenden Schraubenschlüssel festziehen Befestigen der Rollwagensäule an der Basis Stecken Sie die Rollwagensäule in die Basis Befestigen Sie diese mit Schrauben und Unterlegscheiben Verwenden Sie dazu den beiliegenden Inbusschlüssel ...

Страница 12: ... dass der Stift in der gewünschten Höhe wieder einrastet Fixieren Sie die Säule in der gewünschten Höhe indem Sie das Rädchen im Uhrzeigersinn drehen Höheneinstellung der Griffe bzw der Ablage für Geräte Um die Höhe der Griffe einzustellen lösen Sie die Schrauben mit dem Inbusschlüssel stellen Sie die gewünschte Höhe ein und ziehen dann die Schrauben wieder fest Um die Höhe der Ablagefläche einzus...

Страница 13: ...r nicht enthalten Verwenden Sie die Unterlegscheiben um Beschädigungen des Displays zu vermeiden Montage von Displays mit Vertiefung auf der Rückseite oder für den Zugriff auf die AV Anschlüsse Legen Sie die linke und rechte Displayhalterung mit Displayplatte auf die VESA Befestigungslöcher des Displays wie rechts im Diagramm dargestellt Schrauben Sie alles mit einem Schraubenzieher nicht enthalte...

Страница 14: ...drehbaren Radmutter fest Stellen Sie sicher dass eine Person beim Hochheben des Displays helfen kann Vergewissern Sie sich dass das Display fest verankert und korrekt montiert ist ehe Sie es loslassen Neigen des Displays und Kabelmanagement Das Display kann von 10 bis 10 geneigt werden Displaykabel können durch das Kabelmanagementsystem der Displayhalterung geführt werden siehe Diagramm rechts ...

Страница 15: ...e conférence ou de classe Les roulettes pivotantes à 360 assurent une mobilité aisée d un endroit à l autre ce qui garantit une utilisation simple et mobile grâce à des poignées sécurisées et sans démontage répété Ces roulettes peuvent être solidement verrouillées en place pour une utilisation stationnaire idéale pour créer des présentations attrayantes lors de salons et foires commerciales Inform...

Страница 16: ...x roulettes D Etagère appareil E Plaque écran F Support écran gauche G Support écran droit H Couvercle de colonne I 5 x M8x30mm J 4 x 8mm rondelles K 2 x M6x6mm L 2 x M6x16mm M Clé hexagonale 5mm N Clé plate Autres fixations M A 4 x M5x14mm M B 4 x M6x14mm M C 4 x M6x30mm M D 4 x M8x30mm M E 4 x M8x50mm M F 4 x rondelles rectangulaires M G 8 x entretoises courtes M H 8 x entretoises longues ...

Страница 17: ...tes sur la base Poussez le frein de verrouillage des roulettes vers le bas afin de pouvoir les fixer sur la base Fixez les quatre roulettes sur la base de façon sécurisée en serrant avec la clé plate fournie Fixation de la colonne sur la base Insérez la colonne dans la base Sécurisé l ensemble avec les vis et rondelles en serrant à l aide la clé hexagonale fournie ...

Страница 18: ... ce que la position souhaitée soit confirmée Relâchez la cheville de verrouillage à l intérieur d un perçage de la colonne puis fixer la colonne à la hauteur désirée en tournant le bouton de verrouillage dans le sens horaire Ajustement de la hauteur des poignées ou de l étagère pour appareil Pour régler la hauteur des poignées desserrez les vis à l aide de la clé hexagonale repositionnez les poign...

Страница 19: ...ies et serrez avec un tournevis non fourni Veuillez utiliser les rondelles pour vous assurer de ne pas endommager l écran Montage pour écrans avec fond creusé ou pour l accès aux connexions AV Fixez les supports d affichage gauche et droit avec la plaque d affichage aux points VESA de l écran selon le schéma ci contre à droite Fixez en place avec les vis fournies et serrez avec un tournevis non fo...

Страница 20: ... Veuillez vous assurer qu une autre personne peut vous aider à soulever l écran Veuillez également vous assurer que l écran est bien fixé et correctement monté avant de le relâcher Inclinaison de l écran et gestion des câbles L écran peut être facilement incliné de 10 à 10 Les câbles peuvent être facilement acheminés à travers le système de gestion des câbles du chariot support Veuillez consulter ...

Страница 21: ... questo sistema fornisce un esperienza visiva flessibile e confortevole per utenti di sale riunioni o classi di studenti Le ruote piroettanti a 360 forniscono totale libertà di movimento fra i vari ambienti evitando di dover sempre smontare gli apparati e rendono questa soluzione la scelta ideali per presentazioni coinvolgenti in fiere e congressi Informazioni sulla Sicurezza Assicuratevi di legge...

Страница 22: ...ti D Scaffale E Piastra Supporto Schermo F Cover Sinistra G Cover Destra H Cover per colonna del Trolley I 5 x M8x30mm J 4 x Rondelle da 8mm K 2 x M6x6mm L 2 x M6x16mm M Chiave esagonale da 5mm N Chiave inglese Minuteria di fissaggio addizionale M A 4 x M5x14mm M B 4 x M6x14mm M C 4 x M6x30mm M D 4 x M8x30mm M E 4 x M8x50mm M F 4 x Rondella rettangolare M G 8 x Distanziale Piccolo M H 8 x Distanzi...

Страница 23: ...per prepararle all installazione sulla base Inserite le ruote negli appositi alloggiamenti della base e serrate i relativi dadi con la chiave inglese fornita a corredo Collegamento della colonna del trolley alla base Inserite la colonna nella base e bloccatela in posizione tramite le viti e le rondelle indicate in figura e serrate utilizzando la chiave esagonale fornita a corredo ...

Страница 24: ...basso la colonna Quando raggiungete l altezza desiderate lasciate che il pulsate di blocco scatti in posizione e poi ruotando la manopola in senso orario Regolazione dell altezza delle maniglie e dello scaffale Per regolare l altezza delle maniglie allentate tutte le viti utilizzando la chiave esagonale poi spostatela nella posizione desiderata e serrate di nuovo tutte le viti Per regolare l altez...

Страница 25: ...e con le viti e rondelle incluse e serrate con un cacciavite non incluso Vi preghiamo di usare sempre le rondelle fornite per evitare di rovinare il retro dello schermo Montaggio schermi con retro incassato o per accedere alle porte AV Fissate le staffe di destra e sinistra alla piastra sui punti VESA del display come mostrato nell immagine a fianco Usate le viti in dotazione e stringete con un ca...

Страница 26: ...seconda persona possa assistervi nel sollevare e agganciare lo schermo Assicuratevi anche che lo schermo sia bloccato fermamente prima di lasciare la presa Inclinazione dello schermo e gestione dei cavi Lo schermo può essere facilmente inclinato fra 10 10 Tutti i cavi possono essere raggruppati tramite il sistema di gestione cavi integrato nel trolley Fate riferimento alla figura a lato per entram...

Страница 27: ... Die detaillierten Bedingungen dieser Garantie finden Sie auf der LINDY Website aufgelistet bei den AGBs Hersteller Manufacturer EU LINDY Elektronik GmbH LINDY Electronics Ltd Markircher Str 20 Sadler Forster Way 68229 Mannheim Stockton on Tees TS17 9JY Germany England Email info lindy com T 49 0 621 470050 postmaster lindy co uk T 44 0 1642 754000 No 40972 1st Edition November 2019 lindy com ...

Отзывы: