Manual
English
2
Connection & Operation
Make sure all devices are switched off before making any connections! Once all the
connections have been made, switch on the devices in this order: displays, HDMI
Switch, source devices.
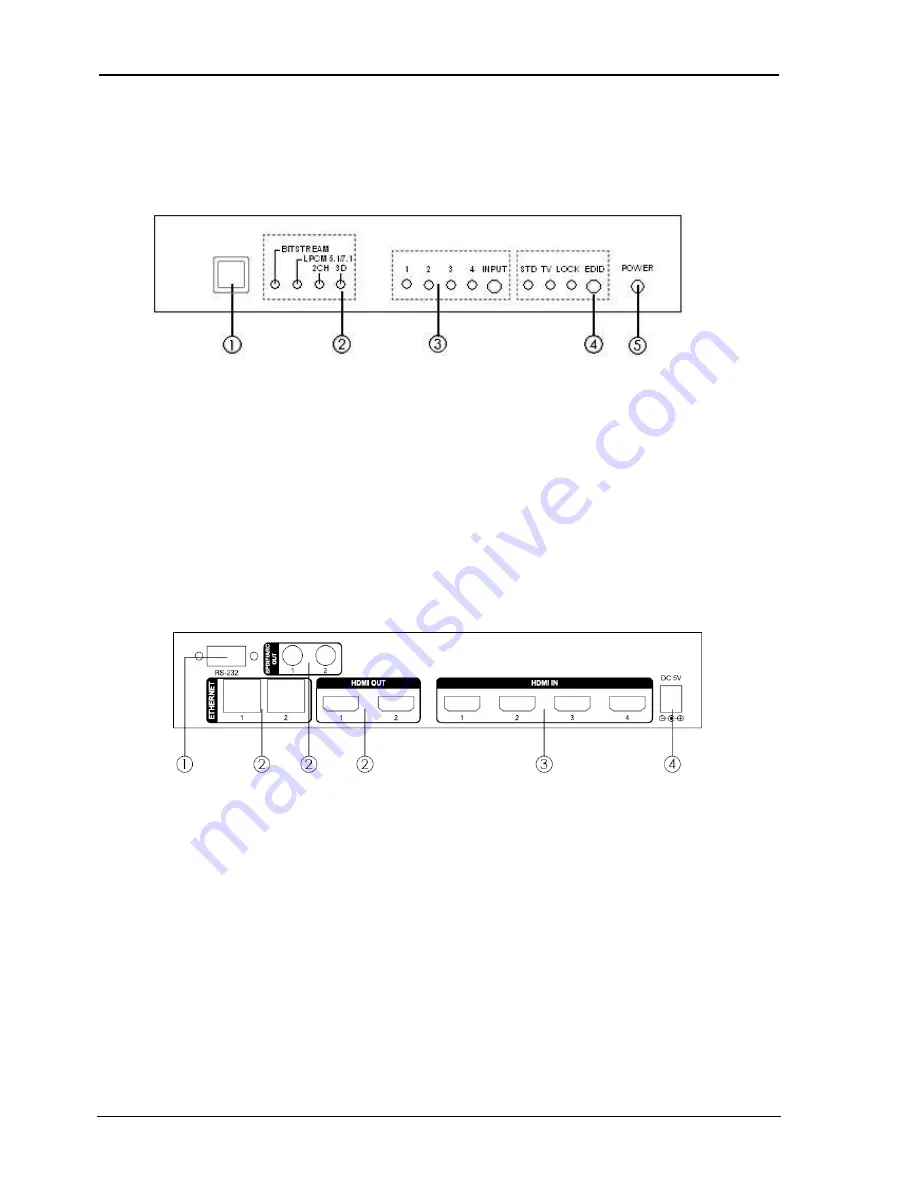
1. IR Remote Control sensor: Using the included remote control, you can select any of
the connected inputs
2. LED Indicators: The HDMI switch will automatically detect the incoming audio/video
signal and illuminate the LED’s accordingly
3. Input Selection: A blue LED will illuminate when you press the input button to select
any of the connected sources
4. EDID Selection: Select either the STD (onboard EDID setting) or TV (display
attached to output port 1) for the EDID setting. To lock the EDID setting, press and
hold the EDID button for 3 seconds and the “lock” LED will illuminate red
5. Power button: Press to switch on the device and then press it again to put the
device in standby
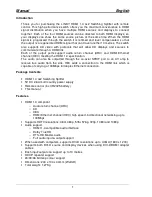
1. RS232 Port: This port can be used to upgrade the firmware or allow control of the
switch via a serial cable
2. HDMI / Audio / Ethernet out:
a. HDMI: Connect your HDMI displays to the two HDMI out ports
b. Audio: Using SPDIF coaxial cable, connect these ports to your external amp
c. Ethernet: You can connect a PC or laptop to these ports to utilise the
Ethernet signal coming from your displays via the HEC
3. HDMI Input: Connect your HDMI source equipment to these input ports
4. Power: Attach the included 5V DC PSU to this port
Note:
To utilise all the functions of this switch, you must use HDMI cables that support
ARC and HEC connections.
If using a device connected to the output port with ARC and have selected an input
with audio. The SPDIF port will give priority to the ARC signal. If you want to use the
audio from the input signal, you must disable ARC in the connected displays menu.
Содержание 38054
Страница 2: ......
Страница 6: ...Manual English 4...


