Quick Installation Guide
English
2)
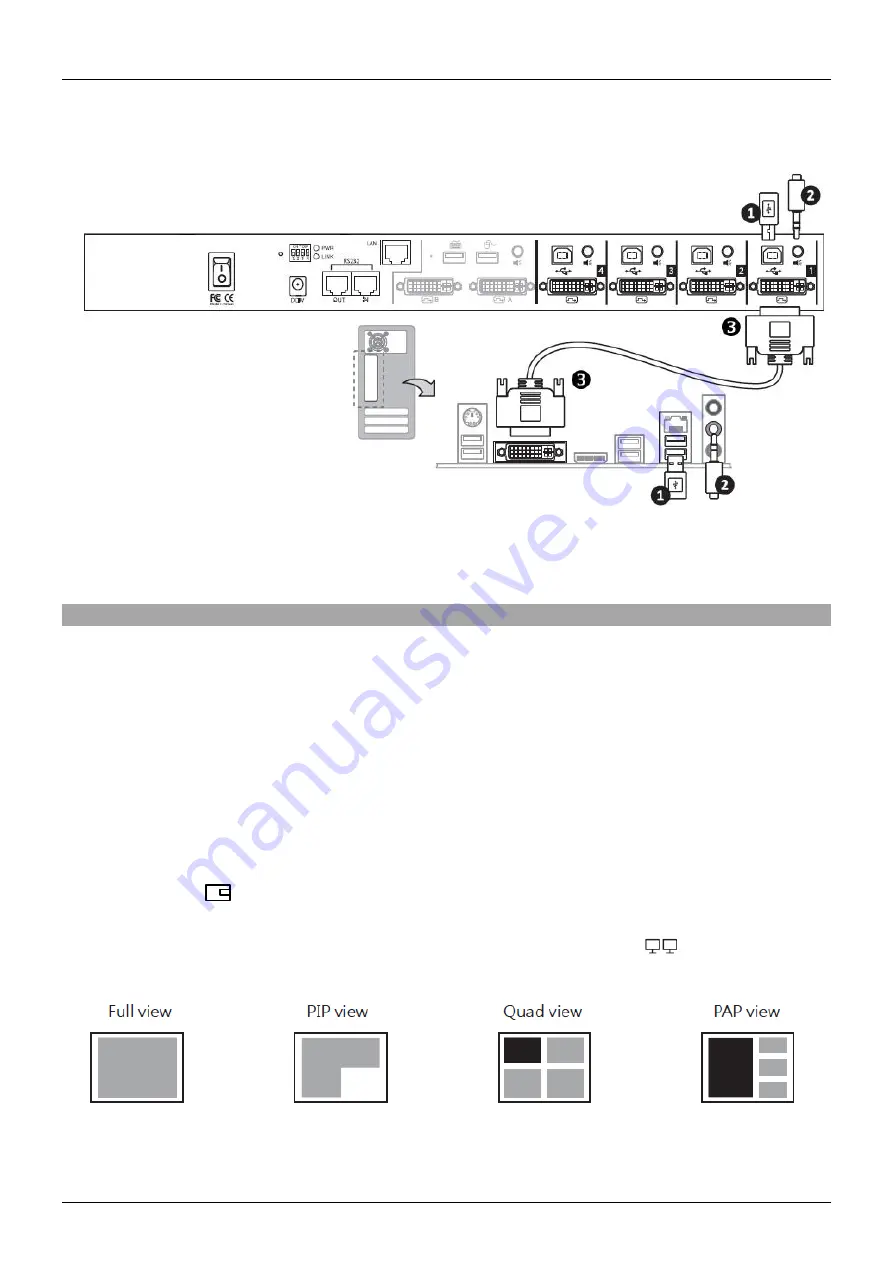
Connect all the computers with the supplied cables (
1
- USB,
2
-
Audio and
3
- DVI-D) to the related PC
ports on the switch as shown below:
3)
Connect the Power Supply Unit to the DC port on switch and then to a mains socket with the included IEC
power cable
4)
Power on the switch with the main power switch and then power on all the other equipment.
Operations
Computer Switching
You can switch control of the connected computers with 3 different methods:
-
Using the front panel computer selection buttons (1, 2, 3 and 4)
-
Through the keyboard with a hotkey combination. The default keys sequence to select the PC is: Scroll
Lock + Scroll Lock + (n) where (n) is the port number where is connected the desired PC.
-
Through the OSD. To open the menu on the screen you can use the related front panel button or the
hotkey sequence Scroll Lock + Scroll Lock + Space Bar then choose the port connected to the computer
you want to control
Video Mode Switching
You can easily choose the video mode for the main local monitor using the Video Mode buttons on the front panel
(please refer to the front panel description).
For the PIP mode (
) the currently selected PC is displayed in the main screen. To switch the subordinate
display please press again the PIP button and then the desired PC button (1-4) on the front panel.
It is possible to control the Video Mode also pressing the display mode menu button (
). After that an OSD
menu will be shown letting you choose the desired video mode directly with the mouse and keyboard:
You can also directly choose the video mode through a hotkey combination. By default this is Scroll Lock + Scroll
Lock + (v) where (v) can be “F” for the Full View, “I” for the PIP view, “Q” for the Quad view or “A” for the PAP view.
Содержание 32327
Страница 2: ......


