background image

PRECISION TIG 185

TROUBLESHOOTING & REPAIR

F-10

F-10

Retur

n to Section TOC

Retur

n to Section TOC

Retur

n to Section TOC

Retur

n to Section TOC

Retur

n to Master TOC

Retur

n to Master TOC

Retur

n to Master TOC

Retur

n to Master TOC

TROUBLESHOOTING GUIDE

Observe Safety Guidelines

detailed in the beginning of this manual.

CAUTION

If for any reason you do not understand the test procedures or are unable to perform the test/repairs safely, con-
tact the Lincoln Electric Service Department for electrical troubleshooting assistance before you proceed.  Call
1-888-935-3877.

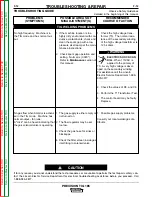
TIG WELDING PROBLEMS

PROBLEMS

(SYMPTOMS)

POSSIBLE AREAS OF

MISADJUSTMENT(S)

RECOMMENDED

COURSE OF ACTION

Black areas along weld bead.

Weak high frequency - machine has
normal welding.  

1.  Clean any oily or organic conta-

mination from the work piece.

2.  Tungsten electrode may be cont-

aminated.  Replace or sharpen.

3.  Check for contaminated gas or

leaks in the gas line, torch, or
associated connections.

4.  The gas shielding may be insuffi-

cient.  Increase gas flow:  reduce
tungsten stickout beyond the gas
cup.

1.  Check for loose or faulty connec-

tions at the torch and/or welding
cables.

2.  The gas shielding may be insuffi-

cient.  Increase gas flow:  reduce
tungsten stickout beyond the gas
cup.

3.  Check spark gap operation and

setting.  Normal is (0.015").
Refer to 

Maintenance

section of

this manual.

4.  The work and electrode cables

may be in poor condition allowing
the high frequency to "leak off".
Use good quality cables with a
high natural rubber content, such
as Lincoln Stable Arc Cable.
Cables should be as short as
possible.

1.  This may be  a welding proce-

dure problem.

Contact The Lincoln Electric Service
Department, 1-888-935-3877.

1.  Make sure that 115VAC is being

applied to the primary of the high
voltage transformer (T3).  See
wiring diagram.

2.  Check for any open or arcing

high frequency component.
Replace as required. 

(Examples: C3, R3, C4)

3.  If spark is weak at the spark gap,

check or replace the high fre-
quency circuit.  

(Examples: T3, L3, L4).

Содержание PRECISION TIG 185

Страница 1: ...NS CON TAINED THROUGHOUT And most importantly think before you act and be careful SERVICE MANUAL For use with machines having Code Number 11105 thru 11109 Return to Master TOC Return to Master TOC Return to Master TOC Return to Master TOC View Safety Info View Safety Info View Safety Info View Safety Info Sales and Service through Subsidiaries and Distributors Worldwide Cleveland Ohio 44117 1199 U...

Страница 2: ... SERIOUS INJURY OR DEATH KEEP CHILDREN AWAY PACEMAKER WEARERS SHOULD CONSULT WITH THEIR DOCTOR BEFORE OPERATING Read and understand the following safety highlights For additional safety information it is strongly recommended that you purchase a copy of Safety in Welding Cutting ANSI Standard Z49 1 from the American Welding Society P O Box 351040 Miami Florida 33135 or CSA Standard W117 2 1974 A Fr...

Страница 3: ...und the work or metal to be welded to a good electrical earth ground 3 f Maintain the electrode holder work clamp welding cable and welding machine in good safe operating condition Replace damaged insulation 3 g Never dip the electrode in water for cooling 3 h Never simultaneously touch electrically hot parts of electrode holders connected to two welders because voltage between the two can be the ...

Страница 4: ...lding area If this is not possible cover them to prevent the welding sparks from starting a fire Remember that welding sparks and hot materials from welding can easily go through small cracks and openings to adjacent areas Avoid welding near hydraulic lines Have a fire extinguisher readily available 6 b Where compressed gases are to be used at the job site special precautions should be used to pre...

Страница 5: ...llant à proximité au soudage à l aide d écrans appropriés et non inflammables 4 Des gouttes de laitier en fusion sont émises de l arc de soudage Se protéger avec des vêtements de protection libres de l huile tels que les gants en cuir chemise épaisse pan talons sans revers et chaussures montantes 5 Toujours porter des lunettes de sécurité dans la zone de soudage Utiliser des lunettes avec écrans l...

Страница 6: ...TENTS FOR ALL SECTIONS Safety i iv Installation Section A Operation Section B Accessories Section C Maintenance Section D Theory of Operation Section E Troubleshooting and Repair Section F Electrical Diagrams Section G Parts Manual P499 Series ...

Страница 7: ... 4 Grinding A 4 Stacking A 4 Lifting and Moving A 4 Tilting A 4 Environmental Rating A 4 Machine Grounding and High Frequency Interference Protection A 4 Input Connections A 5 Input Reconnect Procedure A 6 Output Connections A 6 Connections for TIG Welding A 6 TIG Torch Connection A 6 Work Cable Connection A 7 Shielding Gas Connection A 7 Remote Control Connection A 7 Connections for Stick Welding...

Страница 8: ... Amps DC Standard Voltage 208 230 1 60 INPUT SINGLE PHASE ONLY OUTPUT RANGE RATED OUTPUT Chart gives max rated Output Amps Duty Cycle Based on a 10 minute cycle Example 110A 60 for AC DC Stick and Balance TIG Usingstandard 8 3 inputcable for protected 1 inputsupply 0 10 20 30 40 50 60 70 80 90 100 50 70 90 110 130 150 170 190 208 230v Model AC DC Stick DC TIG AC TIG with 6 3 input cable 460 575v M...

Страница 9: ...GTAW 15 100 Max OCV 74 V AC 59 V DC OUTPUT RANGE RATED OUTPUT Machine Only K2345 1 2 K2346 1 Ready Pak K2347 1 Ready PakW Cart K2347 2 20 71 in 526 mm 20 71 in 526 mm 31 24 in 794 mm 14 48 in 368 mm 14 48 in 368 mm 19 81 in 503 mm 25 62 in 751 mm 25 62 in 651 mm 38 01 in 966 mm Approx 192 lbs 87 1 kgs Approx 212lbs 96 2 kgs Approx 258lbs 117 0 kgs 2 Dimensions are without Lift Eyebolt and Torch Ho...

Страница 10: ...nt can lead to personal injury and or damage to the Precision TIG 185 TILTING Each machine must be placed on a secure level sur face either directly or on a recommended undercar riage The machine may topple over if this procedure is not followed ENVIRONMENTAL RATING The PRECISION TIG 185 power source carries an IP21 environmental rating It may be used in normal industrial and commercial environmen...

Страница 11: ...least eight feet into the ground The ground should be securely made and the ground ing cable should be as short as possible using cable of the same size as the work cable or larger Grounding to the building frame electrical conduit or along pipe system can result in re radiation effectively making these members radiating antennas 6 Keep cover and all screws securely in place 7 Electrical conductor...

Страница 12: ...tch and insu late with the insulation from the H2 lead 3 Connect lead H2 to the power switch where H3 was connected 4 Tighten connections 5 Replace sheet metal cover and all screws For the highest rated voltage connection Refer to figure A 1 The machine is normally shipped connected for the highest rated voltage however verify the following 1 Remove the sheet metal left side cover 2 Disconnect lea...

Страница 13: ...r of the welder The gas inlet has a 5 16 18 right hand female thread CGA 032 The available Under Storage Cart features a low plat form that simplifies loading and unloading of gas cylin ders CYLINDER could explode if damaged Keep cylinder upright and chained to a support Keep cylinder away from areas where it could be damaged Never allow the torch to touch the cylinder Keep cylinder away from live...

Страница 14: ...RECISION TIG 185 NOTES A 8 A 8 Return to Section TOC Return to Section TOC Return to Section TOC Return to Section TOC Return to Master TOC Return to Master TOC Return to Master TOC Return to Master TOC ...

Страница 15: ...cautions B 2 Graphic Symbols B 2 Product Description B 3 Recommended Processes and Equipment B 3 Welding Capability duty cycle B 3 Controls and Settings B 4 Control Functionality B 4 B 5 Operating Steps B 5 Welding in TIG Mode B 5 Pulse TIG Control B 5 Remote Control Operation B 6 Benefits of the Precision TIG 185 Design B 6 Welding in Stick Mode B 7 Recommended Electrode Amperage Ranges B 7 ...

Страница 16: ...reas or on or in the workpiece FUMES AND GASES can be dangerous Keep your head out of fumes Use ventilation or exhaust at the arc or both to remove fumes and gases from breathing zone and general area WELDING SPARKS can cause fire or explosion Keep flammable material away Do not weld on containers that have held combustibles ARC RAYS can burn Wear eye ear and body protection SAFETY PRECAUTIONS Rea...

Страница 17: ... water coolers PROCESS LIMITATIONS The Precision TIG machines are not recommended for arc gouging due to it s limited output capacity and are also not recommended for pipe thawing RECOMMENDED EQUIPMENT INTERFACE See Installed Options in Accessories Section for more details The Precision TIG 185 will be available as a basic Machine Only and in two Factory Configured Welding Packages 1 Machine Only ...

Страница 18: ...AC TIG welding 5 MAXIMUM OUTPUT CONTROL Presets the out put welding current over the rated output range of the machine With a Remote Current Control Amptrol connect ed to the Remote Receptacle See item 10 this knob sets the Maximum output current level set table with the remote Amptrol For Pulse TIG See Item 8 this knob sets the Peak Pulse level with the Remote Amptrol if used 6 DIGITAL METER A 3 ...

Страница 19: ...the electrode holder and cable for Stick welding and a combined electrical and gas connection for the TIG torch when TIG welding 12 WORK CABLE This work cable is factory con nected to the welder and is connected to the work piece to complete the welding circuit Refer to Machine Grounding and High Frequency Interference Protection in the Installation section of this manual for the proper procedure ...

Страница 20: ...ontrol has no effect and is not used It is important to note that in some cases the tungsten will not start an arc at the minimum current because the tungsten may be too large or cold To start an arc reliably it is important to depress the Amptrol far enough so that the machine output current is near the tungsten operating range For example a 3 32 tung sten may be used on DC to weld over the full ...

Страница 21: ... DC 40 70 75 130 90 175 Fleetweld 180 E6011 DC 40 80 55 110 105 135 Fleetweld 37 E6013 DC 70 95 100 135 145 180 Fleetweld 47 E7014 DC 75 95 100 145 135 200 Excalibur E7018 DC 85 110 110 160 130 200 Blue Max Stainless DC 40 80 75 110 95 150 Red Baron Stainless DC 40 70 60 100 90 140 Mild steel procedures are based on recommended procedures listed in C2 10 8 94 and the maximum rating of the PRECISIO...

Страница 22: ...RECISION TIG 185 NOTES B 8 B 8 Return to Section TOC Return to Section TOC Return to Section TOC Return to Section TOC Return to Master TOC Return to Master TOC Return to Master TOC Return to Master TOC ...

Страница 23: ... to Master TOC Return to Master TOC Return to Master TOC Return to Master TOC PRECISION TIG 185 Section C 1 Section C 1 TABLE OF CONTENTS ACCESSORIES SECTION Accessories Section C Options Accessories C 2 C 3 ...

Страница 24: ...Lead w Clamp Gas Regulator with 10 ft 3 1m Hose PTA 17 12 5 ft 3 8m One cable Superflex Torch with 3 32 2 4mm Electrode and Parts Foot Amptrol K870 TIG Slide Rule WC332 GTAW Book JFLF 834 Lift Eyebolt Under Storage Cart K2348 1 Included with K2345 1 Machine Only model Water Cooled System K2267 1 TIG Mate 20 Torch Starter Kit Includes 200A PTW 20 12 5 ft 3 81m Torch KP510 Parts Kit Regulator Hose K...

Страница 25: ...Fastens to torch for convenient thumb activation of arc start switch and output control with 25 ft 7 6m plug cable K814 Arc Start Switch Needed for TIG welding without an Amptrol Includes 25 ft 7 6m plug cable and attaches to torch for convenient finger control TIG Mate Torch Starter Kits Includes Torch with Twist Mate adapter and acces sories listed below K2266 1 TIG Mate Torch Starter Kit Includ...

Страница 26: ...RECISION TIG 185 NOTES C 4 C 4 Return to Section TOC Return to Section TOC Return to Section TOC Return to Section TOC Return to Master TOC Return to Master TOC Return to Master TOC Return to Master TOC ...

Страница 27: ...Master TOC PRECISION TIG 185 Section D 1 Section D 1 TABLE OF CONTENTS MAINTENANCE SECTION Maintenance Section D Safety Precautions D 2 Routine Maintenance D 2 Periodic Maintenance D 2 Spark Gap Adjustment D 2 Fan Motor and Blade Replacement D 2 Major Component Locations D 3 ...

Страница 28: ...r most applications Where less high frequency is desired the setting can be reduced to 0 015 inches 0 4mm Use extreme caution when working with circuit of the high frequency The high voltages developed can be lethal Turn the input power off using the disconnect switch or fuse box before working inside machine This is particularly important when working on the secondary circuit of the high volt age...

Страница 29: ...Return to Master TOC Return to Master TOC Return to Master TOC FIGURE D 2 LOCATION OF MAINTENANCE COMPONENTS 1 9 5 8 8 3 6 2 4 7 1 Case Front Assembly 2 Case Back Assembly 3 Arc Starter Bypass Assembly 4 Center Assembly 5 Cover Assembly 6 Cart Base Assembly 7 Upper Cylinder Support Assembly 8 TIG Torch Cable Assembly 9 Foot Amptrol Assembly Pedal ...

Страница 30: ...X NOTES D 4 D 4 Return to Section TOC Return to Section TOC Return to Section TOC Return to Section TOC Return to Master TOC Return to Master TOC Return to Master TOC Return to Master TOC ...

Страница 31: ...rload Protection E 8 TABLE OF CONTENTS THEORY OF OPERATION SECTION FIGURE E 1 PRECISION TIG 185 BLOCK LOGIC DIAGRAM INPUT POWER SWITCH MAIN TRANSFORMER POLARITY SWITCH SCR BRIDGE X1 X2 AC AC DC DC CONTROL BOARD 18VAC 18VAC 115VAC FAN REMOTE RECEPTACLE H1 H2 H3 SHUNT 115VAC HIGH VOLTAGE TRANSFORMER CIRCUIT BY PASS BOARD HI FREQUENCY TRANSFORMER C H O K E WORK ELECTRODE THERMAL LIGHT GAS VALVE THERM...

Страница 32: ...ovides power to the trigger circuitry The other 18VAC winding is rectified and regulated to a 15VDC supply which operates the circuitry on the con trol board FIGURE E 2 Main Transformer and Input Power INPUT POWER SWITCH MAIN TRANSFORMER POLARITY SWITCH SCR BRIDGE X1 X2 AC AC DC DC CONTROL BOARD 18VAC 18VAC 115VAC FAN REMOTE RECEPTACLE H1 H2 H3 SHUNT 115VAC HIGH VOLTAGE TRANSFORMER CIRCUIT BY PASS...

Страница 33: ...sent to the SCR bridge The control board controls the firing of the SCRs which control the output of the machine See SCR Operation The control board monitors the ther mostats and also controls the gas solenoid valve ther mal light auto balance LED pulse frequency LED TIG LED stick LED and the digital display FIGURE E 3 Control Board and Output Feedback Control INPUT POWER SWITCH MAIN TRANSFORMER P...

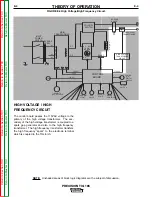
Страница 34: ...to the high frequency transformer The high frequency transformer transfers the high frequency spark to the electrode terminal which is coupled to the TIG torch FIGURE E 4 High Voltage High Frequency Circuit INPUT POWER SWITCH MAIN TRANSFORMER POLARITY SWITCH SCR BRIDGE X1 X2 AC AC DC DC CONTROL BOARD 18VAC 18VAC 115VAC FAN REMOTE RECEPTACLE H1 H2 H3 SHUNT 115VAC HIGH VOLTAGE TRANSFORMER CIRCUIT BY...

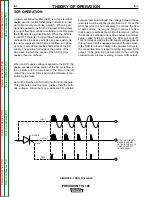
Страница 35: ...DC position the AC voltage from the main transformer secondary is applied to the SCR bridge The SCR bridge and choke circuits are connected in a conventional full wave bridge and filter configuration resulting in a controlled DC output Since the choke is in series with the negative leg of the bridge and also in series with the welding load a filtered DC is applied to the machine output terminals F...

Страница 36: ...ndary is connected to the machine output work terminal The other secondary lead X2 is connected to one of the AC connections on the SCR bridge The electrode terminal is connected to the other AC side of the bridge The choke is now electrically across the negative and positive SCR bridge connections With the ability of the choke to store energy and the SCRs to turn on at the appropriate times an AC...

Страница 37: ...n portion of the AC cycle time in the on state and the remainder of the time in the off state The amount of time spent in the ON state is con trolled by the Gate An SCR is fired by a short burst of current into the gate This gate pulse must be more positive than the cath ode voltage Since there is a standard PN junction between gate and cathode the voltage between these terminals must be slightly ...

Страница 38: ...d duty cycle an internal ther mostat will open disabling the welding output and this yellow light will illuminate The cooling fans will contin ue to run to cool the unit during this time The light will go out when the unit cools and the thermostat resets Once the light goes out the machine will again become available to weld Once the machine cools sufficiently the thermostats are self resetting If...

Страница 39: ... Open Circuit Voltage Waveform DC TIG Mode F 30 Normal Open Circuit Voltage Waveform AC Stick Mode F 31 Normal Open Circuit Voltage Waveform DC Stick Mode F 32 Typical Output Voltage Waveform Machine Loaded AC TIG Mode F 33 Typical Output Voltage Waveform Machine Loaded DC TIG Mode F 34 Typical Output Voltage Waveform Machine Loaded AC Stick Mode F 35 Typical Output Voltage Waveform Machine Loaded...

Страница 40: ...ecommended Course of Action lists the most likely components that may have failed in your machine It also specifies the appropriate test procedure to verify that the subject component is either good or bad If there are a number of possible components check the components in the order listed to eliminate one possibility at a time until you locate the cause of your problem All of the referenced test...

Страница 41: ... equipment Do not touch electrically hot parts Remove the PC board from the static shielding bag and place it directly into the equipment Don t set the PC board on or near paper plastic or cloth which could have a static charge If the PC board can t be installed immediately put it back in the static shield ing bag If the PC board uses protective shorting jumpers don t remove them until installatio...

Страница 42: ...re that the input power switch is in the ON position and the machine is plugged in 2 Check the input voltage at the machine Input voltage must match the rating plate and volt age connection Refer to Reconnect Procedure in the Installation section of this manu al 3 Blown or missing fuses in the input line 1 Check for proper input voltages per nameplate and voltage reconnect configuration 2 Check to...

Страница 43: ...el is on The machine does not respond no gas flow no high frequency and no open circuit voltage when the arc start switch or Amptrol is activated fan is working normally 1 The welding application may have exceeded the recommend ed duty cycle Allow the unit to run until the fan cools the unit and the yellow light goes out 2 The air louvers may be blocked Remove air obstruction and allow unit to coo...

Страница 44: ... 888 935 3877 OUTPUT PROBLEMS PROBLEMS SYMPTOMS POSSIBLE AREAS OF MISADJUSTMENT S RECOMMENDED COURSE OF ACTION Machine regularly over heats ther mostat opens Yellow light on front panel glows The fan runs but the machine has no output The machine does not have output in the Stick mode The machine operates correctly in the TIG mode Machine regularly over heats ther mostat opens Yellow light on fron...

Страница 45: ...ontrol set ting The machine welds at a very high output regardless of the current con trol setting 1 If welding in the TIG mode the remote control device may be defective 2 Make certain the input line volt age is correct for the machine reconnect configuration 3 Check the welding cables and or torch for loose or faulty connec tions 1 If welding in the TIG mode the remote control device may be defe...

Страница 46: ...USTMENT S RECOMMENDED COURSE OF ACTION Machine output is intermittently lost Gas flow and high frequency are also interrupted 1 The problem may be caused by high frequency interference Make sure that the machine is grounded properly according to the installation instructions If there are other high frequency sources in the area make certain that they are grounded properly 2 Make sure the Amptrol i...

Страница 47: ...he tungsten electrode may be too large in diameter for the cur rent setting 2 The tungsten tip may not be sharp enough 3 The gas shielding may be insuffi cient Increase the gas flow and or reduce the tungsten stickout beyond the gas cup 4 Check for contaminated gas or leaks in the gas line torch or connections 5 If a helium blend is used as a shielding gas then reduce the percentage of helium 1 Ma...

Страница 48: ...ted gas or leaks in the gas line torch or associated connections 4 The gas shielding may be insuffi cient Increase gas flow reduce tungsten stickout beyond the gas cup 1 Check for loose or faulty connec tions at the torch and or welding cables 2 The gas shielding may be insuffi cient Increase gas flow reduce tungsten stickout beyond the gas cup 3 Check spark gap operation and setting Normal is 0 0...

Страница 49: ... TIG WELDING PROBLEMS PROBLEMS SYMPTOMS POSSIBLE AREAS OF MISADJUSTMENT S RECOMMENDED COURSE OF ACTION High frequency spark is present at tungsten electrode but operator is unable to establish a welding arc Machine has normal open circuit voltage Refer to Technical Specifications in the Installation Chapter 1 The torch may be faulty Check or replace 2 The current control may be set too low 3 The t...

Страница 50: ...hat the gas solenoid valve is operating 1 If the machine location is in a highly dirty environment with con ductive contaminants check and clean the spark gap with a low pressure air stream per the main tenance instructions 2 Check spark gap operation and setting Normal is 0 020 Refer to Maintenance section of this manual 1 The gas supply is either empty or not turned on 2 The flow regulator may b...

Страница 51: ... 3877 TIG WELDING PROBLEMS PROBLEMS SYMPTOMS POSSIBLE AREAS OF MISADJUSTMENT S RECOMMENDED COURSE OF ACTION When AC TIG welding the arc is erratic and there is a loss of clean ing of the work piece The end of the tungsten electrode melts away 1 The tungsten electrode may be too small for the process Use a larger diameter tungsten or a pure tungsten 2 If a helium blend is used as a shielding gas th...

Страница 52: ...ISADJUSTMENT S RECOMMENDED COURSE OF ACTION Stick electrode Blasts Off when arc is struck The stick electrode sticks in the puddle Variable or sluggish welding arc when welding in the Stick mode 1 Weld current may be set too high for electrode size Reduce cur rent control setting or use a larg er diameter electrode 1 The weld current may be set too low Increase the current control setting or use a...

Страница 53: ...lease observe all safety notes and pre cautions detailed throughout this manual If for any reason you do not understand the test procedures or are unable to per form the test repairs safely contact the Lincoln Electric Service Department for electrical troubleshooting assistance before you proceed Call 1 888 935 3877 WARNING HIGH FREQUENCY CIRCUIT DISABLE PROCEDURE TEST DESCRIPTION This procedure ...

Страница 54: ...the set screw holding the upper electrode in place 5 Increase the distance between the electrodes to at least 3 8 by sliding one electrode away from the other electrode Secure the one electrode in this position 6 This should disable the high frequen cy circuit Visually check to make sure high frequency sparking is NOT present before connecting any test equipment to the TIG 185 machine 7 When volta...

Страница 55: ...contact the Lincoln Electric Service Department for electrical troubleshooting assistance before you proceed Call 1 888 935 3877 PRECISION TIG 185 F 17 F 17 Return to Section TOC Return to Section TOC Return to Section TOC Return to Section TOC Return to Master TOC Return to Master TOC Return to Master TOC Return to Master TOC WARNING TROUBLESHOOTING REPAIR T1 TRANSFORMER TEST TEST DESCRIPTION Thi...

Страница 56: ...ver remove the case wrap around cover 3 Locate plugs J3 and J4 on the control board See Figure F 2 4 Carefully apply the correct input power making certain the reconnect configuration at the input switch is correct for the input voltage applied Turn the TIG 185 ON 5 Using the voltmeter carefully test for the correct transformer secondary voltages per Table F 1 PRECISION TIG 185 CONTROL BOARD J2 J3...

Страница 57: ...he primary leads and any or all of the secondary voltages are incorrect the T1 transformer may faulty See Main Transformer and Output Choke Removal and Replacement Also check the leads for broken or loose connec tions between plugs J3 J4 and the T1 transformer 7 Replace case wrap around cover TEST POINTS ACCEPTABLE VOLTAGES SECONDARY WINDINGS SECONDARY VOLTAGES PLUG J3 PIN 8 LEAD 210 TO 18VAC PLUG...

Страница 58: ...ECISION TIG 185 NOTES F 20 F 20 Return to Section TOC Return to Section TOC Return to Section TOC Return to Section TOC Return to Master TOC Return to Master TOC Return to Master TOC Return to Master TOC ...

Страница 59: ...or your safety and to avoid electrical shock please observe all safety notes and pre cautions detailed throughout this manual If for any reason you do not understand the test procedures or are unable to per form the test repairs safely contact the Lincoln Electric Service Department for electrical troubleshooting assistance before you proceed Call 1 888 935 3877 WARNING STATIC SCR TEST TEST DESCRI...

Страница 60: ...ter TOC Return to Master TOC Return to Master TOC Return to Master TOC TEST PROCEDURE 1 Remove main supply power to the TIG 185 and remove the case wrap around cover 2 Locate and remove plug J2 from the control board See Figure F 3 STATIC SCR TEST continued PLUG J2 REMOVED PRECISION TIG 185 CONTROL J2 J3 J4 Figure F 3 Plug J2 Location on Control Board ...

Страница 61: ...rse the meter leads and check from cathode to anode of SCR1 See Figure F 4 If a low resis tance is indicated in either direction SCR1 is faulty Replace SCR Bridge Assembly See SCR Bridge Assembly Removal and Replacement 4 Repeat Step 3 testing SCR2 SCR3 and SCR4 5 The further check the SCR s func tions use an SCR tester and proceed to the Active SCR Test STATIC SCR TEST continued SCR1 ANODE SCR1 C...

Страница 62: ...ECISION TIG 185 NOTES F 24 F 24 Return to Section TOC Return to Section TOC Return to Section TOC Return to Section TOC Return to Master TOC Return to Master TOC Return to Master TOC Return to Master TOC ...

Страница 63: ...ur factory warranty For your safety and to avoid electrical shock please observe all safety notes and pre cautions detailed throughout this manual If for any reason you do not understand the test procedures or are unable to per form the test repairs safely contact the Lincoln Electric Service Department for electrical troubleshooting assistance before you proceed Call 1 888 935 3877 WARNING ACTIVE...

Страница 64: ... Figure F 6 4 Construct the circuit outlined in Figure F 5 One 6V lantern battery can be used Resistor values are 10 The voltmeter scale should be low approximately 0 5 or 0 10 volts 5 Battery Test Check the battery by shorting leads A and C and then close switch SW 1 Re place battery if voltage is less than 4 5 volts ACTIVE SCR TEST continued FIGURE F 5 ACTIVE SCR TEST SETUP SW1 R2 SW2 R1 A G C V...

Страница 65: ...tch SW 2 is released If the voltmeter does not read or reads only while SW 2 is depressed the SCR or battery is defective repeat Battery Test Procedure above 9 Open switch SW 1 disconnect the gate lead G and reverse the A and C leads on the SCR Close switch SW 1 The voltmeter should read zero If the voltage is higher than zero the SCR is shorted 10 Replace SCR Bridge Assembly if any SCRs do not pa...

Страница 66: ...ECISION TIG 185 NOTES F 28 F 28 Return to Section TOC Return to Section TOC Return to Section TOC Return to Section TOC Return to Master TOC Return to Master TOC Return to Master TOC Return to Master TOC ...

Страница 67: ...aveform checks with high frequency circuit OFF Perform High Frequency Disable Procedure ____________________________________________________________________ 50 V 2 ms 0 V This is the typical AC output voltage wave form generated from a properly operating machine Note that each vertical division represents 50 volts and that each horizontal division represents 2 milliseconds in time Note Scope probe...

Страница 68: ...aveform checks with high frequency circuit OFF Perform High Frequency Disable Procedure ____________________________________________________________________ 50 V 2 ms 0 V This is the typical DC output voltage waveform generated from a properly operat ing machine Note that each vertical division represents 50 volts and that each horizontal division represents 2 milliseconds in time Note Scope probe...

Страница 69: ...waveform checks with high frequency circuit OFF Perform High Frequency Disable Procedure ____________________________________________________________________ 50 V 2 ms 0 V This is the typical AC output voltage wave form generated from a properly operating machine Note that each vertical division represents 50 volts and that each horizontal division represents 2 milliseconds in time Note Scope prob...

Страница 70: ...d waveform checks with high frequency circuit OFF Perform High Frequency Disable Procedure ____________________________________________________________________ 50 V 2 ms 0 V This is the typical DC output voltage waveform generated from a properly operat ing machine Note that each vertical division represents 50 volts and that each horizontal division represents 2 milliseconds in time Note Scope pr...

Страница 71: ...requency Disable Procedure ____________________________________________________________________ 10 V 2 ms 0 V MACHINE LOADED TO 180 AMPS AT 16VDC This is the typical AC output voltage wave form generated from a properly operating machine Note that each vertical division represents 10 volts and that each horizontal division represents 2 milliseconds in time The machine was loaded with a resistance ...

Страница 72: ...requency Disable Procedure ____________________________________________________________________ 10 V 2 ms 0 V MACHINE LOADED TO 180 AMPS AT 16VDC This is the typical DC output voltage waveform generated from a properly operat ing machine Note that each vertical division represents 10 volts and that each horizontal division represents 2 milliseconds in time The machine was loaded with a resistance ...

Страница 73: ...Frequency Disable Procedure ____________________________________________________________________ 10 V 2 ms 0 V MACHINE LOADED TO 180 AMPS AT 26VDC This is the typical AC output voltage wave form generated from a properly operating machine Note that each vertical division represents 10 volts and that each horizontal division represents 2 milliseconds in time The machine was loaded with a resistance...

Страница 74: ...Frequency Disable Procedure ____________________________________________________________________ 10 V 2 ms 0 V MACHINE LOADED TO 180 AMPS AT 26VDC This is the typical AC output voltage wave form generated from a properly operating machine Note that each vertical division represents 10 volts and that each horizontal division represents 2 milliseconds in time The machine was loaded with a resistance...

Страница 75: ...it OFF Perform High Frequency Disable Procedure ____________________________________________________________________ 50 V 2 ms 0 V This is NOT the typical DC output voltage waveform One output SCR is not function ing Note the gap in the waveform One SCR gate was disconnected to simulate an open or non functioning output SCR Note that each vertical division represents 50 volts and that each horizon...

Страница 76: ...ECISION TIG 185 NOTES F 38 F 38 Return to Section TOC Return to Section TOC Return to Section TOC Return to Section TOC Return to Master TOC Return to Master TOC Return to Master TOC Return to Master TOC ...

Страница 77: ...our safety and to avoid electrical shock please observe all safety notes and pre cautions detailed throughout this manual If for any reason you do not understand the test procedures or are unable to per form the test repairs safely contact the Lincoln Electric Service Department for electrical troubleshooting assistance before you proceed Call 1 888 935 3877 WARNING SCR BRIDGE ASSEMBLY REMOVAL AND...

Страница 78: ...ief to allow movement of case back 4 Using the 3 8 nutdriver remove the two lower screws from the case back See Figure F 7 5 With the 5 16 nutdriver remove the two screws holding the case back to the internal divider panel See Figure F 7 6 Remove the gas hose from the gas solenoid valve 7 Carefully pull the case back and fan assembly away to allow access to the SCR Bridge Assembly Support the case...

Страница 79: ...he SCR bridge assem bly 11 Using the 7 16 wrench disconnect the diode pigtail connection from the polarity switch lead See Figure F 10 Cut any necessary cable ties and remove insulating sleeving Note placement of sleeving and cable ties for reassembly 12 Using the 7 16 wrench remove the X2 secondary transformer lead from the left side AC SCR heat sink 13 With the 7 16 wrench remove the shunt from ...

Страница 80: ...ction TOC Return to Master TOC Return to Master TOC Return to Master TOC Return to Master TOC SCR BRIDGE ASSEMBLY REMOVAL AND REPLACEMENT PROCEDURE Continued FIGURE F 9 PLUG J2 ON CONTROL BOARD PLUG J2 REMOVED PRECISION TIG 185 CONTROL J2 J3 J4 FIGURE F 10 DIODE PIGTAIL CONNECTION TO POLARITY SWITCH LEAD DIODE PIGTAIL CONNECTION ...

Страница 81: ...ALUMINUM CONNECTIONS 3 Assemble the positive lead to the right side positive heat sink 4 Assemble the lead from the polarity switch to the right side AC heat sink Note Also connect lead 216 5 Assemble the shunt to the SCR bridge left side negative heat sink 6 Assemble the X2 secondary trans former lead to the left side AC SCR heat sink Note Also connect lead 217 7 Assemble the diode pigtail lead t...

Страница 82: ...ECISION TIG 185 NOTES F 44 F 44 Return to Section TOC Return to Section TOC Return to Section TOC Return to Section TOC Return to Master TOC Return to Master TOC Return to Master TOC Return to Master TOC ...

Страница 83: ...k please observe all safety notes and pre cautions detailed throughout this manual If for any reason you do not understand the test procedures or are unable to per form the test repairs safely contact the Lincoln Electric Service Department for electrical troubleshooting assistance before you proceed Call 1 888 935 3877 WARNING POLARITY SWITCH REMOVAL AND REPLACEMENT PROCEDURE TEST DESCRIPTION Thi...

Страница 84: ...h remove the flex lead from the rear gang of the polarity switch This lead connects to the D1 diode on the SCR bridge See wiring diagram Label lead and connection point for reassembly 11 Using the 1 2 wrench remove the flat copper lead from the polarity switch This lead connects to the high frequency transformer coil and the by pass board See wiring diagram Label lead and connec tion point for rea...

Страница 85: ...arity switch Make certain wash ers are in place and the nut is tight 6 Assemble the flat copper leads to the polarity switch Make certain they are connected to the proper termi nals and the nuts are tightened 7 Assemble the flex lead from diode D1 to the rear gang of the polarity switch Make certain washers are in place and the nut is tight 8 Assemble the flex lead from the AC bridge plate to the ...

Страница 86: ...ECISION TIG 185 NOTES F 48 F 48 Return to Section TOC Return to Section TOC Return to Section TOC Return to Section TOC Return to Master TOC Return to Master TOC Return to Master TOC Return to Master TOC ...

Страница 87: ...ry warranty For your safety and to avoid electrical shock please observe all safety notes and pre cautions detailed throughout this manual If for any reason you do not understand the test procedures or are unable to per form the test repairs safely contact the Lincoln Electric Service Department for electrical troubleshooting assistance before you proceed Call 1 888 935 3877 WARNING TEST DESCRIPTI...

Страница 88: ...y necessary cable ties 5 Remove the lead splice from the other pri mary lead that is connected to lead 236 and the C4 capacitor See wiring dia gram Cut any necessary cable ties 6 Using the phillips head screwdriver remove the front mounting screws from the base of the high voltage transformer Take note of insulator placement for reassembly NOTE On some machines the mounting screw configuration may...

Страница 89: ...g insulators See Figure F 12 2 Install the front mounting insulators and mounting screw 3 Using the phillips head screwdriver tighten all four mounting screws mak ing certain the insulators are posi tioned correctly 4 Reconnect the two primary leads 5 Reconnect the two secondary leads to the high frequency arc starter board assembly 6 Replace any previously removed cable ties 7 Replace the case wr...

Страница 90: ...ECISION TIG 185 NOTES F 52 F 52 Return to Section TOC Return to Section TOC Return to Section TOC Return to Section TOC Return to Master TOC Return to Master TOC Return to Master TOC Return to Master TOC ...

Страница 91: ...ctory warranty For your safety and to avoid electrical shock please observe all safety notes and pre cautions detailed throughout this manual If for any reason you do not understand the test procedures or are unable to per form the test repairs safely contact the Lincoln Electric Service Department for electrical troubleshooting assistance before you proceed Call 1 888 935 3877 WARNING TEST DESCRI...

Страница 92: ... from the main transformer leads Label leads for reassembly See wiring dia gram 6 Using the 1 2 wrench remove the shunt assembly from the choke lead 7 With the 3 8 wrench remove the H1 H2 or H3 lead from the input power switch See wiring diagram Label the leads and connection points for reassembly Cut any necessary cable ties 8 Remove plug J3 from the control board and push through the interior di...

Страница 93: ...the polarity switch 4 Assemble the choke lead to the polarity switch 5 Install the J3 plug into the control board 6 Assemble the H1 H2 or H3 lead onto the input power switch Insulate and secure the unused lead H2 or H3 7 Assemble the shunt assembly to the choke lead 8 Solder leads R209 and U210 to the main transformer leads See wiring diagram Insulate connections 9 Solder leads W201 and W204 to th...

Страница 94: ...ECISION TIG 185 NOTES F 56 F 56 Return to Section TOC Return to Section TOC Return to Section TOC Return to Section TOC Return to Master TOC Return to Master TOC Return to Master TOC Return to Master TOC ...

Страница 95: ... are repaired or replaced the machine must be retested Input Volts Hertz Maximum Idle Amps 208 60 2 50 Amps 230 60 3 00 Amps Stick Mode OCV AC 70 80VAC DC 55 65VDC TIG Mode OCV AC 70 80VAC DC 60 70VDC DC TIG Mode 6 Amps 12 Volts DC TIG Mode 200 Amps 29 Volts MAXIMUM ACCEPTABLE OUTPUT VOLTAGE AT MINIMUM OUTPUT SETTINGS MINIMUM ACCEPTABLE OUTPUT VOLTAGE AT MAXIMUM OUTPUT SETTINGS RECOMMENDED METERS ...

Страница 96: ...ECISION TIG 185 NOTES F 58 F 58 Return to Section TOC Return to Section TOC Return to Section TOC Return to Section TOC Return to Master TOC Return to Master TOC Return to Master TOC Return to Master TOC ...

Страница 97: ... Section G 1 TABLE OF CONTENTS ELECTRICAL DIAGRAMS SECTION Electrical Diagrams Section G Wiring Diagram G4549 G 2 Entire Machine Schematic G4588 G 3 Control PC Board Schematic G4550 1B4 1 G 4 Control PC Board Schematic G4550 1B4 2 G 5 Control PC Board Schematic G4550 1B4 3 G 6 Control PC Board Assembly G4551 1 G 7 ...

Страница 98: ...ANSFORMER PRIMARIES VOLTAGE RECONNECTION AS SHOWN AS SHIPPED FROM FACTORY B BLACK R RED G GREEN W WHITE LEAD COLORING CODE CONNECTOR PIN NUMBERS VIEW OF CONNECTOR ON PC BOARD 1 2 3 7 8 14 LATCH EXAMPLE THIS IS PIN 7 OF CONNECTOR J4 COMPONENT VALUE UNITS RESISTORS CAPACITORS OHMS WATTS MFD VOLTS J4 ELECTRICAL SYMBOLS PER E1537 C1 C2 BY PASS CAPACITORS 0047 250VAC C3 HIGH VOLTAGE CAPACITOR 0025 10kV...

Страница 99: ... CIRCUIT TRIAC OPTO TRIAC DRIVER 15V PCB AS BLY L10121 1 435 OHMS TYP 12 OHMS TYP FAN RUNS FOR 5 S AT POWER UP STOPS AT IDLE 8 MINUTES AFTER WELDING COMPONENT LOCATION DESCRIPTIONS ARE AS VIEWED FROM FRONT OF MACHINE UNLESS STATED OTHERWISE G4 G3 G2 G1 IN LINE CONNECTOR J7 4 3 2 1 In Front of main transformer Attached to Base Left side of Machine near front Rear Panel Right Side Right Side of SCR ...

Страница 100: ...1 G 4 NOTE This diagram is for reference only It may not be accurate for all machines covered by this manual Return to Section TOC Return to Section TOC Return to Section TOC Return to Section TOC Return to Master TOC Return to Master TOC Return to Master TOC Return to Master TOC ...

Страница 101: ... 2 G 5 NOTE This diagram is for reference only It may not be accurate for all machines covered by this manual Return to Section TOC Return to Section TOC Return to Section TOC Return to Section TOC Return to Master TOC Return to Master TOC Return to Master TOC Return to Master TOC ...

Страница 102: ... 3 G 6 NOTE This diagram is for reference only It may not be accurate for all machines covered by this manual Return to Section TOC Return to Section TOC Return to Section TOC Return to Section TOC Return to Master TOC Return to Master TOC Return to Master TOC Return to Master TOC ...

Страница 103: ...SMD 1A 400V DO 214BA AC 32 D24 D27 4 S25040 10SMT DIODE SMD 3A 400V D0 214AB 33 J1 1 S24020 2G CONNECTOR MOLEX MINI PCB 2 PIN GOLD 34 J2 1 S24020 8 CONNECTOR MOLEX MINI PCB 8 PIN TIN 35 J3 1 S24020 12 CONNECTOR MOLEX MINI PCB 12 PIN TIN 36 J4 1 S24020 4 CONNECTOR MOLEX MINI PCB 4 PIN TIN 37 J5 1 S24020 6 CONNECTOR MOLEX MINI PCB 6 PIN TIN 38 J6 1 S18248 4 CONNECTOR MOLEX MINI PCB 4 PIN 39 LED1 1 T...

Страница 104: ...__ ___________________________________________________________________________ ___________________________________________________________________________ ___________________________________________________________________________ ___________________________________________________________________________ ___________________________________________________________________________ _________________...

Отзывы: