background image

5. Confirm your selection 

by pressing the OK button.
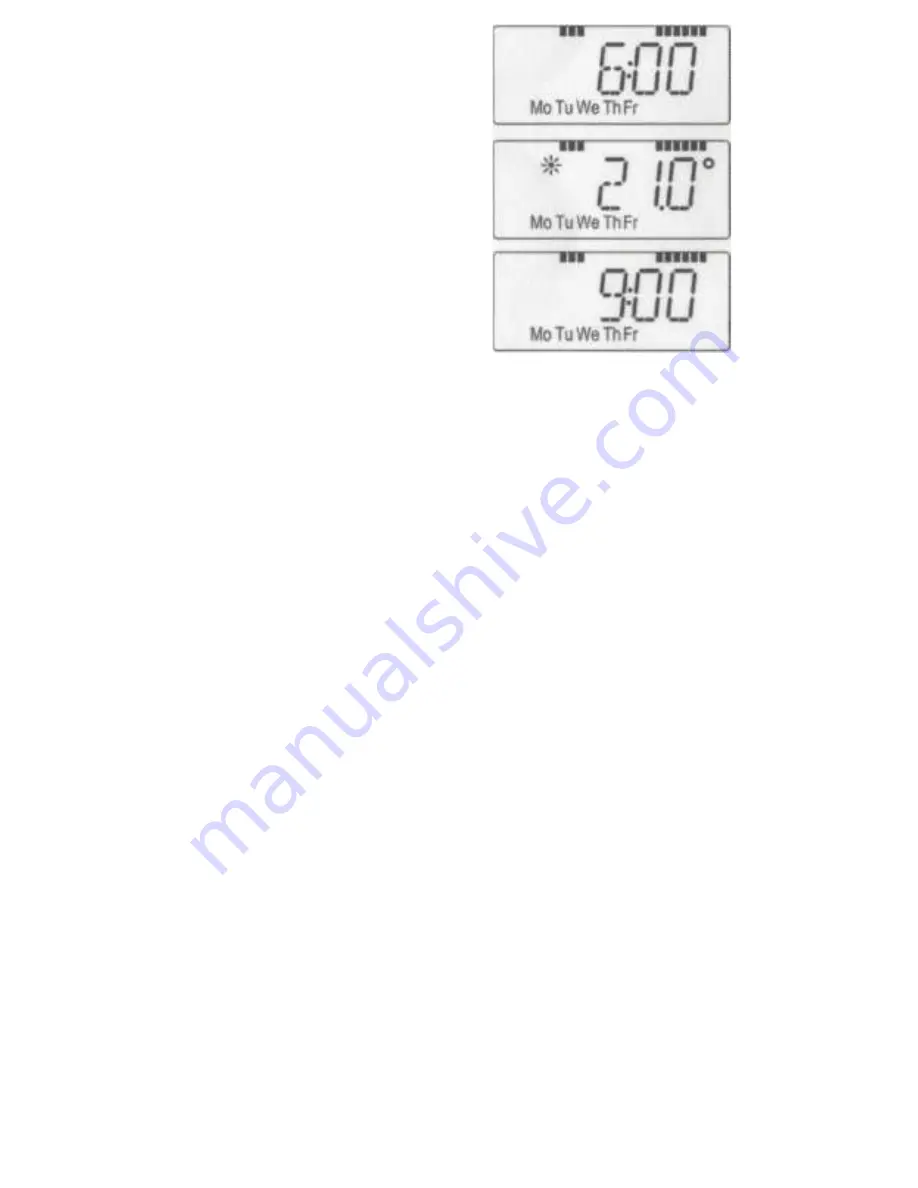
6. The first heating phase 

switching time is displayed 

(6:00); you can change this 

time with the arrow 

buttons. Heating intervals 

are also shown by means 

of bars.
7. Confirm by pressing the 

OK button.

8. Set the temperature that the room should be at 

from 6:00 onwards (21.0°C in the example).
9. Confirm your selection by pressing the OK button.
10. The end time for the first heating interval is 

displayed (9:00 in the example); you can change this 

time with the arrow buttons.
11. Confirm by pressing the OK button.
12. Repeat this procedure for the second heating 

interval

In Auto mode, the set weekly program is adopted by 

the paired LightwaveRF Radiator Valves 

automatically. In auto mode (weekly program), the 

temperature can be changed at any time using the 

arrow buttons. The modified temperature will then 

remain the same until the next point at which the 

program changes.

Weekly program: Examples

Each Valve allows you to store up to 2 heating 

periods (4 switching times) with individual 

temperature settings for each day of the week. The 

factory set-ting consists of two heating phases (from 

6:00 until 9:00 and from 17:00 until 23:00 

respectively) for every single day of the week:

Содержание JSJS LW901

Страница 1: ...this product in accordance with the fitting instructions below Failure to do so may render your guarantee void IMPORTANT PLEASE RETAIN THESE INSTRUCTIONS FOR FUTURE REFERENCE AND FOR GUIDANCE ON THE...

Страница 2: ...and comfort temperatures H OK button For confirming saving and pairing I Warmer arrow button Settings temperature adjustments The LightwaveRF Room Thermostat is a user friendly device for programming...

Страница 3: ...or modification work This device is intended for domestic use only Inserting Replacing the Batteries 1 Remove the battery compartment cover 2 Insert 2 new LR06 Mignon AA batteries into the battery co...

Страница 4: ...orking with a stone wall you should drill the holes using a 5 mm drill Then insert a plug into each of the drilled holes If you are working with a wooden wall you should drill the marked holes a using...

Страница 5: ...he minute A Confirm with OK C After setting the time and date the display will then switch to normal view Operating modes To switch between the 3 operating modes described below press the menu button...

Страница 6: ...e menu button again to return to the previous level After 60 seconds without anything happening the menu will close automatically Setting the weekly program The weekly program allows two separate heat...

Страница 7: ...uttons 11 Confirm by pressing the OK button 12 Repeat this procedure for the second heating interval In Auto mode the set weekly program is adopted by the paired LightwaveRF Radiator Valves automatica...

Страница 8: ...m 17 00 to 23 00 If a room also needs to be heated at around noon the corresponding program might look like this Monday to Sunday from 00 00 to 06 00 17 0 C from 06 00 to 14 00 22 0 C from 14 00 to 17...

Страница 9: ...ows to allow LightwaveRF Radiator Valves to be managed via a Room Thermostat 1 Set the radiator valve to LEARN mode For more information on this refer to the operating manual for the Radiator Valve 2...

Страница 10: ...an easy and convenient way of switching between these two temperatures The factory settings are 21 0 C and 17 0 C respectively To adapt them proceed as follows 1 Press and hold down the comfort set ba...

Страница 11: ...confirm 6 Use the arrow buttons to set the temperature press OK to confirm 7 The display will flash to confirm your settings The set temperature will remain until the specified time The Room Thermosta...

Страница 12: ...ent manual operation 1 To activate deactivate the lock briefly press the Menu and buttons at the same time 2 Once the function is active LOC will appear on the display 3 To deactivate the function pre...

Страница 13: ...as follows 1 In manual mode Manu press and hold the left arrow button decrease temperature until OFF appears on the display 2 To end exit manual mode Manu or press the right arrow button increase temp...

Страница 14: ...2x LR6 batteries AA Battery life Approx 2 years Display LC display Radio frequency 868 3 MHz Range open field 20 m Dimensions W x H x D 70 x 65 x 20 mm Birmingham Science Park Aston Faraday Wharf Holt...

Отзывы: