


5. Software Control - The Built-in Web
MX DVI-Plus Series – User's Manual
20
5.3.
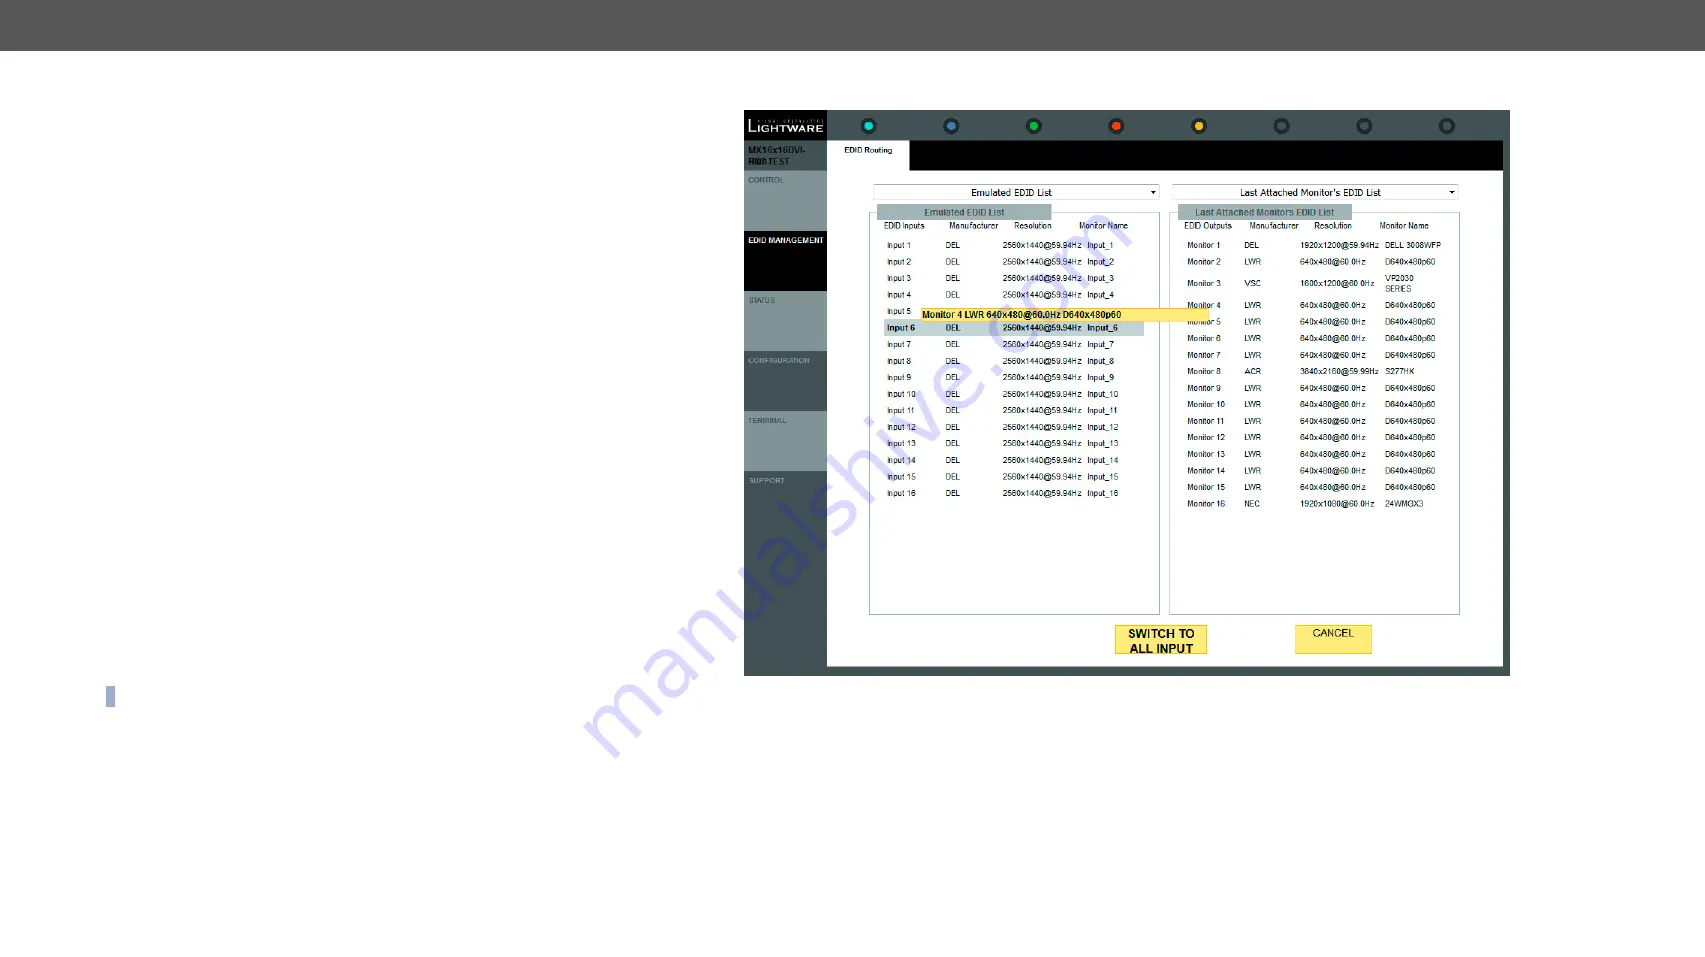
EDID Menu
By clicking on the
EDID Management
menu, the
EDID Routing
page
appears.
When the user enters the menu at the first time, the whole EDID list is
being downloaded from the matrix which may take up to 40 seconds.
The lists of the EDIDs
▪
Emulated EDID List:
the resolutions and the vendor names of the
EDID reported to the source for each input separately.
▪
Last attached Monitor's EDID List:
the resolutions and vendor
names of the display devices connected to matrix switcher's
output.
▪
Factory EDID List:
shows the factory memory locations (01# -
50#) with preprogrammed EDID.
▪
User EDID List:
shows the memory locations (51# - 100#) which
can be used by the user to save custom EDIDs.
5.3.1.
Changing the Emulated EDID at One or All Inputs
Step 1.
Select the
Emulated EDID List
in one of the window areas in the
drop down list.
Step 2.
Select the desired
EDID list
in the other window.
Step 3.
Select the desired
EDID
from this list with a left mouse click,
a popup message appears. (Memory location, manufacturer,
Resolution and Monitor name of the selected EDID).
Step 4.
Click on the desired
memory location
in the Emulated EDID List
window or the Switch to all input button. Now the EDID has
been changed on selected input. If the EDID changing was
successful a response message will appear on the bottom of
the page.
Step 5.
Click on the
Cancel
button to exit EDID changing.
INFO: Switching an EDID to ALL inputs may take some seconds.
The user can switch and learn EDIDs also in the Last Attached
Monitors EDIDs window. Switching an EDID from this list to an input
results dynamic EDID routing. This means that the emulated EDID
changes automatically if a new monitor is attached to the output, by
simply copying the data from the monitor.
The EDID Management Menu


