4. Operation of MMX6x2-HT Family
MMX6x2-HT series – User's Manual
21
Operation of MMX6x2-HT Family
This chapter is about the powering and operating of the device describing the
functions which are available by the front/rear controls:
4.1.
Powering on
Connect the power cord to the IEC standard power input connector.
Switch on the matrix by the power switch on the rear panel.
During the initial self-test and loading of the latest settings ‘Booting…’
appears on the LCD screen. After the self-test, the router reloads its
last configuration and it is ready to use. In the case of hardware failure,
an error message is displayed.
ATTENTION!
After switching ON, the router reloads the latest
settings that were used before it was turned off. The router has an
internal emergency memory that stores all current settings and tie
configurations. This memory is independent of presets and invisible
for the user. This built-in feature helps the system to be ready
immediately in case of power failure or accidental power down.
4.2. Front Panel Operations
Control Lock
When
Control lock
button illuminated red, the device is in control locked
mode, that means front panel operations are disabled. Front panel
operations are enabled if
Control lock
button is not lit.
Press and hold the
Control lock
button for three seconds to toggle
control lock state. Front panel button operations can be enabled or
disabled using Control lock button while remote control (RS-232, USB
or Ethernet) is still available.
Take / Autotake Mode
The router has two different switching modes:
Take
and
Autotake
. If
the
Take
button is unlit,
Take
mode is active. When the
Take
button
continuously illuminates green,
Autotake
mode is selected. Press and
hold the
Take
button for two seconds to change between
Take
and
Autotake
modes.
Take
mode allows the user to connect or disconnect multiple outputs
to an input at once. This mode is useful when the time delay is not
allowed between multiple switching. The commands are only realized
when the
Take
button is pressed.
ATTENTION!
If no button is pressed for three seconds, all
preselected actions (which were not realized with the pressing
TAKE) will be ignored, and the router returns to its idle state.
Autotake mode is useful when immediate actions must be done or
fast switching is needed between sources on a particular destination.
In this mode switching occurs immediately upon pressing one of the
input selector buttons.
4.2.1.
View Crosspoint State
The current switching status can be checked on the front panel by
using the front panel buttons. The crosspoint state is displayed slightly
different in
Take
or
Autotake
modes because of the different switching
methods.
INFO
:
View mode does not mean, that the router has to be switched
in different modes, viewing and switching can be done after each
other, without pressing any special buttons.
View Current State in Take Mode
If the router is in
Take
mode, the user can verify both input and output
connections. In
Take
mode no accidental change can be done unless
Take
button is pressed.
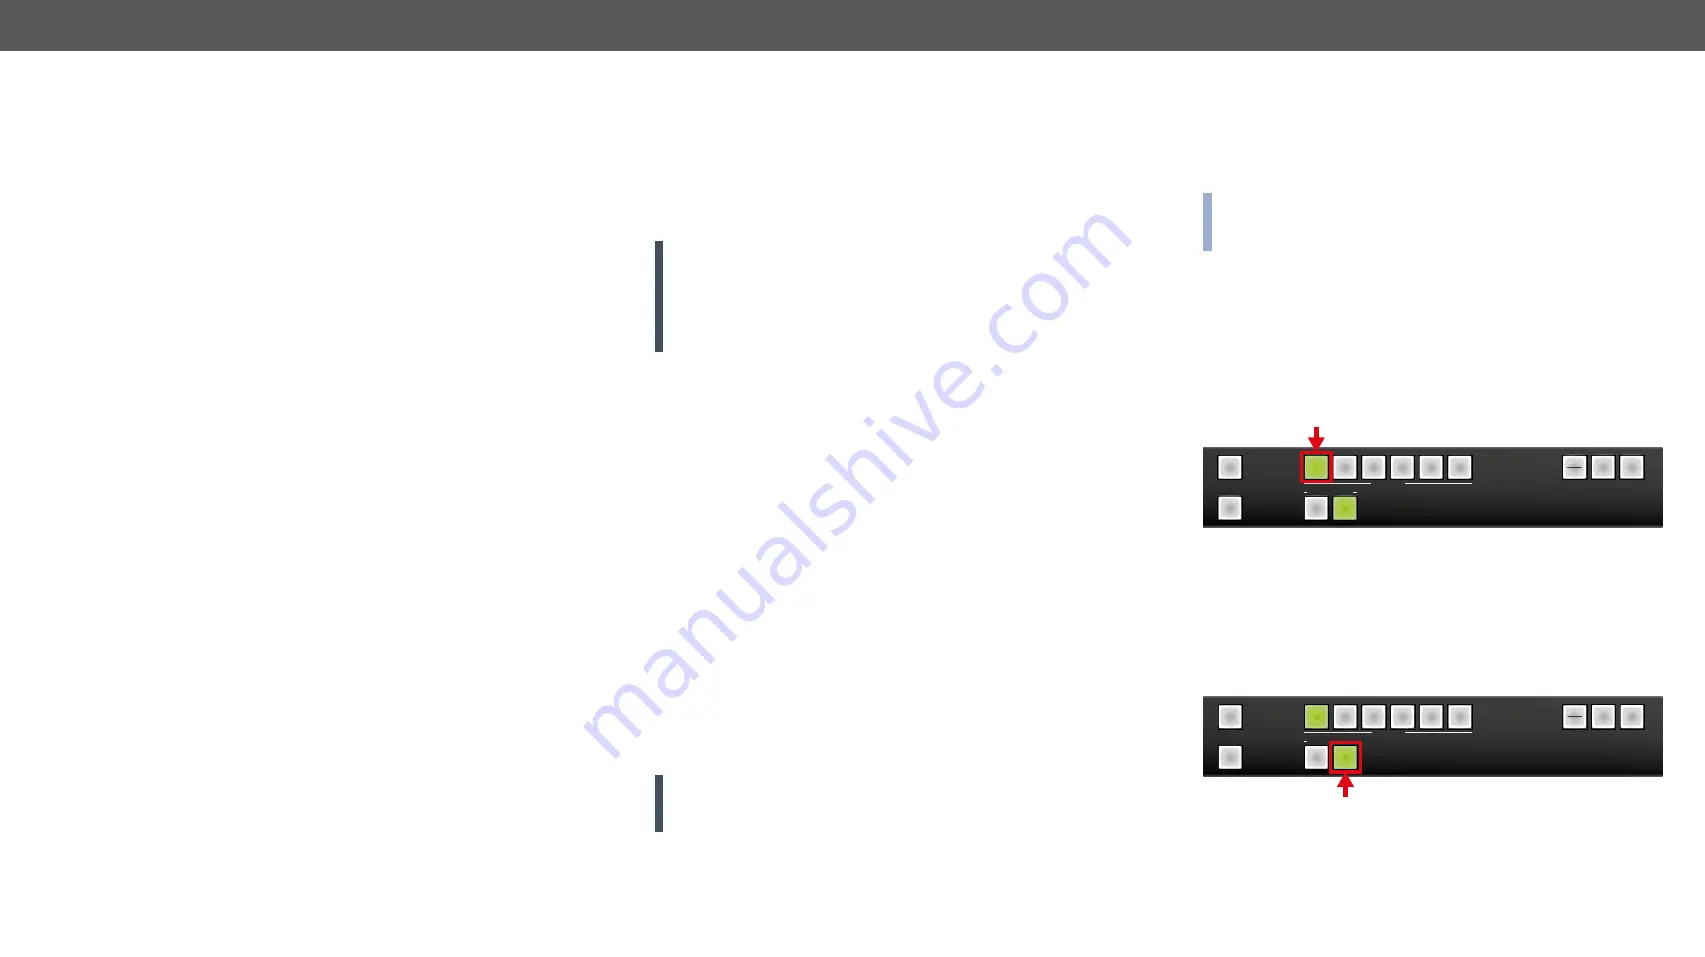
Press and release a
source button
. Now the selected source button and
all destination buttons which are currently connected to the selected
source will light up. This informative display will remain active for
three seconds, then all buttons turn to dark.
Sample drawing shows that Input 1 is currently connected to the
Output 2 port.
If every source, destination, and
Take
buttons are unlit (the unit is in
Take
mode, and no input was selected in the last 3 seconds), press
and release a
destination button
to see its current state. Now the source
button, which is connected to the selected destination, will light up.
Sample drawing shows that Output 2 is connected to the Input 1.
SOURCES
DESTINATIONS
1
2
1
2
3
4
5
6
TTA
AK
KEE
A
AU
UTTO
O
TTA
AK
KEE
A
AU
UTTO
O
LLO
OA
AD
D
PPR
REESSEETT
LLO
OA
AD
D
PPR
REESSEETT
SSA
AVVEE
PPR
REESSEETT
SSA
AVVEE
PPR
REESSEETT
C
CO
ON
NTTR
RO
OLL
LLO
OC
CK
K
LLO
OC
CK
K
O
OU
UTTPPU
UTT
SOURCES
DESTINATIONS
1
2
1
2
3
4
5
6
TTA
AK
KEE
A
AU
UTTO
O
TTA
AK
KEE
A
AU
UTTO
O
LLO
OA
AD
D
PPR
REESSEETT
LLO
OA
AD
D
PPR
REESSEETT
SSA
AVVEE
PPR
REESSEETT
SSA
AVVEE
PPR
REESSEETT
C
CO
ON
NTTR
RO
OLL
LLO
OC
CK
K
LLO
OC
CK
K
O
OU
UTTPPU
UTT
Î
Î
Î
Front Panel Operations – Quick Summary
Î


