Lighttoys FT chip Скачать руководство пользователя страница 9


Image/music library

 – catalogue of all available images/music in the current folder. By 

clicking & dragging with your mouse you move the images to the timeline. 


Timeline

 – used to prepare your image sequence. You can move the images around, change 

their order or length. 


Image tuning

 – allows you fine tuning of the images on the timeline. You can change the 

scale or spacing of each image  


Visualization

 – shows a nice preview how your images will look on Visual Poi when spinned. 
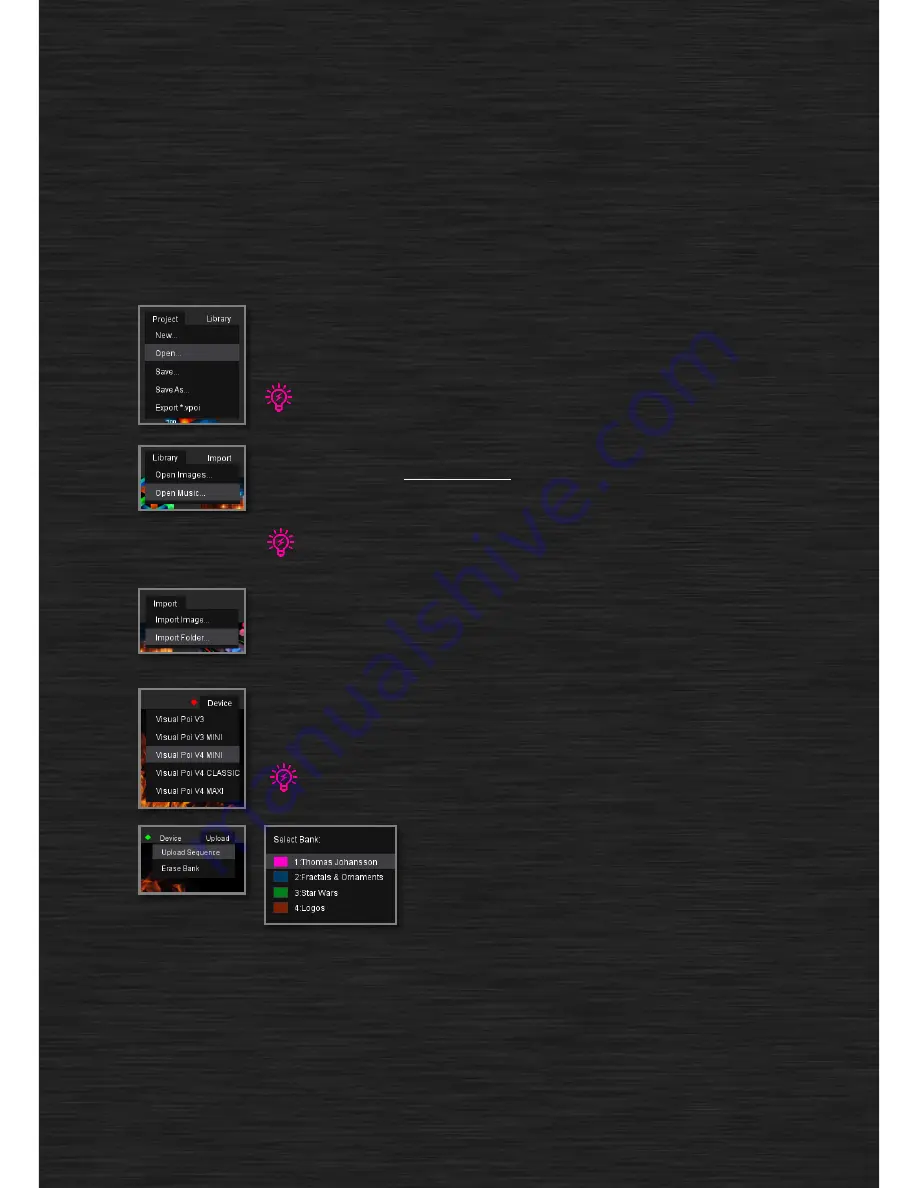
Menu options 

All your media files (including their settings) form a so called “project”. You can 
save your project for future use and then open it to continue with your work 
from the 

Project menu

 on the left. 

When you save your project called i.e. 

MyShow

, a new folder with the same name will be created. 

Inside it will be stored source media like images, music and project file 

MyShow.vpp

. To open the 

project, you navigate to this 

Myshow.vpp

 file.  

Library menu 

is used to select the source folder with your images and music. 

Images must be high 200 pixels or less, otherwise the application won’t show 
them. 

When the application starts, default libraries are loaded from destinations: 

LT_Composer/library/images/default

 and 

LT_Composer/library/music/default

. It’s good idea to save 

your favorite images and music there, so they are automatically loaded. 

Import menu

 helps you import pictures from your hard drive, whose format is 

not suitable for Visual Poi (i.e. more than 200 pixels). You can import a single 
picture or a whole folder with pictures. The pictures will be saved into your 
actively selected library. 

Device menu

 lets you select the target Visual Poi type for which you will be 

creating the image sequence. This setting can be changed during the 
composition at any time. 

When you connect the Visual Poi to the PC and turn it on, Lighttoys Composer automatically detects it 
and changes the device type accordingly. 

Upload menu

 is used to upload your prepared image 

sequences into the device. To begin upload, click 
“Upload Sequence” and select one of the 4 memory 
banks. 


Working with the timeline 

After you select your favorite source folders with images and music from the 

Library menu

, it’s time 

to build your first image sequence on the timeline. 

Содержание FT chip

Страница 1: ...Visual Poi V4 User manual V2 1...

Страница 2: ...g 11 Uploading your first image sequence 13 Using the FT remote controller 14 Powering on off 14 LED indicator 15 Pairing procedure 15 Perfect sync feature 16 How it works 16 Assembling the staff conn...

Страница 3: ...is manual is devoted to the usage of Visual Poi the second part is devoted to the creation of graphic sequences for your Visual Poi so that your shows always look the best With proper use Visual Poi w...

Страница 4: ...y is empty and needs recharge Visual Poi battery level indicator If you leave Visual Poi unattended for 20 minutes it automatically turns off Also when the battery level drops too low the Visual Poi t...

Страница 5: ...ur selection make a longer press of the main button the Visual Poi will enter a prelaunch mode ready to start your image sequence at will This is indicated by only a single LED shining in the color of...

Страница 6: ...SB cable to the PC and power it ON with a long press of the main button On Windows 7 click the Start button type Device manager into the search bar and hit Enter On Windows 8 and 10 press Windows Key...

Страница 7: ...drive click OK and Next Driver installation process 2 A new window appears asking you for permission to install the driver click Install Visual Poi driver should be now successfully installed Successf...

Страница 8: ...copy the whole folder LtComposer with its contents Lighttoys Composer on the USB flash drive Overview Lighttoys Composer is a simple to use yet powerful program to open your images arrange their posit...

Страница 9: ...h 200 pixels or less otherwise the application won t show them When the application starts default libraries are loaded from destinations LT_Composer library images default and LT_Composer library mus...

Страница 10: ...s to change the image duration as needed By clicking inside the image and dragging you can also reposition the whole image From keyboard it is possible to input precise timing values from the keyboard...

Страница 11: ...ers unique visualizations that simulate how the image pattern will look like in real life When you click an image on the timeline a preview appears Three modes of visualization animated static dynamic...

Страница 12: ...uence repeat will make the image sequence loop indefinitely This is useful for demo purposes or when you don t know the exact duration of the act Lock sizing option helps when you plan to use the same...

Страница 13: ...nect your Visual Poi to the computer with the provided micro USB cable and power it ON with a long press of the main button If the Visual Poi was successfully connected the red diamond in the top righ...

Страница 14: ...ing on off To turn on the FT remote press and hold the red button for 1 second until the blue indicator LED on the remote starts shining To turn off press and hold the red button again until the blue...

Страница 15: ...turning pink color indicating a successful pairing Pairing Visual Poi with the FT remote After you pair all Visual Pois to the FT remote press and hold the PAIR button again for 1 second The LED indic...

Страница 16: ...ect sync feature helps to rescue the following unfavorable situations SITUATION 1 some Visual Poi s don t catch the start signal Remedy wait for it to catch the signal or when the interference is stro...

Страница 17: ...connector First remove the leash ring with the chain from the Visual Poi and align the Visual Poi with the connector Preparations for staff attachment Next push the Visual Poi inside making sure the...

Страница 18: ...ur Visual Staff is now ready for use Securing the Visual Poi with a tape To disassemble the staff and return to the normal Visual Poi operation follow the above steps backwards Available staff sizes Y...

Страница 19: ...eave gives the best clarity to your logos and texts We recommend you to learn the basic 3 beat forward weave poi spinning which gives the best clarity to your texts and logos you can search online for...

Страница 20: ...you need to get a DSLR camera and a solid tripod The type of camera is not so important the only requirement for it is to have full manual mode M mode Set your camera on the tripod set it to M mode a...

Страница 21: ...ht which produces pale colors Right and wrong combination of frame rate and shutter speed when shooting video What frame rate to use This is not so important but it s always good to use lower fps 30 f...

Страница 22: ...d Team Pyroterra Lighttoys wishes you a lot of fun and amazed audience with Visual Poi V4 Enjoy the ground breaking technology opening new worlds of visual presentation Because FUTURE IS NOW www light...

Отзывы: