26
TOOLS AND HARDWARE REQUIRED
X
SECTION 2 (CONTINUED)
2.13
CVZ
ATB
CVZ
DXX
DXX
ATB
CQL
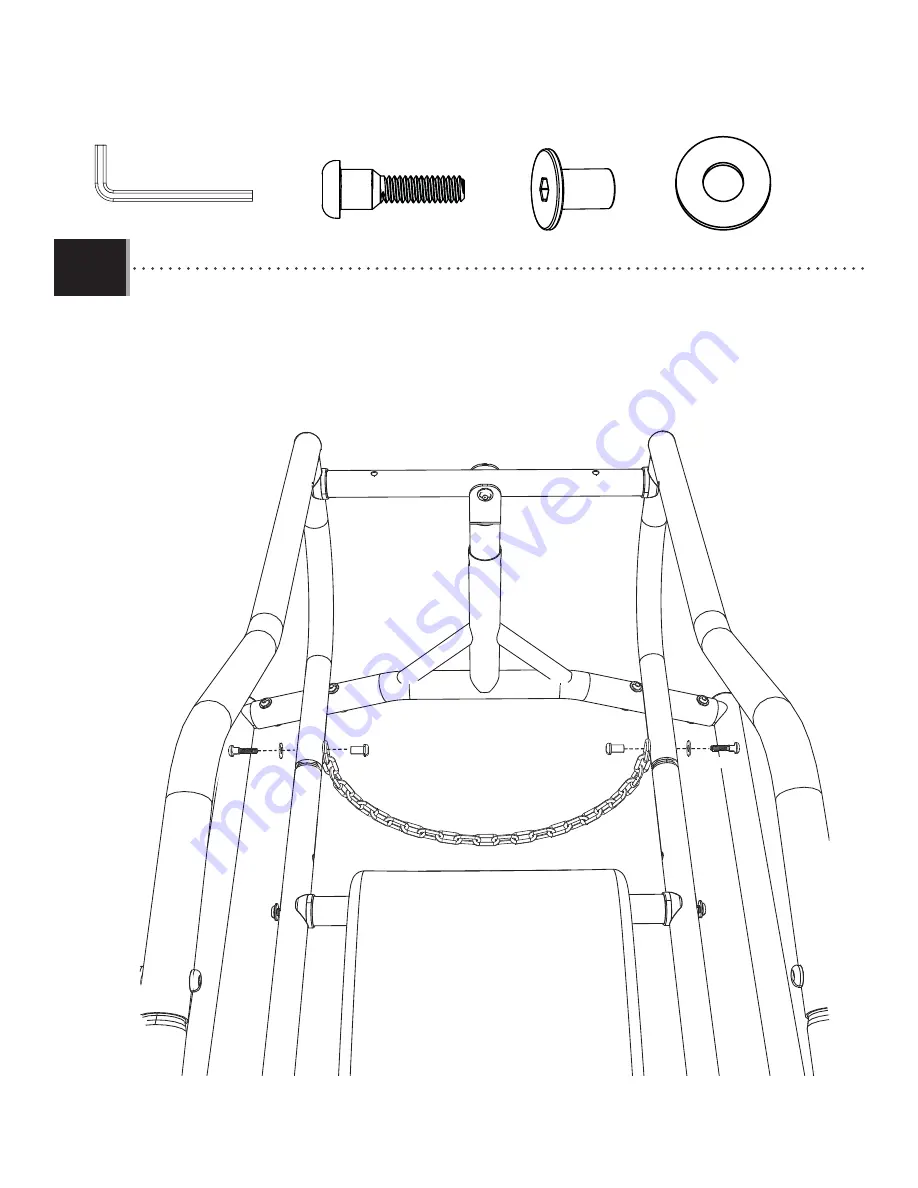
• Secure the
Chain Foot Rest (CQL)
to the Fuselage with the hardware shown by positioning the chain links over the holes
in the fuselage.
DXX
(x2)
ATB
(x2)
CVZ
(x2)
3/16 in/po (≈5 mm)
(2)


