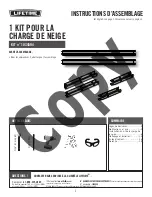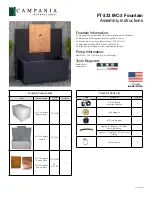
TOOLS AND HARDWARE REQUIRED /
OUTILS ET QUINCAILLERIE REQUIS
/
INSTRUMENTAL Y HERRAJE REQUERIDO
u
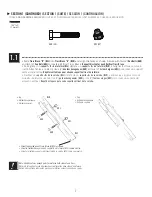
SECTION 1 (CONTINUED) /
SECTION 1 (SUITE)
/
SECCIÓN 1 (CONTINUACIÓN)
10
• Mark the location of the hole on each side of the Horizontal Truss Brace
•
Marquer l’emplacement du trou à chaque côté du Support horizontal de la ferme.
•
Marcar la ubicación del agujero en cada lado del soporte horizontal de cercha.
• Horizontal Truss Brace
• Support horizontal de la ferme
• Soporte horizontal de cercha
BSJ
ADJ
BSJ
(x2)
ADJ
(x2)
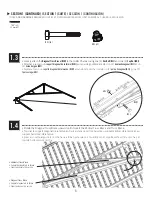
• Mark the location of the hole on each side of the Horizontal Truss Brace. Drill a hole at each spot, with a 5/16" (8
mm) Drill Bit.
• Marquer l’emplacement du trou à chaque côté du support horizontal de la ferme. En utilisant un foret de 8 mm
(5/16"), percer un trou à chaque emplacement.
• Marcar la ubicación del agujero en cada lado del soporte horizontal del armazón. Usando una broca de 8 mm
(5/16"), taladrar un agujero a cada ubicación.
• Loosely secure the Diagonal Truss Support and the
Vertical Truss Brace to the Horizontal Truss Brace
with one (1)
Hex Bolt (BSJ)
and one (1)
Cap Nut (ADJ)
.
Repeat steps 1.3–1.6 for the other end of the Truss. Tighten all
Hardware.
• Attacher à la main le support diagonal de la ferme et
le support vertical de la ferme au support horizontal de
la ferme à l’aide d’un (1)
perno hexagonal (BSJ)
et un (1)
écrou borgne (ADJ)
.
Répéter les étapes 1.3 – 1.6 pour l’autre
extrémité de la ferme. Serrer tous le quincaillerie.
• Sujete a mano el soporte diagonal de cercha y el
soporte vertical de cercha al soporte horizontal de cer-
cha usando un (1)
perno hexagonal (BSJ)
y una (1)
tuerca
ciega (ADJ)
.
Repetir los pasos 1.3–1.6 para el otro extremo de
la cercha. Apretar todos los accesorios de fijación.
1.5
1.6
7/16" (x2)
11 mm (x2)
5/16" (8 mm)
Содержание 1034594
Страница 12: ...12 12 NOTES REMARQUES NOTAS ...
Страница 13: ...13 13 NOTES REMARQUES NOTAS ...
Страница 14: ...14 14 NOTES REMARQUES NOTAS ...


