


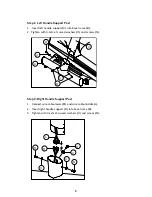


1. Be certain that your treadmill is completely unfolded and sits stable on the floor. It is also
recommended that you locate your treadmill in a pleasant area that gives you something to
look at while your working out, such as a window or television. Maintaining an exercise
program with a treadmill located in a poorly lit basement room is more difficult than when
your treadmill is located in an active and pleasant location.
2. Make sure that your treadmill is plugged into a properly grounded outlet as described in the
grounding section of this document.
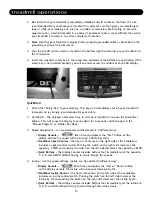
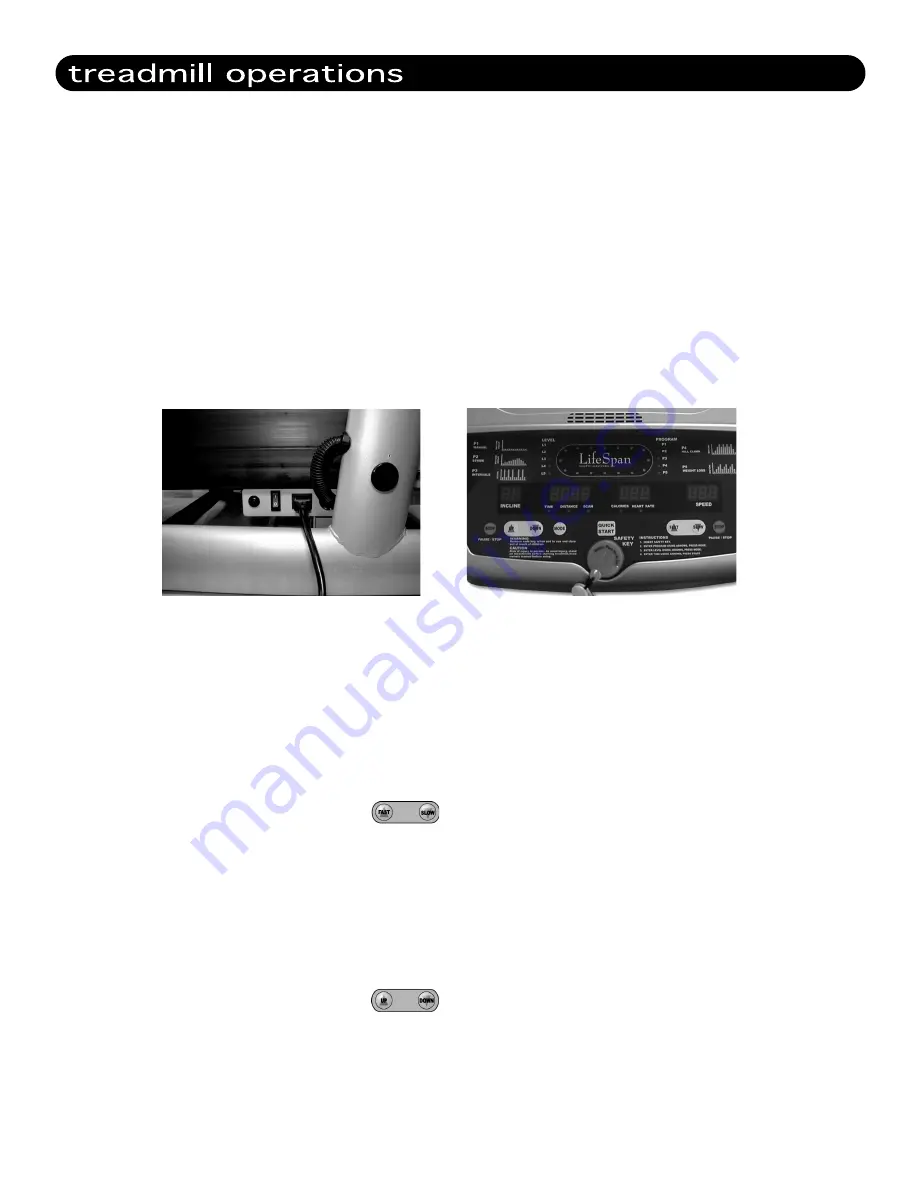
3. Turn the On/Off switch, which is located in the bottom right hand corner of your treadmill, to
the On position.
4. Insert the magnetic safety key in the round area centered at the bottom of your display. If the
safety key is not inserted properly you will see lines across the middle of each LED display.
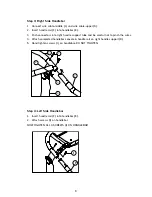
QuickStart
1. Attach the "Safety Key" to your clothing. This key will immediately shut off your treadmill if
removed and is strongly recommended for your safety.
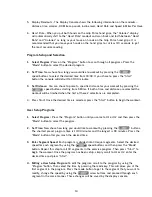
2. QuickStart - The quickest and easiest way to start your treadmill is to push the QuickStart
button. This will cause the display to count down for 3 seconds and then begin in the
"Manual Program" at .5 Miles Per Hour.
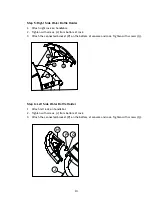
3. Speed Adjustment – can be increased and decreased in 3 different ways:
• Display Console –
Each time you depress the “Fast” button on the
display console the speed will increase by .1 Miles Per Hour.
• Handlebar Speed Control –
the heart rate sensor on the right side of the handlebars
includes a speed control switch. Pushing the switch on the right side increases the
speed by .1 MPH and pushing the switch on the left side decreases the speed by .1 MPH.
• Quick Buttons –
the display console includes buttons that immediately set the speed to
3, 4, 5, and 6 MPH without having to scroll through the speeds.
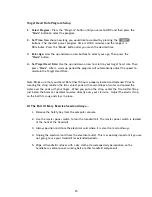
4. Incline – like the speed settings, incline can be adjusted 3 different ways:
• Display Console –
Each time you depress the “Up” or “Down” button
on the display console the incline will increase or decrease by 1%.
• Handlebar Incline Control –
the heart rate sensor on the left side of the handlebars
includes an incline control switch. Pushing the switch on the left side increases the
incline by 1% and pushing the button on the right side decreases the incline by 1%.
• Quick Buttons –
the display console includes buttons that immediately set the incline to
4, 6, 8, and 10% without having to scroll through the incline levels.
13


