background image

The LifeSpan TR1000-SL comes with the following limited warranty, which applies only to the use

of this treadmill in the home, for residential, non-commercial purposes:

• Frame:  Lifetime

• Motor:  10 years

• Parts:  2 years

• Labor:  1 year

PCE Health and Fitness warrants that the equipment it manufacturers is free from defects in

material and workmanship under normal use and service. The periods above are based on the

date of purchase. During these periods, PCE Health and Fitness will repair or replace any defec-

tive part.  Free labor is included for the first year.

If within the time frames specified above, any part of the LifeSpan fails to operate properly

contact your authorized PCE Health and Fitness retailer to report the problem. All labor shall be

supplied by the authorized retailer that sold your product and the product must be located

within that retailer’s service area. If you are unable to reach the dealer that you purchased the

product from, contact PCE Health and Fitness at our web site, www.pcefitness.com or  

at (435) 940–1180.

PCE Health and Fitness reserves the right to make changes and improvements in our products

without incurring any obligations to similarly alter any product purchased. In order to insure our

product warranty and to ensure the safe and efficient operation of your treadmill, only authorized

parts can be used. The warranty is void if any parts other than those provided by PCE Health and

Fitness are used.

Exclusions and Limitations

• This warranty does not apply to any defects caused by negligence, misuse, improper 

assembly or maintenance, accident, or an "act of god".

• This warranty does not apply to discoloration of paint or plastics

• PCE Health and Fitness shall not be responsible for incidental or consequential damages.

• This warranty is nontransferable from the original owner.

Registration

You must register your LifeSpan product before a warranty claim can be processed. 

To complete your registration card online, go to www.pcefitness.com and fill out 

the  registration  card  online  or  fill  out  the  warranty  card  provided  with  your 

treadmill and mail it today. Registration Cards must be completed and sent to 

PCE Fitness within 30 days of purchase to activate the Product Warranty on your 

LifeSpan equipment. Product Warranties are not valid unless properly completed 

and sent to PCE Fitness within this 30 day period.

3

Содержание TR-1000SL

Страница 1: ...Owners Manual Version 1 5...

Страница 2: ...Limited Home Use Warranty 3 Important Safety Precautions 4 Getting Fit 5 Assembly Instructions 7 Electronics Overview 10 Exercise Programs 11 Treadmill Operations 13 Moving and Storage 15 Trouble Sho...

Страница 3: ...lt and 1 75 horse power continuous duty motor are all included to provide years of use and require minimal ongoing maintenance Please read this manual thoroughly before assembly and operation of your...

Страница 4: ...ction All Steel Welded Frame Power Requirements 120 Volts nominal grounded outlet required 10 Amps Motor 1 75 Horsepower Continuous Duty Display Type 3 LED Windows Data Displayed Time Distance Calorie...

Страница 5: ...to make changes and improvements in our products without incurring any obligations to similarly alter any product purchased In order to insure our product warranty and to ensure the safe and efficient...

Страница 6: ...ct for its intended use as described in this Owners Manual Do not use attachments that are not recommended by PCE Health and Fitness Do not leave your treadmill running while not in use Children and P...

Страница 7: ...ls and the program that you pursue warming up and cooling down before and after you workout will help reduce the risk of injury and improve the effectiveness of your workout Warming up is important to...

Страница 8: ...erformance keep your heart rate between 75 and 85 of your maximum heart rate To achieve benefits from your workout your workout time should be at least 20 minutes per session If you are trying to lose...

Страница 9: ...the box Prior to starting the assembly process take all of the parts out of the box remove all plastic bags and lay them out on the floor to become familiar with the components Make sure that you rem...

Страница 10: ...ght left sides of base frame and tighten the screws 4 Attach right base cover on base frame and tighten by screw R Repeat the same step on the left side Handlebar Assembly 1 Adjust the handlebars so t...

Страница 11: ...nsole screws are tightened Cup Holder Assembly 1 Attach the right cup holder to the console tube and the right handlebar Rotate the console tube if necessary to make sure the cup holder fits snugly on...

Страница 12: ...with the breaker switch or erratic performance from your treadmill Using electrical power other than the one speci fied above will void any warranty implied or otherwise Warnings Improper connection...

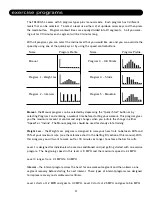
Страница 13: ...This program gives you the maximum amount of control and only changes when you initiate the change in either Speed or Incline The Manual program should be used for steady state training Weight Loss th...

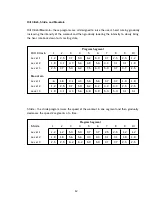
Страница 14: ...gradually decreases the speed 2 segments at a time 12 Hill Climb 1 2 3 4 5 6 7 8 9 10 Level 1 1 2 2 5 3 7 5 0 6 2 5 0 3 7 2 5 2 5 1 2 Level 2 1 8 3 1 4 3 5 6 6 8 5 6 4 3 3 1 3 1 1 8 Level 3 2 5 3 7 5...

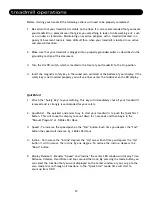
Страница 15: ...of each LED display QuickStart 1 Attach the Safety Key to your clothing This key will immediately shut off your treadmill if removed and is strongly recommended for your safety 2 QuickStart The quicke...

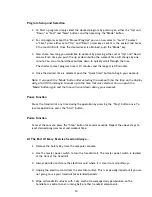
Страница 16: ...kout time the time on the display will go to 00 00 and begin to count up to the time that was selected You can push the Mode button again and the time will count down during your workout Pause Functio...

Страница 17: ...cked in place Caution When lifting use proper safety precautions and lifting techniques Bend you knees and elbows keep your back straight and pull up evenly with both arms c Ensure that the locking me...

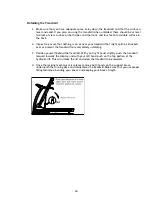
Страница 18: ...t might spill be knocked over or prevent the treadmill from completely unfolding 3 Position yourself behind the treadmill With your right hand slightly push the treadmill forward towards the display a...

Страница 19: ...r to the instructions in this manual on how to tension and adjust the belt Problem The treadmill motor seems strained or the fuse becomes blown Solution The lubricating silicon that is applied to the...

Страница 20: ...unning Belt Ensure the running belt is centered on your treadmill at all times Running style and a non level surface are two instances that may cause the belt to drift off center Minor adjustments to...

Страница 21: ...s through the gap in the frame and behind the bottom of the treadmill belt on the underside of the treadmill With the treadmill running at 3 MPH spray the silicon for 5 6 seconds Refer to the picture...

Страница 22: ...435 940 1180 www pcefitness com P O Box 981316 Park City Utah 84098 1316...

Отзывы: