background image


6

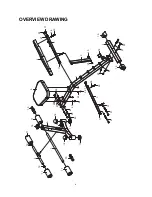
OVERVIEW DRAWING 


17

26

23

3

4

5

10

11

16

6

11

12

8

12

11

7

10

14

13

13

15

29

22

27

24

24

25

25

17

21

27

21

3

23

26

17

1

17

20

2

20

18

14

19

9

19

28

27

27

22

29

27

28

28

27

11

Содержание 76140 E1 Sit-Up Bench

Страница 1: ...40 OWNER S MANUAL IMPORTANT Read all instructions carefully before using this product Retain this owner s manual for future reference The specifications of this product may vary from this photo subjec...

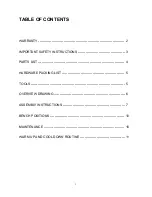
Страница 2: ...F CONTENTS WARRANTY 2 IMPORTANT SAFETY INSTRUCTIONS 3 PARTS LIST 4 HARDWARE PACKING LIST 5 TOOLS 5 OVERVIEW DRAWING 6 ASSEMBLY INSTRUCTIONS 7 BENCH POSITIONS 10 MAINTENANCE 10 WARM UP AND COOL DOWN RO...

Страница 3: ...repairing free of charge any parts which may prove to be defective under normal home use This warranty does not include any damage caused by improper operation misuse or commercial application From t...

Страница 4: ...Authorized Service Representative 7 Close supervision is necessary when this sit up bench is used by on or near children invalids or disabled persons 8 Children should not use the sit up bench without...

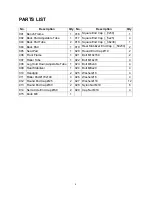
Страница 5: ...r End Cap 50x50 2 005 Seat Pad 1 020 Round End Cap 19 2 006 Front Frame 1 021 Bolt M10x150 2 007 Roller Tube 1 022 Bolt M10x70 4 008 Leg Hold Down Adjustable Tube 1 023 Bolt M6x40 4 009 Rear Stabilize...

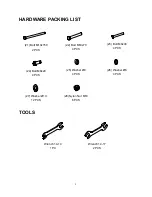
Страница 6: ...KING LIST TOOLS 21 Bolt M10x150 2 PCS 22 Bolt M10x70 4 PCS 24 Bolt M8x20 4 PCS 25 Washer 8 4 PCS 23 Bolt M6x40 4 PCS 27 Washer 10 12 PCS 26 Washer 6 4 PCS 28 Nylon Nut M10 6 PCS Wrench 14 10 1 PC Wren...

Страница 7: ...6 OVERVIEW DRAWING 17 26 23 3 4 5 10 11 16 6 11 12 8 12 11 7 10 14 13 13 15 29 22 27 24 24 25 25 17 21 27 21 3 23 26 17 1 17 20 2 20 18 14 19 9 19 28 27 27 22 29 27 28 28 27 11...

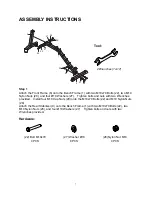
Страница 8: ...s provided Install four M10 Cap Nuts 29 onto the M10x70 Bolts 22 and M10 Nylon Nuts 28 Attach the Rear Stabilizer 9 onto the Bench Frame 1 with two M10x70 Bolts 22 two M10 Nylon Nuts 28 and four 10 Wa...

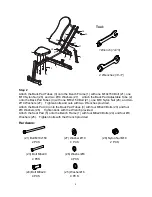
Страница 9: ...vided Attach the Back Pad 4 onto the Back Pad Tubes 3 with four M6x40 Bolts 23 and four 6 Washers 26 Tighten bolts with the Wrench provided Attach the Seat Pad 5 onto the Bench Frame 1 with four M8x20...

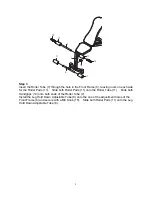
Страница 10: ...oth Roller Pads 11 onto the Roller Tube 11 Slide both Handgrips 10 onto both ends of the Roller Tube 7 Install the Leg Hold Down Adjustable Tube 8 onto the one of the adjustment holes of the Front Fra...

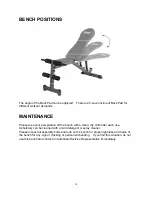
Страница 11: ...ff the bench with a clean dry cloth after each use Upholstery can be cleaned with a mild detergent or spray cleaner Please inspect all assembly bolts and nuts on the bench for proper tightness and fra...

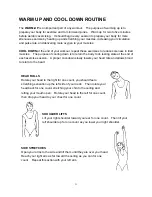
Страница 12: ...state at the end of each exercise session A proper cool down slowly lowers your heart rate and allows blood to return to the heart HEAD ROLLS Rotate your head to the right for one count you should fee...

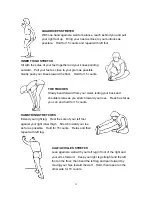
Страница 13: ...ean against a wall with your left leg in front of the right and your arms forward Keep your right leg straight and the left foot on the floor then bend the left leg and lean forward by moving your hip...

Отзывы: