background image


2

INDEX 


Page


INDEX 


1


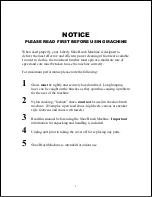
NOTICE- READ BEFORE USING MACHINE 


2


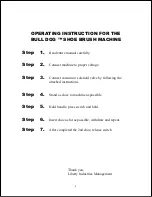
OPERATION INSTRUCTIONS 


3


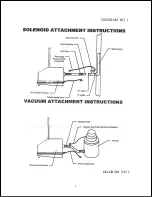
SOLENOID ATTACHMENT DIAGRAM   


4


VACUUM ATTACHMENT DIAGRAM 


4


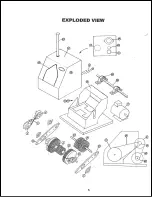
EXPLODED VIEW  


5


PARTS LIST 


6


BELT REPLACEMENT INSTRUCTIONS   


7


TOP BRUSH REPLACEMENT INSTRUCTIONS  


7


BOTTOM BRUSH REPLACEMENT INSTRUCTIONS  


7


SIDE BRUSH REPLACEMENT INSTRUCTIONS 


7


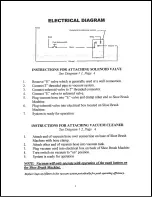
ELECTRICAL DIAGRAM 


8


INSTRUCTIONS FOR ATTACHING SOLENOID VALVE 


8


INSTRUCTIONS FOR ATTACHING VACUUM CLEANER   

8


MAINTENANCE OF COVER   


9


REPLACEMENT PARTS 


9


ON SITE REPAIR  


10


WARRANTY 


11


Содержание The Bull Dog 351

Страница 1: ......

Страница 2: ...VIEW 5 PARTS LIST 6 BELT REPLACEMENT INSTRUCTIONS 7 TOP BRUSH REPLACEMENT INSTRUCTIONS 7 BOTTOM BRUSH REPLACEMENT INSTRUCTIONS 7 SIDE BRUSH REPLACEMENT INSTRUCTIONS 7 ELECTRICAL DIAGRAM 8 INSTRUCTIONS...

Страница 3: ...owing 1 Shoes must be tightly and securely laced and tied Long hanging laces can be caught on the brushes as they spin thus causing a problem for the user of the machine 2 Nylon stocking fashion shoes...

Страница 4: ...per voltage Step 3 Connect vacuum or solenoid valve by following the attached instructions Step 4 Stand as close to machine as possible Step 5 Hold handle press switch and hold Step 6 Insert shoe as f...

Страница 5: ...5 DIAGRAM NO 1...

Страница 6: ...6...

Страница 7: ...1 14 20 2116 Outlet Electrical 1 15 20 2118 hp Electric Motor 1 16 20 2123 Pillow Block 2 17 20 2129 Sheave Top Driven 1 18 20 2263 Side Brush Hubs for D Shape Shaft 2 19 20 2352 15 amp Breaker 1 20 2...

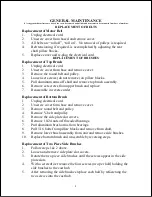
Страница 8: ...mbly 6 Remove set screws from upper brush and replace 7 Reassemble in reverse order Replacement of Bottom Brush 1 Unplug electrical cord 2 Unscrew cover form base and remove cover 3 Remove round belt...

Страница 9: ...9...

Страница 10: ...e above suggestions are followed your machine will look newer longer and provide you with years of trouble free service REPLACEMENT KIT Consists of 1 set of brushes 4 1 set of belts 3 1 set of wrenche...

Отзывы: