21
INSTALLATION
ENGLISH
Feet that move or slide on the floor can
contribute to excessive vibration and noise.
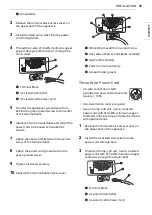
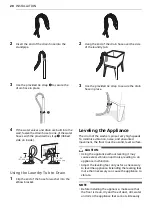
How to Level the Appliance
1
Position the appliance in its final location.
• Take special care not to pinch, strain, or
crush the water and drain hoses. If you have
a carpenter’s level
a
, you can use it to
check that the appliance is level. The slope
beneath the appliance should not exceed
1
inch
, and all 4 leveling feet must rest firmly
on the floor.
2
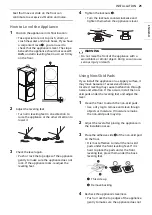
Adjust the leveling feet.
• Turn all 4 leveling feet in one direction to
raise the appliance or the other direction to
lower it.
3
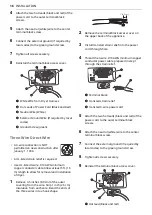
Check the level again.
• Push or rock the top edges of the appliance
gently to make sure the appliance does not
rock. If the appliance rocks, readjust the
leveling feet.
4
Tighten the locknuts
b
.
• Turn the locknuts counterclockwise and
tighten them when the appliance is level.
WARNING
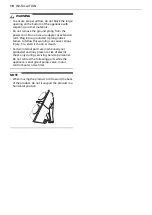
• Do not raise the front of the appliance with a
wood block or similar object. Doing so can cause
serious injury or death.
Using Non-Skid Pads
If you install the appliance on a slippery surface, it
may move because of excessive vibration.
Incorrect leveling may cause malfunction through
noise and vibration. If this occurs, install the non-
skid pads under the leveling feet and adjust the
level.
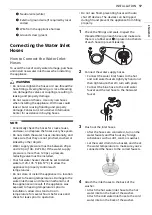
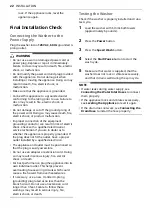
1
Clean the floor to attach the non-skid pads.
• Use a dry rag to remove and clean foreign
objects or moisture. If moisture remains,
the non-skid pads may slip.
2
Adjust the level after placing the appliance in
the installation area.
3
Place the adhesive side
c
of the non-skid pad
on the floor.
• It is most effective to install the non-skid
pads under the front leveling feet. If it is
hard to place the pads under the front
leveling feet, place them under the back
leveling feet.
a
This side up
b
Remove backing
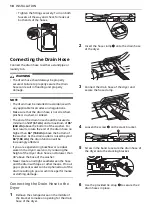
4
Recheck the appliance’s levelness.
• Push or rock the top edges of the appliance
gently to make sure the appliance does not
1"
Содержание WKHC202H A Series
Страница 30: ...30 OPERATION DRYER 6 Press the Start Pause button to start the cycle ...
Страница 62: ...62 Memo ...
Страница 63: ...63 Memo ...
Страница 89: ...25 Memo ...
Страница 90: ...26 Memo ...
Страница 91: ...27 Memo ...

