background image

21

EXHAUST REQUIREMENTS AND MAINTENANCE

Part 7

Following are important instructions and information concerning the exhaust requirements for your dryer.

Important Warning:

To reduce the risk of fire, combustion, or accumulation of combustible gases, DO NOT

exhaust dryer air into an enclosed and unventilated area, such as an attic, wall, ceiling, crawl space, chimney, gas
vent, or concealed space of a building. To reduce the risk of fire, DO NOT exhaust the dryer with plastic or thin foil
ducting.

NOTE : Deduct 6 feet (1.8 m) for each additional elbow.

It is not recommended to use more than 4 90° elbows.

Weather Hood

Type

Recommended

Number of 90°

Elbows

Maximum length of 4”

(10.2 cm) diameter rigid

metal duct

Maximum length of 4”

(10.2 cm) diameter

flexible metal duct

Exhaust Requirements and Instructions:

1. Venting materials are not provided with the dryer

and you should obtain the necessary venting
materials locally. For example, the outer end of
exhaust pipe must have a weather hood with
hinged dampers to prevent back-draft when the
dryer is not in use.

2. The exhaust duct must be four inches (10.2 cm)

in diameter with no obstructions. The exhaust
duct should be kept as short as possible. Make
sure to clean any old ducts before installing your
new dryer.

3. Rigid metal duct is recommended. Do not install

flexible duct in concealed spaces.
Non-combustible flexible metal duct is
acceptable. Do not use plastic or thin foil ducting.

4. DO NOT use sheet metal screws on exhaust pipe

joints or other fastening means which extend into
the duct that could catch lint and reduce the
efficiency of the exhaust system. Secure all joints
with duct tape.

5. To maximize operating results, please observe the

duct length limitations noted in the chart above.

2-1/2"

2-1/2"

2-1/2 "

(6.35 cm)

0

1

2

3

4

65 feet (19.8 m)

55 feet (16.8 m)

47 feet (14.3 m)

36 feet (11.0 m)

28 feet (8.5 m)

45 feet (13.7 m)

35 feet (10.7 m)

30 feet (9.1 m)

25 feet (7.6 m)

20 feet (6.1 m)

0

1

2

3

4

55 feet (16.8 m)

47 feet (14.3 m)

41 feet (12.5 m)

30 feet (9.1 m)

22 feet (6.7 m)

35 feet (10.7 m)

27 feet (8.2 m)

21 feet (6.4 m)

17 feet (5.2 m)

15 feet (4.5 m)

Use Only for Short Run

Installations

Содержание TDW15116G

Страница 1: ...erial Numbers and retain the manual for future reference If you use GAS dryer this dryer is equipped for use with NATURAL GAS DO NOT connect the dryer to the Liquefied Petroleum LP Gas service without converting the gas value A qualified technician must perform the LP Gas conversion Owner s Manual Electric and Gas Dryer TDW15116G TDW15117G P NO 3828EL2002H ...

Страница 2: ...T6 GAS REQUIREMENTS AND INSTRUCTIONS 20 PART7 EXHAUST REQUIREMENTS AND MAINTENANCE 21 22 PART8 OPERATING YOUR DRYER 23 28 PART9 TROUBLESHOOTING GUIDE 29 31 What are Sensor Dry and Time Dry Your dryer provides sensor drying and time drying programs Sensor Dry Dryer senses electronically laundry humidity and it automatically determines operation time based on the dryness of the load and the selected...

Страница 3: ...3 Type Electric and Gas Dryer Rating 120V 60 Hz 400W Size 68 6 cm x 73 7 cm x 111 cm Capacity 198 L Weight 57 2 kg ACCESSORIES Dryer rack 1 each See page 26 for how to use Specifications are subject to change by manufacturer ...

Страница 4: ...commendations in this manual must be followed To reduce the risk of fire or explosion electric shock or to prevent property damage personal injury or death when using your appliance follow basic precautions including the following WARNING Warranty Restriction If the dryer is subjected to other than private family use all warranty coverage is effective for only 90 days You will need the complete Mo...

Страница 5: ...s may contribute to a chemical reaction that could cause a load to catch fire 14 Do not use fabric softners or products to eliminate static unless recommended by the manufacturer of the fabric softner or product GROUNDING INSTRUCTIONS This appliance must be grounded In the event of malfunction or breakdown grounding will reduce the risk of electric shock by providing a path of least resistance for...

Страница 6: ...our gas supplier including the following Do not store or use any gasoline dry cleaning solvents any other flammable vapors or liquids in the area surrounding this appliance Do not dry anything that has ever had anything flammable on it even after washing No washer can completely remove oil Do not dry any articles that have ever had any kind of oil on them including cooking oil Articles containing ...

Страница 7: ...ns require a minimum 5 1 2 in 14 cm clearance behind the dryer for the exhaust vent with elbow Positioning the Dryer STEP 1 Certain minimum clearances are required above behind and to the sides of the unit as shown below Those required minimum clearances are set forth in the picture below Please also keep the following instructions in mind when installing in a closet or recessed area Consider allo...

Страница 8: ...lation The door on your dryer can be installed to open either to the left or the right Follow these procedures to reverse the direction in which your door opens Open the door and remove the filler plugs opposite the hinges Procedure for Reversing the Door STEP 2 Note Door and latch should be aligned at the center when closed Otherwise door is improperly closed and opened REMOVE FILLER PLUGS 1 REMO...

Страница 9: ...oor catch and filler plate Install them on opposite sides of the door Insert the door on the opposite side of the open ing by moving the door IN and DOWN until the top hinge and the bottom hinge are resting on the top screws inserted in Step 2 Tighten the two top screws of each hinge Reinsert the plastic plugs on the side from which the door was removed Remove the remaining screws from the side of...

Страница 10: ...joints as possible Use duct tape on all duct joints Insulate ductwork that runs through unheated areas in order to reduce condensation and lint build up on pipe walls and PLEASE BE AWARE THAT FAILURE TO EXHAUST THE DRYER CORRECTLY WILL VOID THE DRYER S WARRANTY 2 1 Detach and remove the knockout that matches the desired venting direction Right side not available on Gas Dryers the order of work 2 2...

Страница 11: ...r and your laundry room s gas supply Turn on your laundry room s gas supply and check all pipe connections both internal and external for gas leaks with a non corrosive leak detection fluid Refer to Part 7 page 20 5 For LP Liquefied Petroleum gas connection refer to this manual s section entitled Gas Requirements and Instructions 1 New stainless steel flexible connector Use this type of connector ...

Страница 12: ...ssure MAXIMUM STATIC PRESSURE IN WATER COLUMN 0 6 inches 1 5 cm Confirming Heat Source in Gas Dryers Close the door to the dryer drum drying compartment and after completing all steps in this manual for proper installation of this dryer start the dryer on a heat setting as described more fully in the operating instructions that accompany the dryer After the dryer starts the igniter will glow red a...

Страница 13: ...e vented to the outside using the back left right or bottom panel 5 Gas dryers may be vented to the outside using the back left or bottom panel Gas dryer may not be vented to the outside using the right side panel because of the burner housing 6 The dryer exhaust duct must be affixed securely to the manufactured or mobile home structure and the exhaust duct must be made of a material that will res...

Страница 14: ... 50 m or less in length use U L Underwriters Laboratories listed No 10 A W G wire copper wire only or as required by local codes If over fifteen feet 4 50 m use U L Underwriters Laboratories listed No 8 A W G wire copper wire only or as required by local codes Allow sufficient slack in wiring so dryer can be moved from its normal location when necessary d The power cord pigtail connection between ...

Страница 15: ...of appliance and connect it to center screw 4 Make sure that the strain relief screw is tightened and be sure that all terminal block nuts are on tight and power cord is in right position Use the instructions at this section if your home has a 3 wire receptacle NEMA type 10 30R and you will be using a UL listed 120 240 volt minimum 30 amp dryer power supply cord If this type is available at your h...

Страница 16: ... cord is in right position 1 Connect neutral wire white of power cord to center terminal block screw 2 Connect red and black wire to the left and right terminal block screws 3 Connect ground wire green of power cord toexter nal ground screw and move neutral groundwire of appliance and connect it to center screw 4 Make sure that the strain relief screw is tightened and be sure that all terminal blo...

Страница 17: ...he instructions under this section 1 Connect neutral wire white of power cord to center terminal block screw 2 Connect ground wire of appliance and neutral wire of power cord to center terminal block screw 3 Connect red and black wire to the left and right terminal block screws 4 Make sure that the strain relief screw is tightened and be sure that all terminal block nuts are on tight and power cor...

Страница 18: ...lified service person or company for example a qualified electrician or your local electric company review your laundry room s electrical supply for any problems 120 120 120 120Volt 60 Hertz with 3 Prong Grounding Plug Following are additional instructions regarding electrical connections and requirements for gas dryers Important Warning To help prevent fire electric shock serious injury or death ...

Страница 19: ... appliances recommend they be placed upon a dedicated circuit that is a single outlet circuit which powers only that appliance and has no additional outlets or branch circuits Check the spercification page of this owner s manual to be certain Do not overload wall outlets Overloaded wall outlets loose or damaged wall outlets extension cords frayed power cords or damaged or cracked wire insulation a...

Страница 20: ...s and when acceptable to your gas supplier 3 8 inch approved tubing may be used where lengths are less than 20 feet 6 1m Larger tubing should be used for lengths in excess of 20 feet 6 1m It is also important that you use pipe joint compound that is insoluble in LP gas 6 To reduce the danger of gas leaks explosion and fire please follow and observe the following Instructions and WARNINGS Connect t...

Страница 21: ...t have a weather hood with hinged dampers to prevent back draft when the dryer is not in use 2 The exhaust duct must be four inches 10 2 cm in diameter with no obstructions The exhaust duct should be kept as short as possible Make sure to clean any old ducts before installing your new dryer 3 Rigid metal duct is recommended Do not install flexible duct in concealed spaces Non combustible flexible ...

Страница 22: ...nd attach it to the vacuum duct See item 2 above 12 Please note that the wiring diagram is provided inside the dryer control hood Label all wires prior to disconnection when servicing the dryer because wiring errors can cause serious injury to you and your dryer 1 Clean the lint filter either before drying each load or after drying each load Always make sure the lint filter is clean before startin...

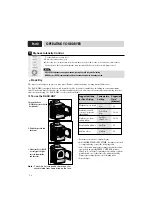
Страница 23: ...le Failure to follow these instructions can result in death or fire Fire Hazard Use this button for power on or off Following are instructions for starting and using your new dryer Please refer to specific sections of this manual for more detailed information Important Warning To reduce the risk of fire electric shock or injury to person read this entire manual including the Important Safety Instr...

Страница 24: ...uroys PERMPRESS Synthetics permanent press ULTRA DELICATE Shear workout wear and lace items DELICATE Lingerie sheets blouses 1 Sensor Dry Cycles 2 Manual Dry Cycles Use Manual Cycles to select a specific amount of drying time and a drying temperature When a Manual Cycle is selected the ESTIMATED TIME REMAINING display shows the actual time remaining in your cycle You can change the actual time in ...

Страница 25: ...PROGRAM To recall your stored CUSTOM PROGRAM Press CUSTOM PROGRAM button then press START PAUSE Child Lock 6 Child Lock can be used to prevent your children from undesirable use on control panel while the dryer is running When Child Lock is enabled all the button will be locked and Child Lock glows To lock Child Press and hold Dry Lavel and Temp Control for 3 seconds A single beep tone is heard an...

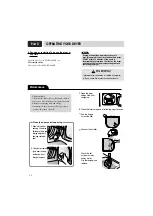
Страница 26: ...Dry Temperature setting Refer to the following table Start the dryer Note Check the lint screen and remove any lint accumulated from items dried on the rack 1 Open the door Hold the dryer rack with both hands To use the RACK DRY 2 Put the dryer rack into the drum 3 Make sure Dryer RACK is evenly spaced right onto the drum inside and door rim Suggested Items for Rack Drying Washable wool items Low ...

Страница 27: ...r Dry Cycles or Manual Cycles will glow The estimated or actual cycle time in minutes will show in the display OPERATING YOUR DRYER Part 8 Following are sample loads for Super Capacity Dryers Heavy Work Clothes 4 jeans 4 workpants 4 work shirts Mixed Load 3sheets 1king 2twin 4pillowcases 3shirts 3blouses Cotton Towels 10 bath towels 10 hand towels 2 sweatpants 2 sweatshirts 14 wash cloths 9 T shir...

Страница 28: ...ng one of following ways in cases Run the fingers across the filter Vacuum the lint filter Wash the lint screen in warm soapy water Dry thoroughly and replace Maintenance Note Drying will continue from where the cycle was interrupted if you close the door and press START within 10 minutes If the cycle is interrupted for more than 10 minutes the dryer will shut off Select new cycle settings before ...

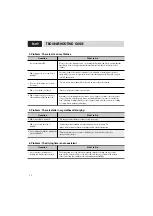
Страница 29: ...circuit breaker box and replace the fuse or reset the circuit breaker IMPORTANT electric dryers generally use two fuses or breakers Confirm that the house gas shutoff and the dryer gas shutoff are both fully open Is the gas supply or service blocked or off What to Do 2 Problem My Dryer Doesn t Heat Question Did you follow the instructions on your fabric softener product Confirm and follow the inst...

Страница 30: ... your load of laundry Do your clothes have excess static electricity Did you overload your dryer Did you place any paper tissue or other similar material in the load What to Do 4 Problem There is Lint on my Clothes Question Did you use fabric softener Try using a fabric softener to reduce static electricity Over drying a load of laundry can cause a build up of static electricity Try using a fabric...

Страница 31: ...r loads If you are only drying a handful of items add a few extra pieces to help ensure proper tumbling action Are you drying large loads of heavy fabrics Are the dryer controls properly set Is the lint filter clean before each new load of laundry Are the exhaust ducts clear and properly configured Is the fuse blown or is the circuit breaker tripped Did you overload your dryer Did you under load y...

Страница 32: ...32 MEMO ...

Страница 33: ...imiento Cónservelo para futuras referencias archive el modelo y números de serie de su secadora Si la secadora es del gas este secador se equipa para el uso del GAS NATURAL No intente conectar la Secadora al servicio de Gas Petróleo Líqido LP Gas sin personal calificado Un técnico calificado debe realizar la conversión de Gas LP MANUALDELPROPIETARIO Secadora eléctrica a Gas TDW15116G TDW15117G ...

Страница 34: ...TENIMIENTO SOBRE EL ESCAPE 21 22 PARTE 8 USANDO SU SECADORA 23 28 PARTE 9 GUÍA PARA LA SOLUCIÓN DE PROBLEMAS 29 31 Qué significa secado por sensor o secado por tiempo Su secadora le proporciona la posibilidad de programar acciones de secado por sensor o por tiempo Secado por sensor La secadora detectará automáticamente la humedad de la colada y determinará el tiempo de funcionamiento necesario bas...

Страница 35: ...son sujetas a cambio por el fabricante Nombre Secadora Eléctrica y a Gas Suministro de Energia 120V 60Hz 400 W Tamaño 68 6 cm X 73 7 cm X 111 cm Capacidad de la Secadora 198 L Peso 57 2 kg ACCESORIOS Parrilla de secado 1 Vea la página 26 para su uso ...

Страница 36: ...quier pieza defectuosa en material o mano de obra a lo largo del período cubierto por la garantia comenzando desde el dia compra Para su seguridad debe seguir las recomendaciones de este manual Para reducir el riesgo de incendio o explosión o choque eléctrico o para prevenir daños a la propiedad lesiones personales o muerte cuando use su artefacto siga las precauciones básicas incluyendo las sigui...

Страница 37: ...e hayan sido expuestos a aceite de cocina dentro de la secadora Artículos contaminados con aceite de cocina pueden contribuir a una reacción química causante de incendiar una carga 14 No use suavizantes de telas o productos para eliminar la estética a menos que sea recomendado por el fabricante de estos productos INSTRUCCIONES DE CONEXIÓN A TIERRA Este artefacto debe estar conectado a tierra En ca...

Страница 38: ...iguientes No almacene o use gasolina solventes para lavado en seco o cualquier otro vapor o líquido inflamable en el área adyacente a este artefacto No seque nada que alguna vez haya tenido contacto con algo inflamable aún después de lavarlo Ninguna lavadora puede remover completamente el aceite No seque ningún artículo que haya tenido contacto con cualquier clase de aceite incluyendo aceite de co...

Страница 39: ... libre 14 cm detrás de la secadora para el conducto de escape con el codo Colocación de la Secadora PASO 1 Son necesarias ciertas holguras mínimans de separación arriba por debajo y a los lados de la unidad como puede apreciar en las ilustraciones siguientes Las holguras mínimas necesarias son las que marcan las ilustraciones de abajo Recuerde siempre las instrucciones siguientes al instalar en un...

Страница 40: ...cadora puede ser instalada de manera que abra hacia la izquierda o hacia la derecha Siga estos procedimientos para invertir la dirección en que su puerta abre Con la puerta completamente ablerta remueva el tornillo inferior de cada bisagra en la cara de la secadora Inserte los tornillos hasta la mitad en los agujeros SUPERIORES para cada bisagra en el lado opuesto de donde usted removió los tapone...

Страница 41: ... que la bisagra superior y la inferior estén sobre los tornillos superiores insertados en el Paso 2 Remueva los tornillos restantes del lado de la apertura del que la puerta se removió Con estos tornillos asegure las bisagras Apriete lao dos tormillos superiores de cada bisagra reinserte los tapones en el lado de donde la puerts se removió Remeuva los tornillos que sostienen la manija y los espaci...

Страница 42: ...ase a través de áreas sin calentamiento con el fin de reducir la condensació y la acumulación de pelusas en las paredes de la tubería y POR FAVOR TENGA CUIDADO YA QUE DE NO INSTALAR CORRECTAMENTE EL SISTEMA DE ESCAPE ANULARÁ LA GARANTÍA DE LA SECADORA 2 1 Separe y remueva el botòn que iguala la direcciòn de ventilaciòn deseada El lado derecho no es disponible en Secadoras de Gas es el órden de tra...

Страница 43: ...tro de gas en su cuarto de lavado y verifique todas las conexiones de la tubería internas y externas para detectar fugas de gas utilizando un detector líquido de fugas no corrosivo 5 Para una conexión a gas LP Petróleo Licuado refiérase a la sección de este manual sobre Requerimientos e Instrucciones del Gas 1 Conector flexible nuevo de acero inoxidable Utilice este tipo de conector sólo si es per...

Страница 44: ... AGUA 0 6 pulgadas 1 5 cm Confirmación de la Fuente de Calor en Secadoras a Gas Cierre la puerta al tambor compartimiento de secado de la secadora y después de haber completado todos los pasos de este manual para la instalación correcta de esta secadora encienda la secadora en temperatura caliente como mejor se describe en las instrucciones de operación provistas con la secadora Después que la sec...

Страница 45: ...nferior 5 Las secadoras a gas pueden ser ventiladas hacia el exterior usando el panel trasero izquierdo o inferior Las secadoras a gas no pueden ser ventiladas al exterior usando el panel del lado derecho debido a la cubierta del quemador 6 El ducto de escape de la secadora debe estar fijo a la estructura de la casa prefabricada o móvil y el ducto de escape debe estar hecho de un material que resi...

Страница 46: ... No 10 A W G de cobre únicamente listado por U L Underwriters Laboratories o como lo requieran los códigos locales Si es de más de 15 pies 4 50 m use un cable No 8 A W G de cobre únicamente listado por U L Underwriters Laboratories o como lo requieran los códigos locales Deje suficiente holgura en el cableado de manera que la secadora pueda ser movida de su posición cuando sea necesario d La conex...

Страница 47: ... el cable de tierra verde del cordón de poder al tornillo de tierra externo y mueva el cable de tierra neutral fuera del aparato y conéctelo al tornillo central 4 Asegúrese que el tornillo de alivio de tensión este apretado Asegure que todo el bloque de tuercas esten bien apretados y el cable eléctrico de poder este en la posición correcta Utilice las instrucciones en esta sección si su casa tiene...

Страница 48: ...tado Asegure que todo el bloque de tuercas esten bien apretados y el cable eléctrico de poder este en la posición correcta 1 Conecte un cable neutral blanco al cordón de poder para centrar la terminal del tornillo 2 Conecte un cable rojo y otro Negro en las terminales izquierdas y derechas de los tornillos 3 Conecte el cable de tierra verde del cordón de poder al tornillo de tierra externo y mueva...

Страница 49: ...centrar la terminal del tornillo 2 Conecte el cable de tierra verde del cordón de poder al tornillo de tierra externo y mueva el cable de tierra neutral fuera del aparato y conéctelo al tornillo central 3 Conecte un cable rojo y otro Negro en las terminales izquierdas y derechas de los tornillos 4 Asegúrese que el tornillo de alivio de tensión este apretado Asegure que todo el bloque de tuercas es...

Страница 50: ...or favor haga que un técnico o compañía calificada por ejemplo un electricista calificado o su compañía eléctrica local verifique el suministro eléctrico de su cuarto de lavado y corrija cualquier problema Vca Vca Vca 120 120 120 120 Voltios 60 Hertz con Enchufe de 3 Clavijas con Conexión a Tierra Las siguientes son instrucciones adicionales sobre las conexiones y requerimientos eléctricos para la...

Страница 51: ...ual sólo le da energía a eseelectrodoméstico y no tiene salidas adicionales o sucursal de circuitos otras sucursales de circuitos Chequear la página de las especificaciones en este manual de usuario para estar seguro No se debe sobre cargar la pared de las salidas de energía Sobrecargar la pared de salida de energía es peligroso también lo es tener la pared salida de energía suelta o dañada cordon...

Страница 52: ...Nacional de Gas Combustible ANSI Z223 1 Un conector de tubería N P T de 1 8 pulgada debe ser instalado como se muestra Instrucciones y ADVERTENCIAS Conecte la secadora al tipo de gas indicado en la placa de la secadora Utilice conectores nuevos flexibles de acero inoxidable Utilice cinta de Teflón y sellador de uniones insoluble en gas LP en todas las roscas de las tuberías Purgue el suministro de...

Страница 53: ...exterior de la tubería de escape debe tener una campana con compuertas con bisagras para evitar corrientes de aires cuando la secadora no está en uso 2 El ducto de escape debe ser de 4 pulgadas 10 2 cm de diámetro sin obstrucciones El ducto de escape debe mantenerse lo más corto posible Asegúrese de limpiar cualquier ducto viejo antes de instalar su nueva secadora 3 Se recomienda un ducto de metal...

Страница 54: ...e desconectarlos al darle mantenimiento a la secadora debido a que errores en el cableado pueden causar lesiones serias a usted y daño a su secadora 1 Limpie el filtro de pelusa antes o después de haber secado cada carga Siempre asegúrese que el filtro de pelusa esté limpio antes de empezar una nueva carga debido a que un filtro de pelusa obstruido puede aumentar el tiempo de secado 2 Para limpiar...

Страница 55: ...ecadora No seque nada que haya tenido contacto con algo inflamable aún habiéndolo lavado El no llevar a cabo estas instrucciones puede resultar en muerte explosión o incendio MUY Pelogro de Explosión Use este botón para encender o apagar el aparato Las siguientes son las instrucciones para encender y utilizar su nueva secadora Por favor refiérase a las secciones especificas de este manual para inf...

Страница 56: ...algodón NORMAL Ropa de Trabajo pana PLANCHADO PERMANENTE Sintéticos planchado permanente ULTRA DELICADOS Prendas de ejercicio encaje etc DELICADOS Ropa Interior playeras blusas 1 Sensor de secado 2 Secado manual Use los Secado Manual para seleccionar una cantidad especifica de tiempo de secado y una temperatura de secado Cuando Secado Manual es seleccionado la pantalla del Tiempo Restante Estimado...

Страница 57: ... aquí para rellamarlos con un simple toque de un botón Esta opción le ayuda a evitar que queden arrugas en sus prendas de vestir Cuando seleccione la opción libre de arrugas la secdora dará vueltas periódicamente hasta 3 horas una vez completado el ciclo Puede usar esta opción en casi de que no pueda sacar la colada terminado el secado 1 Seleccione un ciclo 2 Cambie NIVEL DE SECADO y CONTROL TEMP ...

Страница 58: ...o las temperaturas del Secado con Aire Refiérase a la siguiente tabla Encienda la secadora El perchero de secado viene incluido en su secadora Retire y deseche el material envolvente antes de usarlo Use el Secado con Parrilla para artículos que usted no quiera secar dando vueltas así como suéteres Cuando use el perchero de secado con calor el aire caliente dentro de la secadora fluirá en una traye...

Страница 59: ...a Illegible parts cannot read properly please re send Los siguientes son ejemplos de cargas para Secadoras de Súper Capacidad Ropas de Uso Pesado 4 pantalones vaqueros 4 pantalones de trabajo 4 camisas de trabajo Carga Mixta 3sabanas 1grande 2medianas 4fundasdealmohadas 3camisas 3blusas Toallas 10 toallas de baño 10 toallas de mano 2pantalonesdeejercicios 2sudaderas 14pañosparalimpiar 9 camisetas ...

Страница 60: ...asos Usar los dedos a traves del filtro Aspire el filtro Lave el filtro con jabòn y agua caliente Seque fuertemente y reemplace 2 Limpie la puerta transparente para mantener una vista clara a traves del vidrio Mantenimiento 5 Pausar o reiniciar Para pausar la secadora en cualquier momento Abra la puerta o pulse INCIO PAUSA una vez Para reiniciar la secadora Cierre la puerta Pulse INCIO PAUSA Nota ...

Страница 61: ...u casa y cambie los fusibles o reconecte los disyuntores INPORTANTE generalmente las secadoras eléctricas usan dos fusibles o disyuntores Confirme que las válulas de apagado de gas de la gas de la casa y de la secadora estén completamente abriertas Está el suministro o servicio de gas bloqueado o apagado Qué Hacer 2 Problema Mi Secadora no Calienta Pregunta Siguió usted las instrucciones del empaq...

Страница 62: ... carga de ropa Tiente la ropa exceso de electricidad estática Sobrecargó su secadora Colocó algún papel servilleta u orto material similar en la carga Qué Hacer 4 Problema Hay Pelusa en la Ropa Pregunta Utiliza suavizante de tela Trate usando un suavizante de telas para reducir la electricidad estática El secado en exceso de la carga puede causar una acumulación de electricidad estática Trate usan...

Страница 63: ... Si están secando pocos artículos añada unas cuenta piezas más para ayudar a una adecuada acción giratoria Secó secando cargas grandes de ropa pesada Secó los controles de secado ajustados correctamente Está el filtro de pelusa limpio antes de cada carga nueva Están los ductos de escape limpios y debidamente configurados Está el fusible fundido o el disyuntor disparado Sobrecargó su secadora Muy p...

Страница 64: ...32 MEMO ...

Отзывы: