


14
PC Connection (USB)
- more you can do
Connecting a PC
Connect the unit to your PC using an optional USB cable. Upon connection:
• Your PC will automatically recognize any memory cards installed in the unit.
An icon representing your installed memory cards will appear as
“PF39 Memory” (Internal memory) and “Removable Disks” (External memory
card) when you open “My Computer”.
• It may take Windows several minutes to recognize and set up the device the
first time it is connected depending on your hardware configuration.
• Plug and Play Support: Windows 2000/ME/XP
• PC monitor image will appear on the screen when the unit is connected to
PC and you cannot use any buttons on the unit (Except
1
1
BAT.
and
P-SAVE
buttons).
Transferring Files
The USB 2.0 High-Speed connection makes it easy to transfer music, video, or
photo files (or any other data) quickly between the unit and PC.
Simply use the unit as you would a USB Flash Drive using basic operating sys-
tem commands.
Important Notice:
• If you need further assistance with transferring files, please refer to your
operating system’s instruction manual or on-screen help.
• Do not disconnect or otherwise interrupt the unit during transmission - this
could damage or corrupt the unit’s firmware or your files.
• If you want to format the internal memory of the unit using PC, you must
format it with FAT file system.
Double-click the “My Computer” icon on your desktop and then double-click the
“PF39 Memory” or “Removable Disks” icon that corresponds with the unit’s
internal or external memory card.
Drag your media files (or other files) to the “PF39 Memory” or “Removable
Disks”.
• You may choose to use folders/subfolders to organize your media and data.
Disconnecting from a PC
Disconnect the unit as instructed below to prevent data loss or file/firmware cor-
ruption.
1.
Double-click the green arrow in the task bar located on the lower-right side
of the PC screen (Safely Remove Hardware).
2.
Safely Remove Hardware: Select “USB Mass Storage Device” from the list
that appears and then click on “Stop”.
Stop a Hardware Device: Select “USB Mass Storage Device” from the list
that appears and then click on “OK”.
3.
When the “Safe to Remove Hardware” window appears, click the OK button
and disconnect the USB cable from the unit and your PC.
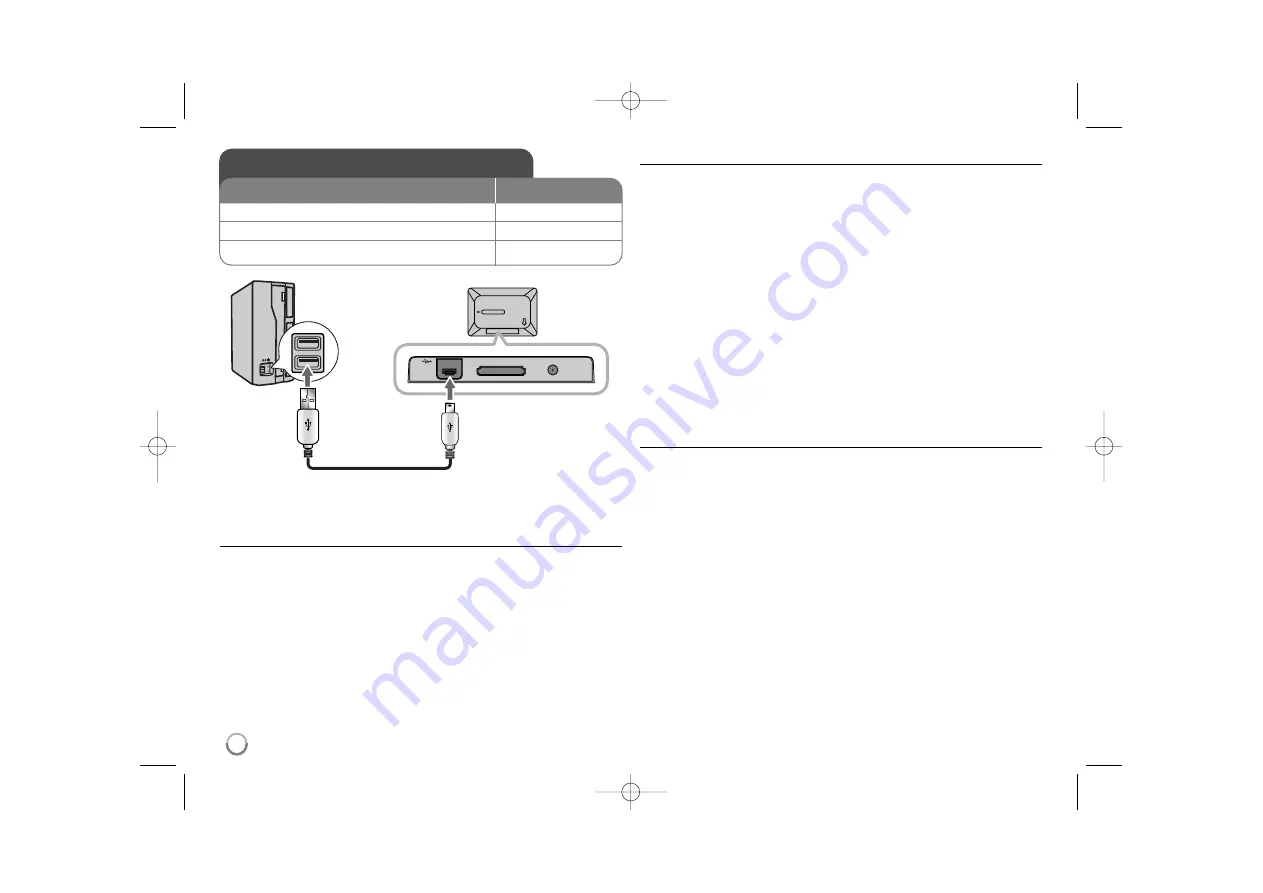
PC Connection (USB)
1 Connect the unit and PC:
–
2 Turn on the unit:
1
BAT.
3 Transfer Files:
–
BUTTON
USB Cable
PF391P-P-AHUNLLW-ENG 12/6/07 3:42 PM Page 14
Содержание PF391
Страница 16: ...PF391P P AHUNLLW ENG 12 6 07 3 42 PM Page 16 ...
Страница 17: ...MAGYAR PF391 P NO MFL42173810 R1 PF391P P AHUNLLW HUN 12 6 07 3 43 PM Page 1 ...
Страница 32: ...PF391P P AHUNLLW HUN 12 6 07 3 43 PM Page 16 ...
Страница 33: ...HRVATSKI PF391 P NO MFL42173810 R1 PF391P P AHUNLLW CRO 12 6 07 3 43 PM Page 1 ...
Страница 48: ...PF391P P AHUNLLW CRO 12 6 07 3 43 PM Page 16 ...
Страница 49: ...SRPSKI PF391 P NO MFL42173810 R1 PF391P P AHUNLLW SER 12 6 07 3 43 PM Page 1 ...
Страница 64: ...PF391P P AHUNLLW SER 12 6 07 3 43 PM Page 16 ...
Страница 65: ...ÅöãÉÄêëäà PF391 P NO MFL42173810 R1 PF391P P AHUNLLW BUL 12 6 07 3 42 PM Page 1 ...
Страница 80: ...PF391P P AHUNLLW BUL 12 6 07 3 42 PM Page 16 ...
Страница 81: ...åÄäÖÑéçëäà PF391 P NO MFL42173810 R1 PF391P P AHUNLLW MAC 12 6 07 3 42 PM Page 1 ...
Страница 96: ...PF391P P AHUNLLW MAC 12 6 07 3 42 PM Page 16 ...


