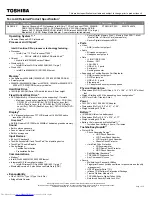
Rocky W EXPLODED VIEW
7
Location
LG P/N
SPECIFICATION
REMARKS
NKBD1
3823B00371B SWEDEN/FINLAND ROCKY W P CHICONY
KEYBOARD
ASSEMBLY
NKBD1
3823B00372A DENMARK ROCKY W CHICONY
KEYBOARD
ASSEMBLY
NKBD1
3823B00372B DENMARK ROCKY W P CHICONY
KEYBOARD
ASSEMBLY
NKBD1
3823B00373A CANADIAN FRENCH ROCKY W CHICONY
KEYBOARD
ASSEMBLY
NKBD1
3823B00373B CANADIAN FRENCH ROCKY W P CHICONY
KEYBOARD
ASSEMBLY
NKBD1
3823B00374A TURKEY ROCKY W CHICONY
KEYBOARD
ASSEMBLY
NKBD1
3823B00374B TURKEY ROCKY W P CHICONY
KEYBOARD
ASSEMBLY
NKBD1
3823B00375A ITALY ROCKY W CHICONY
KEYBOARD
ASSEMBLY
NKBD1
3823B00375B ITALY ROCKY W P CHICONY
KEYBOARD
ASSEMBLY
NKBD1
3823B00376A HUNGARY ROCKY W CHICONY
KEYBOARD
ASSEMBLY
NKBD1
3823B00376B HUNGARY ROCKY W P CHICONY
KEYBOARD
ASSEMBLY
NKBD1
3823B00377A GERMAN ROCKY W CHICONY
KEYBOARD
ASSEMBLY
NKBD1
3823B00377B GERMAN ROCKY W P CHICONY
KEYBOARD
ASSEMBLY
NKBD1
3823B00378A BRAZIL ROCKY W CHICONY
KEYBOARD
ASSEMBLY
NKBD1
3823B00378B BRAZIL ROCKY W P CHICONY
KEYBOARD
ASSEMBLY
NODD1
2029B0MW10C GCC-4244N HLDS 8X 24X 24X 24X FOR ROCKY-F
COMBO,
ASSEMBLY
NODD1
2026B2A01TU GSA-4082N HLDS 8X 24X 24X 24X 8X 24X 10X 2X 2X 2.4X 2.4X 2X 24X
DVD
NOTE BOOK FOR ROCKY-F
REWRITABLE
Содержание P1
Страница 2: ...0 Service Manual S1 P1 LG Electronics ...
Страница 21: ...19 System Block Diagram Ch3 System information ...
Страница 31: ...29 Ch3 System information c Select File Format as Image Files iso d Open Image File iso which is sent from LGE ...
Страница 32: ...30 Ch3 System information e Tab Next then burning will be started f Burn process completed as below and tab OK ...
Страница 59: ...57 2 Pull the HDD Assy out in the direction shown below Ch5 Removing and replacing a part ...
Страница 61: ...59 2 Disconnect the WLAN Card Antenna cable then remove the WLAN Card Ch5 Removing and replacing a part ...
Страница 63: ...61 3 Disconnect the keyboard connector Ch5 Removing and replacing a part ...
Страница 65: ...63 Ch5 Removing and replacing a part ...
Страница 68: ...66 Ch5 Removing and replacing a part ...
Страница 72: ...70 Ch5 Removing and replacing a part ...
Страница 76: ...74 3 Remove 5 screws 5 M2 5 x L6 0 1SZZBA4080J 1 Qty Specification FRU No No Ch5 Removing and replacing a part ...
Страница 77: ...75 4 Remove the Cardbus 5 in 1 Dummy Ch5 Removing and replacing a part ...
Страница 79: ...77 Ch5 Removing and replacing a part ...
Страница 81: ...79 3 Remove the Fan Assembly 2 Disconnect the Fan Assembly connector Ch5 Removing and replacing a part ...
Страница 83: ...81 3 Remove the Main Board Ch5 Removing and replacing a part ...
Страница 86: ...84 3 Remove the Audio sub board Ch5 Removing and replacing a part ...
Страница 88: ...86 2 Remove the Finger Printer Ch5 Removing and replacing a part ...
Страница 90: ...88 2 Remove the Touchpad Ch5 Removing and replacing a part ...
Страница 92: ...90 2 Disassemble the LCD Hook located on top of LCD Ch5 Removing and replacing a part ...
Страница 93: ...91 3 Remove a screw 1 M2 5 x L4 5 1SZZBA4080F 1 Qty Specification FRU No No Ch5 Removing and replacing a part ...
Страница 97: ...95 Ch5 Removing and replacing a part ...
Страница 106: ...Rocky W EXPLODED VIEW 2 NSCRC NBRKH NSCRC NCSNH NHDD1 NLAN1 NCVRC NMEM1 NCVRS ...
Страница 113: ...Rocky W EXPLODED VIEW 9 NSCR2 NSCR2 NSCR2 NSCR2 NSUBB NSUBT NSUBF NSUBA NSCR2 ...
Страница 118: ...Rocky W EXPLODED VIEW 14 NSCR7 NSCR7 NFAN1 NSCRA NFAN2 NSCR7 NMDM1 NCPU1 NMEM1 ...