


ENGLISH
7
•
Remove the stand before installing the TV on a wall mount
by performing the stand attachment in reverse.
•
For more information of screws and wall mount bracket,
refer to the Separate purchase.
•
If you intend to mount the product to a wall, attach VESA
standard mounting interface (optional parts) to the back
of the product. When you install the set to use the wall
mounting bracket (optional parts), fix it carefully so as
not to drop.
•
When mounting a TV on the wall, make sure not to install
the TV by hanging the power and signal cables on the
back of the TV.
•
Do not install this product on a wall if it could be exposed
to oil or oil mist. This may damage the product and cause
it to fall.
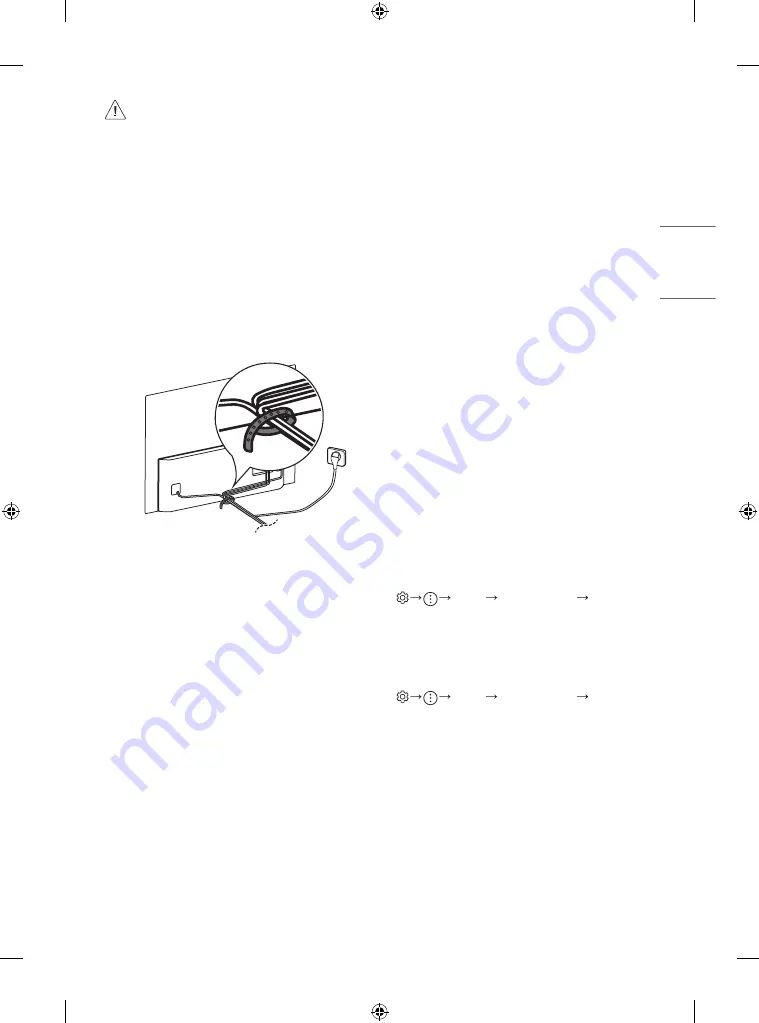
•
Please use the accessory cable holder when hanging on
the wall. (Only OLED55/ 65/77CX*)
Connections
Connect various external devices to the TV and switch input modes to
select an external device. For more information of external device’s
connection, refer to the manual provided with each device.
Antenna/Cable
Connect the TV to a wall antenna socket with an RF cable (75 Ω).
•
Use a signal splitter to use more than 2 TVs.
•
If the image quality is poor, install a signal amplifier properly to
improve the image quality.
•
If the image quality is poor with an antenna connected, try to
realign the antenna in the correct direction.
•
An antenna cable and converter are not supplied.
•
This TV cannot receive ULTRA HD (3840 x 2160 pixels) broadcasts
directly because the related standards have not been confirmed.
Other connections
Connect your TV to external devices. For the best picture and audio
quality, connect the external device and the TV with the HDMI cable.
Some separate cable is not provided.
HDMI
•
When connecting the HDMI cable, the product and external devices
should be turned off and unplugged.
•
Supported HDMI Audio format (Depending on model):
True HD (48 kHz),
Dolby Digital / Dolby Digital Plus (32 kHz / 44.1 kHz / 48 kHz),
PCM (32 kHz / 44.1 kHz / 48 kHz / 96 kHz / 192 kHz)
(OLED55BX*)
•
[Picture] [Additional Settings] [HDMI Ultra
HD Deep Colour]
-
On: Support 4K @ 50/60 Hz (4:4:4, 4:2:2, 4:2:0)
[3,4 port Only] 4K @ 100/120 Hz (4:4:4, 4:2:2, 4:2:0)
-
Off: Support 4K @ 50/60 Hz (4:2:0)
(OLED48/55/65/77CX*)
•
[Picture] [Additional Settings] [HDMI Ultra
HD Deep Colour]
-
On: Support 4K @ 50/60 Hz (4:4:4, 4:2:2, 4:2:0),
4K @ 100/120 Hz (4:4:4, 4:2:2, 4:2:0)
-
Off: Support 4K @ 50/60 Hz (4:2:0)
If the device connected to Input Port also supports Ultra HD Deep
Colour, your picture may be clearer. However, if the device doesn’t
support it, it may not work properly. In that case, change the TV’s
[HDMI Ultra HD Deep Colour] setting to Off.
Содержание OLED55CXPCA
Страница 15: ...ENGLISH 15 ...


