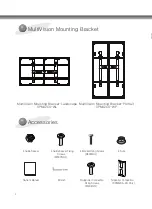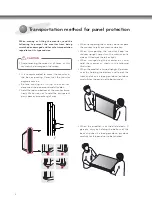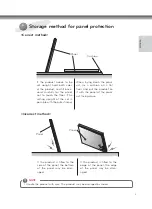
6
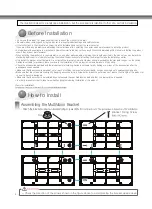
How to Install
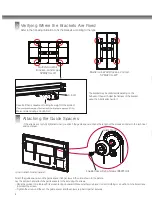
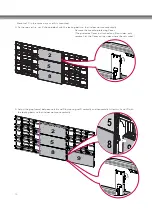
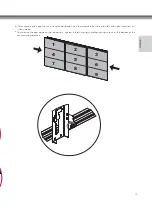
- Attach the brackets using two bracket fixing screws (M6
Assembling the MultiVision Bracket
1
Nut
Before Installation
* Do not use this product for purposes other than to attach the monitor to the wall.
* Be careful when installing and using the bracket to prevent product damage and safety hazards.
* If the instructions in the manual are unclear, stop the installation and contact the service center.
If you are still having problems understanding the instructions after contacting the center, seek a professional to install the product.
* An individual with experience in mechanical and architectural fields may not have any difficulty understanding this manual or installing the product,
even if they are not a professional.
* When installing the bracket on a concrete wall or on any other walls capable of holding the strength specified in the manual, you may detach the
standard gap bracket for stud wall mounting then follow the instructions for attaching the bracket to make the installation easier.
* Only install the bracket on vertical walls. Do not install the bracket on a wall inclined at an angle, exceeding the standard range or on the ceiling.
Salitek is not liable for problems that occur due to the installation of the product on a slanted wall or on the ceiling.
* Check the accessories provided with the product before installing. Salitek is not liable for any damage to or loss of the accessories after the
package has been opened.
* Make sure that the accessories are kept out of reach of children to prevent safety accidents, such as choking due to swallowing small parts.
* Make sure that the screws are fixed tightly. Applying excessive force to screws may impair the performance or reduce the strength of the product, or
cause it to become damaged.
* Make sure that the monitor to be installed does not exceed the specified tension load and that no external force is applied.
* In order to prevent accidents, take care when handling tools during installation of the product.
<Tools for Installation>
Bracket Fixing Screw
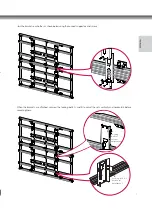
The illustration depicts a landscape installation, but the procedure is identical to that of a portrait installation.
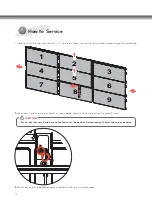
Check the direction of the arrows shown in the figure above to avoid placing the bracket upside down.
CAUTION

