


Using Windows® 8.1
53
3
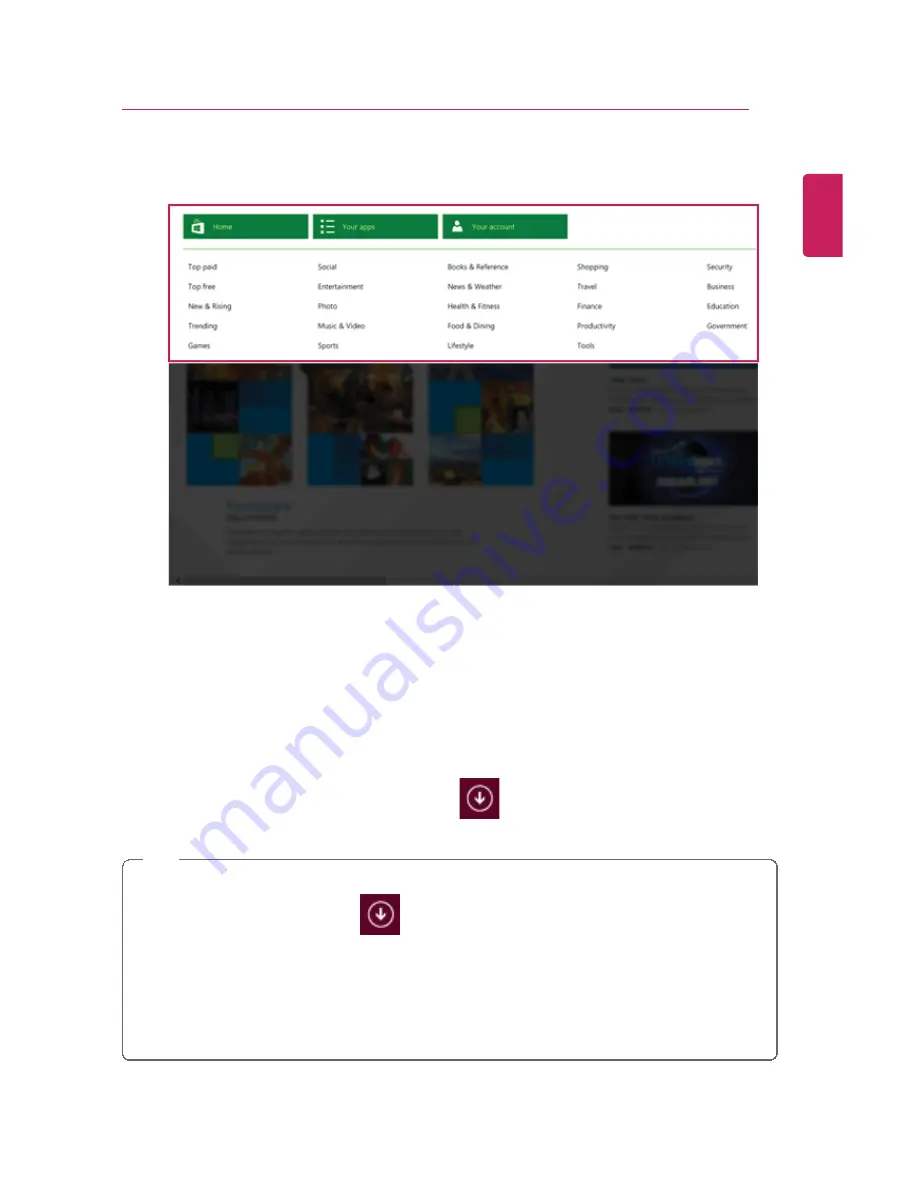
Right-click the mouse to open the category details.
4
Select an app in a category you want.
5
When the detailed app screen appears, click the
[Install]
button.
If a local account is being used, a login screen appears.
Login with a Microsoft account, or press the
[Register New Account]
button to create
an account in accordance with the instructions.
6
After a while, an Installation Guide message appears on the top-right of the screen.
7
When the installation is complete, click the [
] icon on the Start screen to check the
apps installed in the list of apps.
TIP
You can add a newly installed app tile on the Start screen as follows:
1
On the Start screen, press [
] icon.
2
Right-click on the installed app in the App list, then press the [Lock in Start Screen]
button.
(Enter the name of the app in the search field and then you can find the app installed
faster.)
3
The app tile selected is added to the
Start screen
.
ENGLISH
Содержание LG29V95
Страница 1: ......
Страница 26: ...26 Tips Important Safety Precautions ENGLISH ...
Страница 27: ...Tips Important Safety Precautions 27 ENGLISH ...
Страница 31: ...Using Windows 8 1 31 ENGLISH ...
Страница 37: ...Using Windows 8 1 37 ENGLISH ...
Страница 46: ...46 Using Windows 8 1 2 When the title bar appears click the icon at the top right to close the app ENGLISH ...
Страница 50: ...50 Using Windows 8 1 ENGLISH ...
Страница 52: ...52 Using Windows 8 1 2 The basic categories appear on the Store screen ENGLISH ...
Страница 60: ...60 Using Windows 8 1 2 Move the cursor to the top center of the running app screen ENGLISH ...
Страница 61: ...Using Windows 8 1 61 3 When you drag the cursor down the screen is reduced in size ENGLISH ...
Страница 64: ...64 Using Windows 8 1 6 Click on the empty screen to go to the Start screen ENGLISH ...
Страница 85: ...Using the PC 85 8 As shown in the following figure channels are then searched for automatically ENGLISH ...
Страница 103: ...Using the PC 103 2 In the Charms click Settings Change PC Settings ENGLISH ...
Страница 105: ...Using the PC 105 5 When a device is found click the device to connect ENGLISH ...
Страница 106: ...106 Using the PC 6 When the passwords are matched click Yes to complete the connection ENGLISH ...
Страница 108: ...108 Using the PC 3 In the Charms click Settings Control Panel View By Small Icon Network and Sharing Center ENGLISH ...
Страница 109: ...Using the PC 109 4 Click Change Adapter Settings ENGLISH ...
Страница 110: ...110 Using the PC 5 Right click Ethernet and select Properties ENGLISH ...
Страница 111: ...Using the PC 111 6 Select Internet Protocol Version 4 TCP IPv4 and click Properties ENGLISH ...
Страница 114: ...114 Using the PC 3 Closest available Access Point wireless network is automatically searched ENGLISH ...
Страница 121: ...Using Software 121 2 Click the All Lists menu to access the update and install lists ENGLISH ...
Страница 131: ...Using Software 131 2 Select the Reader Mode On menu to switch to Reader Mode as shown in the figure ENGLISH ...
Страница 140: ...140 Restoring the System ENGLISH ...
Страница 147: ...Setup and Upgrade 147 1 Reboot the system and press F2 ENGLISH ...
Страница 150: ...150 Setup and Upgrade 2 When the following screen appears click Enter in the Set Supervisor Password menu ENGLISH ...
Страница 154: ...154 Setup and Upgrade 1 After opening the system setup screen click the Security button ENGLISH ...
Страница 155: ...Setup and Upgrade 155 2 When the following screen appears click Enter in the Set User Password menu ENGLISH ...
Страница 159: ...Setup and Upgrade 159 1 After opening the system setup screen click the Security button ENGLISH ...
Страница 166: ...166 Setup and Upgrade 7 When the following message appears click YES The PC will restart ENGLISH ...
Страница 169: ...Setup and Upgrade 169 2 When the following screen appears click Enter in the Set Supervisor Password menu ENGLISH ...
Страница 171: ...Setup and Upgrade 171 4 Press Enter in Enter New Password and Confirm New Password ENGLISH ...
Страница 173: ...Setup and Upgrade 173 7 When the following message appears click YES The PC will restart ENGLISH ...
Страница 177: ...Setup and Upgrade 177 5 Press Enter in Enter New Password and Confirm New Password ENGLISH ...
Страница 179: ...Setup and Upgrade 179 8 When the following message appears click YES The PC will restart ENGLISH ...
Страница 181: ...Setup and Upgrade 181 2 When the Exit menu appears click Load Setup defaults ENGLISH ...
Страница 185: ...Setup and Upgrade 185 2 When the system setup screen appears click the Boot button ENGLISH ...
Страница 188: ...188 Setup and Upgrade Selecting a Boot Device to Use 1 Reboot the system and press F10 ENGLISH ...
Страница 192: ...192 Setup and Upgrade 1 Loosen the screw in the stand with a screwdriver or coin to separate the stand ENGLISH ...
Страница 193: ...Setup and Upgrade 193 2 Loosen the two screws at the bottom of the stand using a Philips screwdriver ENGLISH ...
Страница 195: ...Setup and Upgrade 195 4 Loosen the two screws indicated in the figure to separate the memory cover ENGLISH ...
Страница 199: ...Setup and Upgrade 199 3 Select an item size to proceed as instructed ENGLISH ...
Страница 201: ...FAQ 201 2 When the following screen appears select a language you want to use and then click Next ENGLISH ...
Страница 202: ...202 FAQ 3 When the following screen appears select the I Agree button and then click the Next button ENGLISH ...
Страница 205: ...FAQ 205 3 Select an item size to proceed as instructed ENGLISH ...
Страница 209: ...FAQ 209 ENGLISH ...
Страница 213: ...FAQ 213 If a program was running already you need to exit and restart the program for it to produce sound ENGLISH ...
Страница 216: ...216 FAQ 3 Closest available Access Point wireless network is automatically searched ENGLISH ...
Страница 219: ...FAQ 219 3 In the Charms click Settings Control Panel View By Small Icon Network and Sharing Center ENGLISH ...
Страница 220: ...220 FAQ 4 Click Change Adapter Settings ENGLISH ...
Страница 221: ...FAQ 221 5 Right click Ethernet and select Properties ENGLISH ...
Страница 222: ...222 FAQ 6 Select Internet Protocol Version 4 TCP IPv4 and click Properties ENGLISH ...


