


Operating
8
Operating
3
Operation
Basic operations
1. Turn the unit on by pressing any key
on the unit.
2. Select a source by pressing SRC.
3. Rotate the volume knob to adjust the
volume on the unit.
Or press VOLUME
W
/
S
on the
remote control.
Turning off the sound
temporarily
1. Press MUTE to mute your unit.
Or press MUTE on the remote control.
2. Press it again to cancel
Using EQ (Equalizer)
EQ is to increase or decrease the signal
strength of audio frequencies. The
function helps you to enjoy sound more
plentifully.
Press EQ on the unit repeatedly. The
indicator lights up in the following order.
B-BOOST (BASS BOOSTER)
/
POP
/
CLASSIC
/
ROCK
/
JAZZ
/
VOCAL
/
SALSA
/
SAMBA
/
REGGAE
/
RUSSY
/
USER1
/
USER2
/
Off (Not
displayed)
Using 3D SOUND
This mode delivers outstanding surround
sound.
1. Press and hold EQ/ • 3D.
2. Press and hold it again to cancel.
3D SOUND is only available when
you use the CD/ USB. (Except iPod/
iPhone)
When you are recording, 3D
SOUND will be turned off
automatically.
,
Note
Checking the clock
1. Press DISP
2. Press it again to cancel
Turning off the display light
1. Press and hold DISP.
2. Press and hold it again to turn it on.
Under the light-off condition, press
any key, the light is turned on and
then off automatically if you don't
press it within a few seconds.
,
Note
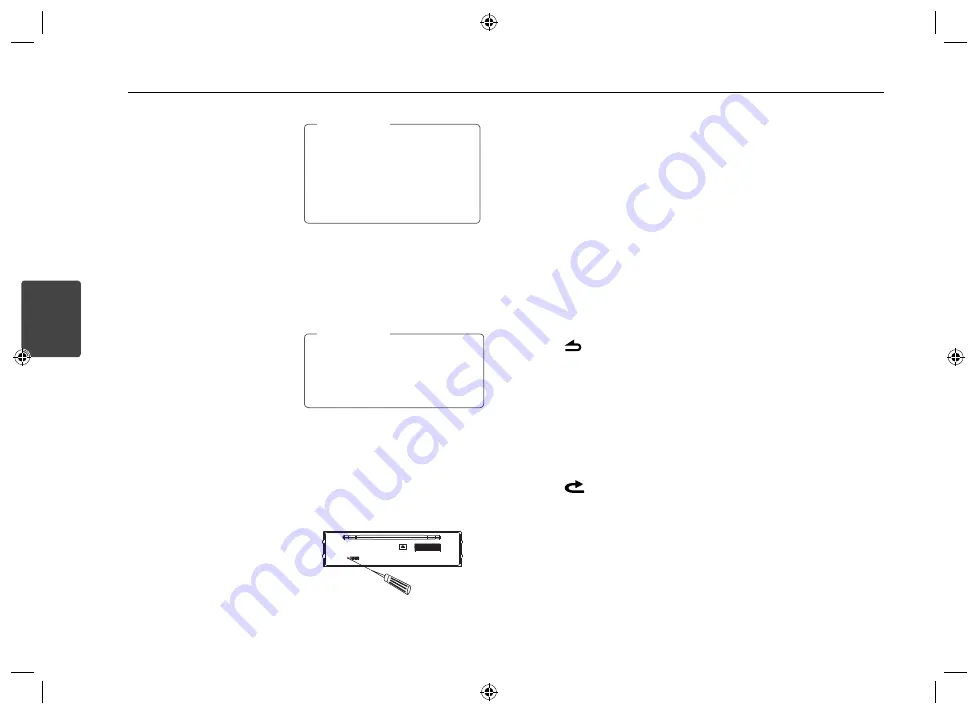
Resetting the unit
You can reset the unit when it does not
operate properly.
1. Detach the control panel.
Refer to page 6 for detaching the
control panel.
2. Press the RESET hole with a sharp
object.
Adjusting the general
settings
You can adjust [SOUND], [LIGHT] and
[OTHER] settings.
On the unit
1. Press and hold • MENU.
2. Rotate the volume knob to select
[SOUND], [LIGHT], or [OTHER] and press
it.
3. Rotate the volume knob to select the
item and press it.
4. Rotate the volume knob clockwise or
counterclockwise to adjust the level.
5. Press the volume knob to confirm the
setting.
If you want to return to the previous
step, press
.
On the Remote Control
1. Press and hold FUNC / • MENU.
2. Press
w
/
s
to select [SOUND], [LIGHT],
or [OTHER] and press ENTER.
3. Press
w
/
s
to select the mode and
press ENTER.
4. Press
w
/
s
to adjust the level.
5. Press ENTER to confirm the setting.
If you want to return to the previous
step, press
.
For [SOUND] setting
You can adjust sound quality by adjusting
the level BAL (left/right speaker), FAD
(front/rear speaker), SW (Subwoofer), SW-F
(Subwoofer frequency), A-EQ (Auto EQ).
- When you set the EQ to USER 1/2 mode.
: You can adjust the level of BAS (bass),
MID (middle), TRB(treble).
SW (Subwoofer)
You can adjust the volume of
subwoofer.
SW-F (Subwoofer frequency)
OFF/ SW 55 Hz/ SW 85 Hz/ SW 120 Hz
You can enable the subwoofer.
A-EQ (Auto EQ) OFF/ ON
AUTO EQ operates only in the music
fi le supported with genre in the device.
When you set AUTO EQ to ON, POP,
CLASSIC, ROCK, or JAZZ is automatically
selected according to the music genre.
For [LIGHT] setting
You can adjust the light eff ects by
adjusting LED MODE, USER LED, DIM, or
DIM LV.
LED MODE : You can change the LED
window color.
LED AUTO/ LED USER / LED 01 to 27
USER LED
Making the desired LED color by
adjusting the each level of RED, GREEN,
and BLUE. (USER LED is only available
when you set LED MODE to LED USER.)
Содержание LCF620IP
Страница 16: ......


