background image

20

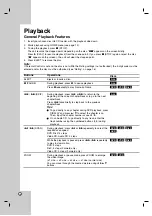
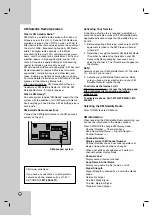
If a menu screen is displayed 

The menu screen may be displayed first after loading a
DVD or Video CD which contains a menu.

Use the 

b

B

v

V

buttons to select the

title/chapter you want to view, then press ENTER to
start playback.
Press TITLE or MENU/LIST to return to the menu
screen.

Use the number buttons to select the track you want
to view.
Press RETURN (

O

) to return to the menu screen.

Menu setting and the exact operating procedures
for using the menu may differ depending on the
disc. Follow the instructions on the each menu
screen. You may also set PBC to [OFF] under
Setup menu (see page 15).

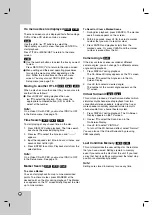
Moving to another TITLE 

When a disc has more than one title, you can move to
another title as follows:

Press DISPLAY during playback then use 

v

V

to select the title icon. Then, press the

appropriate numbered button (0-9) or 

b

B

to

select a title number.

Note:

On a Video CD with PBC, you must set PBC to OFF
in the Setup menu. See page 15

Time Search 

To start playing at any chosen time on the disc:

1. Press DISPLAY during playback. The time search

box shows the elapsed playing time.

2. Press 

v

/

V

to select the time icon and “--:--:--”

appears.

3. Input the required start time in hours, minutes, and

seconds from left to right. 

4. Press ENTER to confirm. Playback starts from the

selected time.

Note:

On a Video CD with PBC, you must set PBC to OFF
in the Setup menu. See page 15

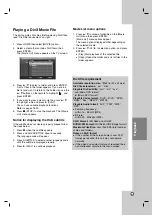
Marker Search

To enter a Marker 

You can start playback from up to nine memorized
points. To enter a marker, press MARKER at the
desired point on the disc during playback. The Marker
icon appears on the TV screen briefly. Repeat to enter
up to nine markers.

To Recall or Clear a Marked Scene

1. During disc playback, press SEARCH. The marker

search menu appears on the screen.

2. Within 5 seconds, press 

b

to select a marker

number that you want to recall or clear.

3. Press ENTER and playback starts from the

marked scene. Or, press CLEAR and the marker
number is erased from the list.

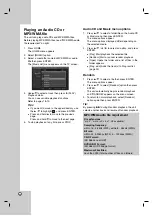
Camera Angle 

If the disc contains scenes recorded at different
camera angles, you can change to a different camera
angle during playback.

1. Press DISPLAY during playback. 

The On-Screen Display appears on the TV screen.

2. Use 

v

V

to select the Angle icon in the On-

Screen Display.

3. Use 

b

B

to select a desired angle.

The number of the current angle appears on the
TV screen.

Virtual Surround 

This unit can produce a Virtual Surround effect, which 
simulates multi-channel audio playback from two 
conventional stereo speakers, instead of the five or
more speakers normally required to listen to multi-
channel audio from a home theater system. 

1. Press DISPLAY during playback. The On-Screen

Display appears on the TV screen.

2. Use 

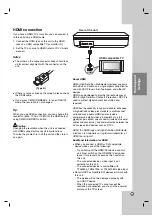
v

V

to select the Sound icon in the 

On-Screen Display.

3. Use 

b

B

to select “VIRTUAL”.

To turn off the 3D Surround effect, select “Normal”. 

You can also set the Virtual Surround by pressing
VSM repeatedly.

Last Condition Memory

This unit memorizes the user settings for the last disc
that you have viewed. Settings remain in memory
even if you remove the disc from the unit. If you load
a disc that had its settings memorized, the latest stop
position is automatically recalled.

Note: 

Settings are stored in memory for use any time.

VCD

DVD

DivX

DVD

DVD

DivX

VCD

DVD

VCD

DivX

DVD

VCD

DivX

DVD

VCD

DVD

VCD

DVD

Содержание J10D

Страница 1: ...ase read this instruction booklet carefully and completely J10D A_JA1CLLA_ENG_2490 Compact Home Theater System OWNER S MANUAL MODEL J10D SPEAKERS J10D SF J10D SA http www LG ca For questions about this product please call 1 1 8 88 88 8 5 54 42 2 2 26 62 23 3 ...

Страница 2: ...justments or carrying out procedures other than those specified herein may result in hazardous radiation exposure To prevent direct exposure to laser beam do not try to open the enclosure Visible laser radiation when open DO NOT STARE INTO BEAM The main label is attached on the exterior of the bottom of the apparatus CAUTION The apparatus should not be exposed to water dripping or splashing and no...

Страница 3: ...to ensure reliable operation of the product and to protect it from over heating The openings should never be blocked by placing the product on a bed sofa rug or other similar surface This product should not be placed in a built in installation such as a bookcase or rack unless proper ventilation is provided or the manufacturer s instructions have been adhered to 8 Do not install near any heat sour...

Страница 4: ...r TV with the Supplied Remote Control 30 Controlling other TVs with the Supplied Remote Control 30 31 Language Codes 32 Area Codes 32 Troubleshooting 33 Specifications 34 Copyright Recording equipment should be used only for lawful copying and you are advised to check carefully what is lawful copying in the area in which you are making a copy Copying of copyright material such as films or music is...

Страница 5: ... Hold the disc by the edges so that fingerprints do not get on the surface Never stick paper or tape on the disc Storing Discs After playing store the disc in its case Do not expose the disc to direct sunlight or sources of heat and never leave it in a parked car exposed to direct sunlight Cleaning Discs Fingerprints and dust on the disc can cause poor picture quality and sound distortion Before p...

Страница 6: ...corded in a compatible format there are cases in which it may not play because of the settings of the application software used to create the disc Check with the software publisher for more detailed information This unit requires discs and recordings to meet certain technical standards in order to achieve optimal playback quality Pre recorded DVDs are automatically set to these standards There are...

Страница 7: ...it to a computer are not supported 2 MP3 Player Flash type MP3 player The MP3 player requiring installation of a driver is not supported 3 USB Flash Drive Devices that support USB2 0 or USB1 1 Notes Do not extract the USB device in operating play copy move etc A back up demands to prevent a data damage If you use a USB extension cable or USB hub the USB device might not be recognized This unit can...

Страница 8: ...e level before you plug in the headphones Connecting headphones will switch off the speakers f USB Connect to a USB port of multimedia USB memory etc g 1 1 I Switches the unit ON or OFF h Remote Sensor Point the unit remote control here i HOME Accesses or removes the HOME menu j PLAY Starts playback k STOP Stops playback l PAUSE Pauses playback temporarily m CD slot loader Notes Do not push a disc...

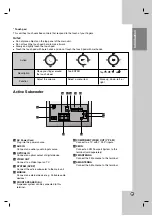
Страница 9: ...TV with Y Pb Pr inputs w XM IN Connect an XM Passport System to this terminal sold separately x FM ANTENNA Connect the FM antenna to this terminal y AM ANTENNA Connect the AM antenna to this terminal Active Subwoofer Touch pad Action Description This unit has touch sensitive controls that respond to the touch of your fingers Notes Do not place objects on the top panel of the main unit Do not touch...

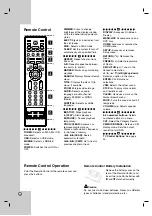
Страница 10: ... previous chapter or track d DISPLAY Accesses On Screen Display MENU LIST Accesses menu on a DVD disc HOME Accesses or removes the HOME menu SETUP Accesses or removes Setup menu RETURN O Removes the menu PRESET Select programme of Radio XM CH TUN Tunes in the desired radio station b B v V left right up down Selects an option in the menu ENTER Confirms menu selections VSM Selects the virtual sound ...

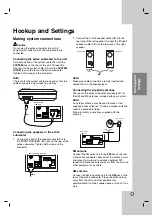
Страница 11: ...e fully inserted and seated firmly in the speaker jacks Connecting the supplied antennas The rear of the active subwoofer provides jacks for the AM and FM antennas included with your system Note An outdoor antenna may be used in place of the supplied indoor antennas To add an outdoor antenna consult a qualified installer Follow all safety instructions supplied with the antenna FM antenna Connect t...

Страница 12: ...ack on the rear of the active subwoofer using optical cable O Caution When you use HDMI connection the VIDEO OUT connection are not available Connecting an additional device There are two options for connecting an additional device to the unit Option A AUX IN L R jacks e g VCR Laser disc player Option B MOBILE jack e g Portable audio devices Option A AUX IN L R jacks 1 Connect the red plug of the ...

Страница 13: ...igh Definition Contents Protection HDCP is used to protect digital content transmitted and received HDMI has the capability to support standard enhanced or high definition video plus standard to multi channel surround sound audio HDMI features include uncompressed digital video a bandwidth of up to 5 gigabytes per second one connector instead of several cables and connectors and communication betw...

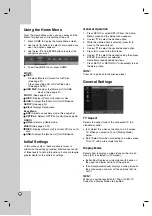
Страница 14: ...ptions but some require greater depth for the variety of settings General Operation 1 Press SETUP or select SETUP from the Home Menu screen and the Setup menu appears 2 Use v V to select the desired option 3 While the desired item is selected press B to move to the second level 4 Use v V to select the second desired option 5 Press B to move to the third level 6 Use v V to select the desired settin...

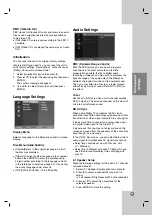
Страница 15: ...ic presentation possible thanks to digital audio technology However you may wish to compress the dynamic range of the audio output the difference between the loudest sounds and the quietest ones Then you may listen to a movie at a lower volume without losing clarity of sound Set DRC to ON for this effect Vocal Set Vocal to ON only when a multi channel karaoke DVD is playing The karaoke channels on...

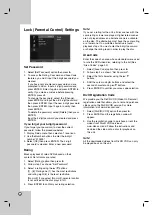
Страница 16: ...estrictive No Limit If you select No Limit parental control is not active and the disc plays in full 4 Press ENTER to confirm your rating selection Note If you set a rating for the unit all disc scenes with the same rating or lower are played Higher rated scenes are not played unless an alternate scene is available on the disc The alternative must have the same rating or a lower one If no suitable...

Страница 17: ...ting by pressing b B For details about each item see the pages in parentheses Title Current title or track number total number of titles or tracks Chapter Current chapter number total number of chapters Time Elapsed playing time See page 20 Audio Selected audio language DVD VIDEO only or audio channel See page 19 Subtitle Selected subtitle See page 19 Angle Selected angle total number of angles Se...

Страница 18: ...y Frame by Frame SKIP During playback press or to return to the beginning of the current chapter track or to go to the next chapter track Press twice briefly to step back to the previous chapter track Tips To go directly to any chapter during DVD playback press DISPLAY and press v V to select the chapter icon Then input the chapter number or use b B On an Audio CD to go directly to any track enter...

Страница 19: ...utton to select point A and point B and repeats a sequence from point A Starting point to point B End point TITLE If the current DVD title has a menu the title menu appears on the screen Otherwise the disc menu may appears MENU LIST The disc menu appears on the screen SUBTITLE During playback press SUBTITLE then press b B repeatedly to select a desired subtitle language AUDIO Press AUDIO then pres...

Страница 20: ...he Marker icon appears on the TV screen briefly Repeat to enter up to nine markers To Recall or Clear a Marked Scene 1 During disc playback press SEARCH The marker search menu appears on the screen 2 Within 5 seconds press b B to select a marker number that you want to recall or clear 3 Press ENTER and playback starts from the marked scene Or press CLEAR and the marker number is erased from the li...

Страница 21: ...r language code until the subtitle is displayed properly 4 Press B PLAY to continue playback Movie List menu options 1 Press v V to select a folder file on the Movie List menu then press ENTER Movie List menu options appear The menu options displayed differ depending on the selected media 2 Press v V b B to select an option and press ENTER Play Start playback of the selected title Open Opens the f...

Страница 22: ...e menu options displayed differ depending on the selected media 2 Press v V b B to select an option and press ENTER Play Start playback the selected title Random Start or cancel random playback Open Opens the folder and a list of files in the folder appears Prog add Adds the track s to Program list page 23 Random 1 Press v V to select a file then press ENTER The menu options appear 2 Press v V to ...

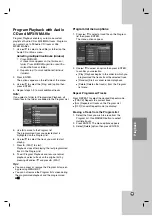
Страница 23: ...start Playback stops after playing the last programmed track in the Program list 8 To exit Program Playback and resume normal playback select a track on the original list by pressing b and v V and press B PLAY Tips You can access or remove the Program list screen by pressing MENU LIST You can not remove the Program list screen during the programmed playback and the programmed Xx x Program list men...

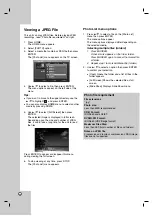
Страница 24: ...nu appears Photo List menu options 1 Press v V to select a file on the Photo List menu then press ENTER The menu options appear The menu options displayed differ depending on the selected media Selecting multiple files folders 1 Press MARKER A check mark appears on the file or folder Press MARKER again to cancel the marked file or folder 2 Repeat step 1 to mark additional file folders 2 Use v V to...

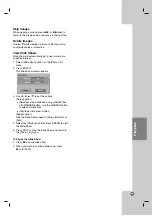
Страница 25: ...ist menu 2 Press ENTER The Slide Show menu appears 3 Use b B v V to set the options Object option Selected Views slide show only selected files with MARKER button Use the MARKER button to select multiple files All Views slide show all files Speed option Sets the Slide Show speed to Slow Normal or Fast 4 Select the Start option then press ENTER to start the Slide Show 5 Press STOP to stop the Slide...

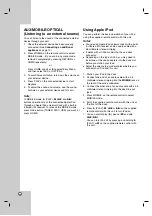
Страница 26: ...od You can perform the basic operations of your iPod using the supplied remote control with this unit Notes You need an Apple iPod universal dock with a built in infrared IR receiver and an audio cable with a 3 5 millimeter stereo miniplug It works with all iPod models that have a dock connector Depending on the type of iPod you may need to insert one of the dock adapters into the dock slot before...

Страница 27: ...l stations have already been entered the FULL message will appear in the display window for a moment and then a preset number will flash To change the preset number follow the steps 5 6 as above Listening to the Radio Preset radio stations in the unit s memory first see Presetting the radio stations on the left 1 Press TUNER until AM MW or FM appears in the display window The last received station...

Страница 28: ...l be added to your first bill 1 Before activating XM service make sure your XM equipment is tuned to the XM Preview Channel Channel 1 2 Determine your eight character XM Satellite Radio ID number by referencing the label on your XM Passport System packaging rear cover or by selecting channel 0 The ID number will appear on the display Note Carefully check your XM Satellite Radio ID The letter I O S...

Страница 29: ...ly Channel up down Use XM CH or XM CH repeatedly to select the channel you want Category Search 1 Select the Category Search mode using the CAT key on the Remote Control CAT Icon Blinking in Category Search mode 2 PRESET or changes target of category for search XM CH or XM CH selects next channel of selected category in category search mode Note Category type of current channel displays for 3 seco...

Страница 30: ...their own multimedia players Virtual sound A pending downmix technology converts 5 1 channel to 2 channel sound having directional information of audio And it makes a 2 channel or 2 1 channel feel 5 1 channel sound Controlling Your TV with the Supplied Remote Control You can control the sound level input source and power switch of your LG GoldStar TV with the supplied Remote Control You can contro...

Страница 31: ...8 43 58 PHILIPS 06 07 43 61 62 65 PIONEER 30 PORTLAND 09 PROSCAN 03 37 44 QUASAR 11 13 RADIO SHACK 16 17 23 RCA 01 03 37 44 69 REALISTIC 16 17 23 SAMPO 08 SAMSUNG 01 08 09 25 68 SANYO 28 29 SCOTT 01 08 SEARS 09 25 26 27 28 29 SEMP 64 SHARP 09 22 23 24 60 66 SIGNATURE 2000 01 06 08 09 10 23 24 33 34 SONY 12 62 SOUNDESIGN 51 SYLVANIA 01 04 05 06 07 08 35 51 SYMPHONIC 46 47 TATUNG 11 TEKNIKA 07 09 16...

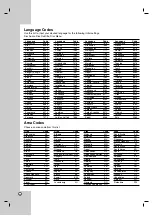
Страница 32: ...6669 Cambodian 7577 Catalan 6765 Chinese 9072 Corsican 6779 Croatian 7282 Czech 6783 Danish 6865 Dutch 7876 English 6978 Esperanto 6979 Estonian 6984 Faroese 7079 Language Code Fiji 7074 Finnish 7073 French 7082 Frisian 7089 Galician 7176 Georgian 7565 German 6869 Greek 6976 Greenlandic 7576 Guarani 7178 Gujarati 7185 Hausa 7265 Hebrew 7387 Hindi 7273 Hungarian 7285 Icelandic 7383 Indonesian 7378 ...

Страница 33: ...nto the wall outlet securely Select the appropriate video input mode on the TV so the picture from the unit appears on the TV screen Connect the video cable securely Turn on the TV Adjust the volume Disconnect the headphones Switch off MUTE Clean the disc Insert a playable disc Check the disc type color system and regional code Place the disc with the playback side down Clean the disc Cancel the R...

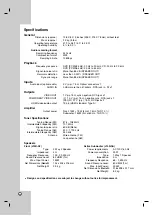
Страница 34: ...ative sync RCA jack x 1 Pb Pr 0 7 V p p 75 Ω RCA jack x 2 HDMI video audio output 19 pin HDMI standard Type A Amplifier Output power Front 75W 75W 4Ω at 1 kHz THD 10 Subwoofer 150W 3Ω at 60 Hz THD 10 Tuner Specifications Tuning Range FM 87 5 108 MHz Intermediate Frequency FM 10 7 MHz Signal to noise ratio 60 dB Mono Tuning Range AM 520 1 720 kHz Intermediate Frequency AM 450 kHz Antenna Wire anten...

Страница 35: ...P NO MFL30582490 ...

Отзывы: