


16
Recording music from CD to your USB device
- more you can do
Record Audio CD source to USB
One track recording - If the USB recording is started during playback of the
CD, the only track would be recorded into the USB.
All track recording - If the REC button is pressed at the CD stop, all track
would be recorded.
Program list recording - USB Records after selecting the tracks pressing the
PROG./MEMO. button if you want to record the track you want. (Refer to
“Creating your own program” on page 13.)
When you are recording, look out for the following
• Do not remove the USB device during USB recording. If not, an incomplete
file may be made and not deleted on PC.
• When you start the USB direct recording, you can check the recording
percentage rate on the screen.
• During the recording is no sound and not operate for volume .
• When you stop recording, the file that has been recorded at that time will be
stored.
• Playable USB REC. Bit rate : 96/128kbps (Refer to “Bit Rate” on page 10.)
• PAUSE/STEP (
X
) button does not operate during USB recording.
• USB port of the unit cannot be connected to PC. The unit cannot be used as
a storage device.
• If the USB recording is not available, “NO USB”,.“ERROR”, “USB FULL”,
“NO REC” appear on the display window.
• File will be stored to CD_REC folder as a format “TRK-001.MP3”.
• CD-G disc and the disc encoded with DTS are not recorded to USB.
• If you record more 999 files on CD_REC folder, “ERROR” appears on the
display window.
• New files are numbered in numeric sequence. If the total number of the files
are more than 999, delete some or store some in PC.
• External HDD, Multi Card reader, Locked device and MP3 player is not
supported.
• If you turn off and then on TV when the connected TV is HDMI mode,
nothing may be displayed on screen during USB recording. To solve the
problem, stop the USB direct recording.
The making of unauthorized copies of copy-protected material, including
computer programs, files, broadcasts and sound recordings, may be an
infringement of copyrights and constitute a criminal offense. This
equipment should not be used for such purposes.
Be responsible
Respect copyrights
Recording music from CD to
your USB device
ON REMOTE
1 Connect the USB device to the unit:
-
2 Select the DVD/CD function:
FUNCTION
3 Start the recording:
z
z
REC
If you want to record a desired music file
in disc to USB, record after playing
v
v V
V
, PLAY (
N
) and
back the file.
z
z
REC
4 To stop a recording:
x
x
STOP
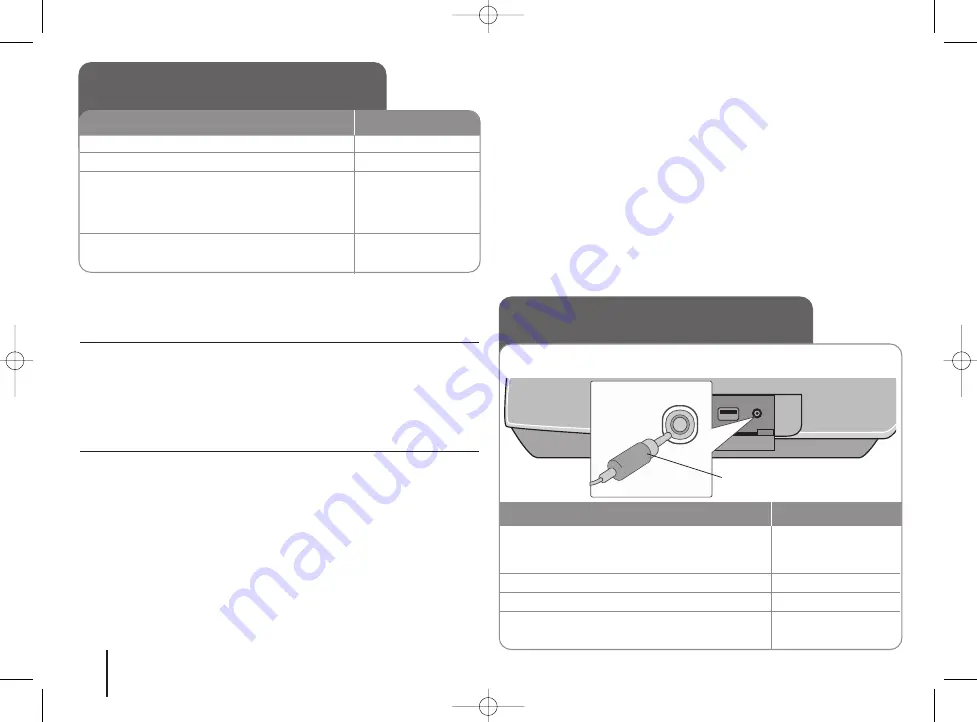
Listening to music from your
portable player
1 Connect the headphone (or line out ) jack
of the portable player into the PORT. IN on
the right side of the main unit:
-
2 Turn the power on:
POWER
3 Select the PORTABLE function:
INPUT
4 Turn the portable player on and start it
playing:
-
The player can be used to play the music from many types of portable
player
ON REMOTE
3.5mm stereo
miniplug cable
HS33S-X2.BRUSLL_ENG 10/14/08 9:45 AM Page 16
Содержание HS33
Страница 22: ...HS33S X2 BRUSLL_ENG 10 14 08 9 45 AM Page 22 ...