13
INSTALLATION
ENGLISH
Connecting the Drain Hose
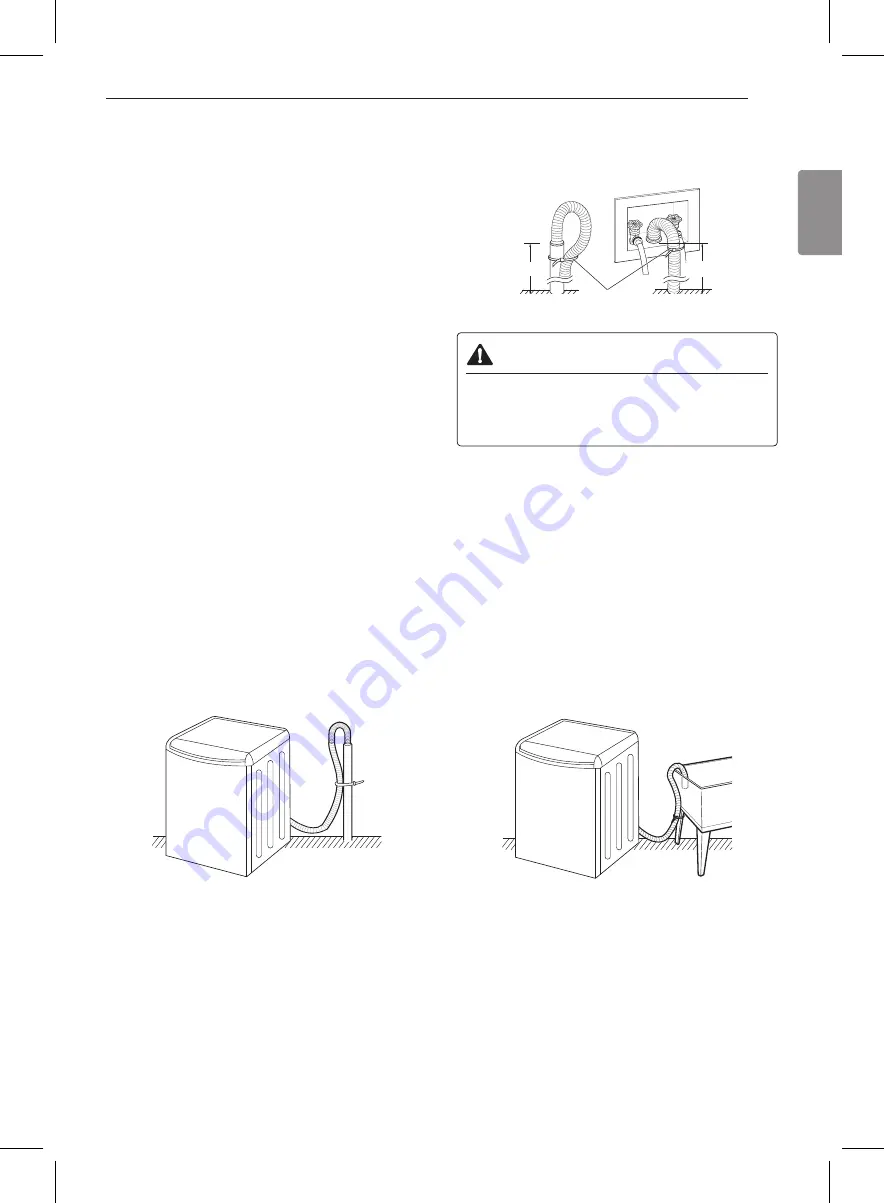
Connect the drain hose to either a standpipe or
laundry tub.
NOTE
•
The drain hose should always be properly secured.
Failure to properly secure the drain hose can result
in flooding and property damage.
•
The drain must be installed in accordance with any
applicable local codes and regulations.
•
Make sure that the drain hose is not stretched,
pinched, crushed, or kinked.
•
Do not install the drain hose with the end lower than
29.5 inches (75 cm) or higher than 96 inches (244
cm) above the bottom of the washer or more than
60 inches (152 cm) away from the washer.
•
Never create an airtight seal between the hose and
the drain with tape or other means. If no air gap
is present, water can be siphoned out of the tub
resulting in poor wash/rinse performance or clothing
damage.
•
Normal height of the end of the hose should be
approximately 35 inches (89 cm) to 47 inches (120
cm) from the floor.
Option 1: Standpipe
1
Insert the end of the drain hose into the
standpipe.
2
Use the provided tie strap to secure the drain
hose in place.
3
If the water valves and drain are built into the wall,
fasten the drain hose to one of the water hoses
with the tie strap provided (ribbed side on inside).
29.5 - 96 "
(75 - 244 cm)
29.5 - 96 "
(75 - 244 cm)
Tie strap
CAUTION
•
Do not insert the end of the drain hose into the
standpipe more than 8 inches (20 cm). Doing
so can cause siphoning, odors, or improper
draining.
NOTE
•
If the drain is large enough for the flange on the
hose to fit inside, then do not insert the flange more
than 1-2 inches into the drain.
Option 2: Laundry Tub
1
Hang the end of the drain hose over the side of
the laundry tub.
2
Use the provided tie strap to secure the drain
hose in place.
MFL68267072_EN.indd 13
2019. 2. 13. 오전 11:28
Содержание DLGX7901BE
Страница 53: ...53 MEMO MFL68267072_EN indd 53 2019 2 13 오전 11 28 ...
Страница 54: ...54 MEMO MFL68267072_EN indd 54 2019 2 13 오전 11 28 ...
Страница 107: ...53 MEMO MFL68267072_SP indd 53 2019 2 13 오전 10 32 ...

