8
Pedestal Installation Instructions
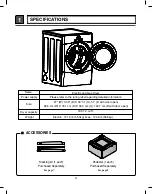
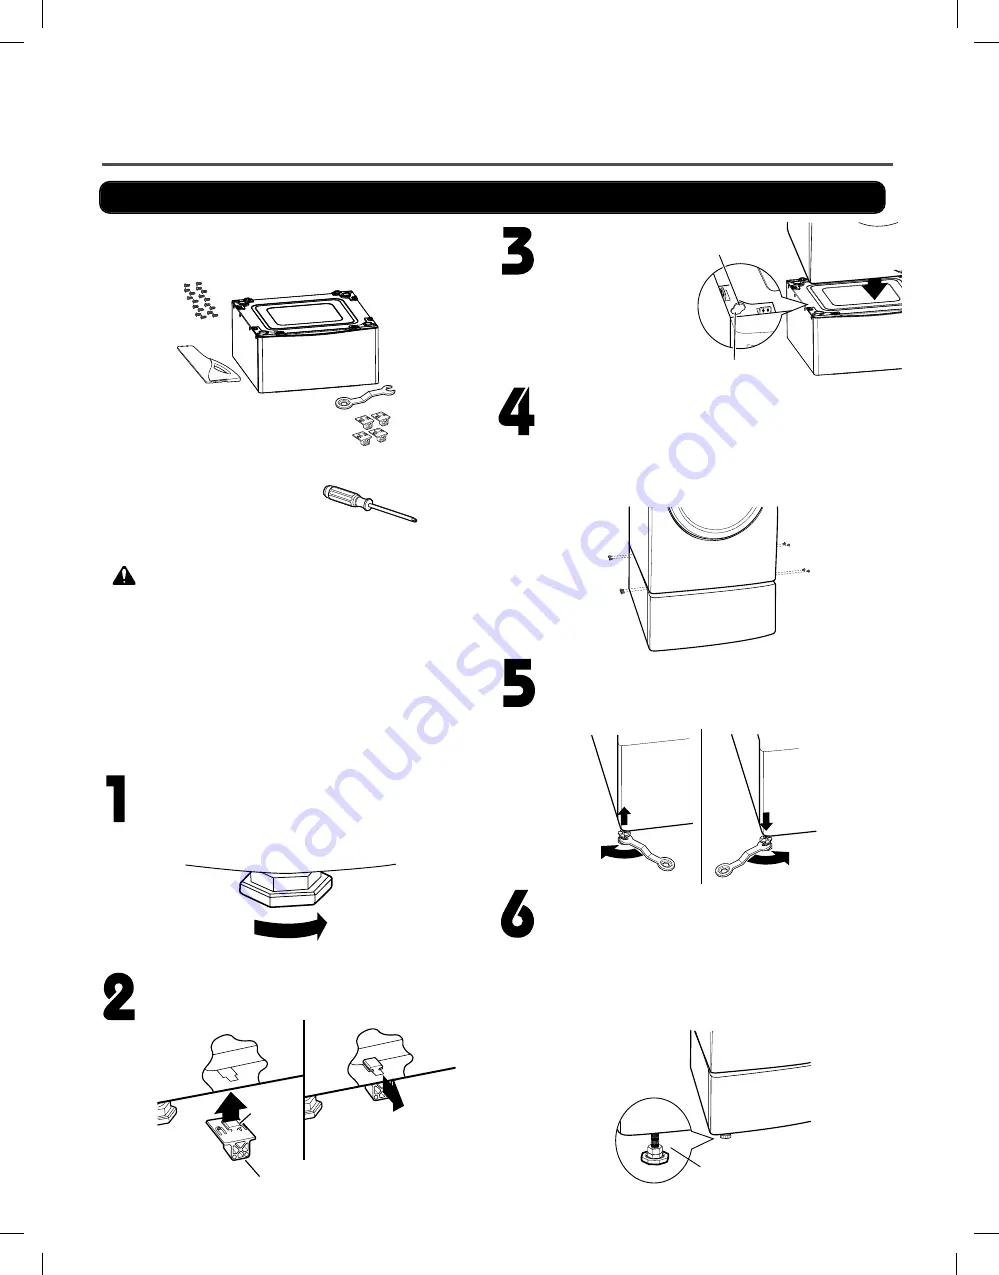
The pedestal accessory includes:
•
Drawer divider (1)
•
Wrench (1)
•
Screws (18) †
•
T-clips (4) ††
Tools Needed for Installation:
•
Phillips-head screwdriver
•
Wrench (supplied)
† Dryer installation only uses 8 screws
†† For dryer only
To ensure safe and secure installation, please
thoroughly follow the instructions below.
•
Incorrect installation can cause serious accidents.
•
The appliances are heavy. Two or more people are
required when installing the pedestal.
There is a
risk of serious back injury or other injuries.
• Do not allow children to play in or on the drawer.
There is a risk of suffocation or injury.
• Do not step on the handle.
There is a risk of serious injury.
• If appliances are already installed, disconnect them
from all power, water, or gas lines and from draining or
venting connections.
Failure to do so can result in
electrical shock, fire, explosion, or death.
• When installing, gloves must be put on.
WARNING
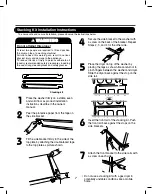
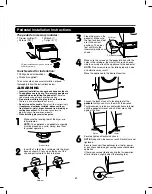
Retract fully
Retainer
T-clip
Make sure the leveling feet of the dryer are
fully retracted.
NOTE:
The appliance and pedestal assembly
must be placed on a solid, sturdy, level floor
for proper operation.
Insert the T-clip of the 4 retainers into the dryer
base as shown. Press up on the back of the
clip and pull outward to lock into place.
Place the dryer on the
pedestal. Make sure
the front and back feet
are in the correct
positions. The dryer
feet will fit into the
innermost positions as
shown.
Make sure the screws on the pedestal align with the
holes in the retainers, then install 4 screws on each
side to securely attach the appliance to the pedestal.
NOTE:
If the screws are not installed properly, noise
and vibration may result.
Move the appliance to the desired location.
Securely tighten all locknuts by hand.
NOTE:
Noise and vibration may result if locknuts are not
tightened.
Be sure to connect the appliances to all water, power,
or gas lines and draining or venting connections before
operation.
If there is excessive vibration during the first operation
after installation, slightly adjust the leveling feet.
Loosen the locknuts on all 4 leveling feet of the
pedestal
until you can turn them with the wrench.
Turn clockwise to raise or counterclockwise to lower
until the pedestal is level and all 4 feet are solidly
against the floor.
For dryer
For washer/combo
Raise
Lower
Locknut
Содержание DLE3170W
Страница 10: ...10 1 2 5 cm 3 8 9 cm Option 1 0 ...
Страница 18: ...18 GN YL 3 WIRE SYSTEM EARTH 4 WIRE SYSTEM X1 X2 CN11 CN11 X1 X2 7 WIRING DIAGRAM ...
Страница 23: ...23 8 4 Troubleshooting with Error ...
Страница 24: ...24 ...
Страница 25: ...25 ...
Страница 26: ...26 ...
Страница 27: ...27 ...
Страница 28: ...28 ...
Страница 29: ...29 ...
Страница 30: ...30 ...
Страница 35: ...35 Test 2 Thermistor Test Measure with Power Off ...
Страница 36: ...36 Test 3 Motor Test ...
Страница 37: ...37 6AIJ ...
Страница 38: ...38 Test 5 Door switch test ...
Страница 39: ...39 Test 6 Heater switch test Electric Type ...
Страница 40: ...40 ᅐ Test 7 GAS Valve test Gas Type ...
Страница 47: ...47 DRYER EXHAUST CHANGE 1 2 3 4 5 Note ...
Страница 50: ...12 EXPLODED VIEW 50 12 1 Control Panel and Plate Assembly A210 A211 A130 A120 A140 A110 ...
Страница 55: ...APR 2016 PRINTED IN KOREA P No MFL62119987 ...

