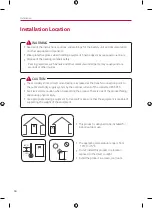


Installation
24
y
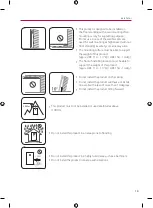
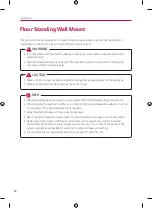
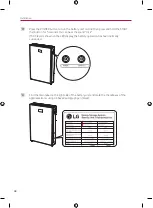
The battery unit must be installed on the floor due to its heavy weight. Wall mounting is
only for supporting purposes.
y
Rotate the legs at the bottom of the battery unit to adjust the level.
y
Install the product on a flat surface.
y
There should be no foreign object that could damage the bottom of the product.
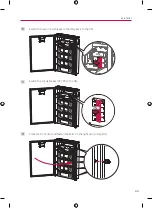
WARNING
c
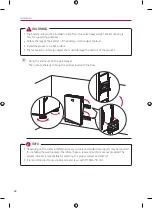
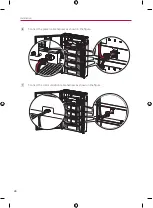
Hang the enclosure on the wall bracket.
Then, rotate the legs to bring the product level with the floor.
y
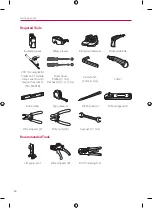
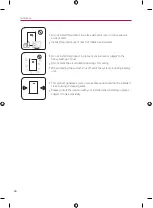
Depending on the surface, different screws, anchors and additional supports may be required
for installing the wall brackets. Therefore, these screws and anchors are not provided. The
system installer is responsible for selecting the proper screws and anchors.
y
It is recommended to use stainless steel screws with TX M8 x 50 mm.
INFO
Содержание BUEL011HBC1
Страница 46: ...Appendix 46 Wiring Diagram BUEL011HBC1 Pack 3 BCU Enclosure BUEL015HBC1 Pack 4 BCU Enclosure ...
Страница 47: ...Appendix 47 ...
Страница 48: ......
Страница 93: ...Anhang 45 Elektroschaltplan BUEL011HBC1 Paket 3 BCU Gehäuse BUEL015HBC1 Paket 4 BCU Gehäuse ...
Страница 94: ......
Страница 139: ...Apéndice 45 Diagrama de cableado BUEL011HBC1 3 baterías BCU carcasa BUEL015HBC1 4 baterías BCU carcasa ...
Страница 140: ......


