background image

THE    SYMBOL MARK OF THIS SCHEMETIC DIAGRAM INCORPORATES
SPECIAL FEATURES IMPORTANT FOR PROTECTION FROM X-RADIATION.
FIRE AND ELECTRICAL SHOCK HAZARDS, WHEN SERVICING IF IS 
ESSENTIAL THAT ONLY MANUFACTURES SPECIFIED PARTS BE USED FOR
THE CRITICAL COMPONENTS IN THE    SYMBOL MARK OF THE SCHEMETIC.

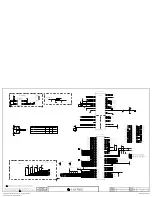
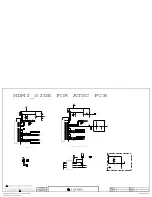
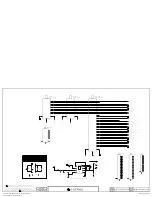
TPO_DATA[4]

TPI_DATA[6]

TPI_DATA[7]

TPO_DATA[7]

TPI_DATA[0]

TPI_DATA[2]

TPI_DATA[5]

TPO_DATA[6]

TPO_DATA[1]

TPO_DATA[3]

TPO_DATA[2]

TPO_DATA[0]

TPI_DATA[1]

TPI_DATA[3]

TPI_DATA[4]

TPO_DATA[5]

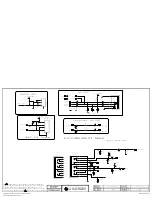
R139
10K

NON_EU

R131
1K

PWM1_PULL_DOWN_1K

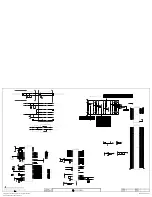
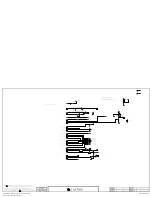
EB_ADDR[13]

EB_DATA[4]

CI_RESET

+3.3V_TUNER

COMP1_DET

I2C_SCL4

TPI_DATA[0-7]

CI_WE#

I2C_SCL1

OPCTRL3

C101
5pF
50V

USB_DM2

TP129

TP113

EB_DATA[0]

R101

4.7K

OPT

TPO_VAL

XTAL_OUT

TPO_SYNC

+3.3V_TUNER

TP145

FE_DEMOD1_TS_DATA[5]

XTAL_IN

R123
10K

NON_L/D

TP144

+3.3V_NORMAL

TP146

TP115

C107
0.1uF

USB_DP1

I2C_SCL3

EB_DATA[2]

SC_DET

TP111

TP126

R142

0

OPT

PWM_DIM

5V_HDMI_3

SMARTCARD_RST/SD_EMMC_DATA[2]

SC_DET

AV1_CVBS_DET

EB_ADDR[12]

CI_CE1#

R126

24K

1%

TP102

DVDD18_EMMC

TPO_CLK

R143
4.7K

OPT

R114
3.3K

LED_PWM0

TP125

SMARTCARD_PWR_SEL/SD_EMMC_DATA[1]

SC_ID_SOC

I2C_SDA1

CI_CE1#

TP135

TP106

I2C_SCL2

5V_HDMI_1

TP128

EB_ADDR[0]

R144
4.7K

OPT

5V_HDMI_3

I2C_SCL1

TP199

TP100

CI_CD1#

CI_REG#

VDD3V3

EB_DATA[5]

EPHY_RDP

TP109

5V_HDMI_1

C103
4.7uF
10V

R108
10K

+3.3V_NORMAL

TP132

WIFI_DM

FE_DEMOD1_TS_DATA[3]

EB_ADDR[14]

C102

1uF

10V

EB_ADDR[5]

/TU_RESET2

FE_DEMOD1_TS_CLK

C110
0.1uF

R107
10K

OPT

R133
4.7K

OPT

CI_RESET

EB_DATA[6]

TP147

TP103

TP104

C100
5pF
50V

CI_WAIT#

/USB_OCD1

EB_DATA[7]

TP141

EMMC_CMD

I2C_SDA1

VDD3V3

+3.3V_NORMAL

TPO_DATA[0-7]

CI_CD1#

PCM_5V_CTL

TP116

EB_DATA[6]

TPI_SYNC

/USB_OCD2

R111

33

C111
0.1uF

EMMC_DATA[2]

EB_ADDR[6]

+3.3V_NORMAL

MODEL_OPT_13

+3.3V_NORMAL

EB_ADDR[9]

CI_CD2#

SOC_RX

TP136

X100

24MHz

4

GND_2

1

X-TAL_1

2

GND_1

3

X-TAL_2

TP150

R117
3.3K

R102
10K

OPT

WIFI_DP

EB_ADDR[9]

TPI_CLK

I2C_SDA1

R103
10K

EPHY_RDN

TP119

TPI_DATA[0-7]

EB_DATA[4]

EMMC_DATA[6]

EB_ADDR[13]

EB_DATA[0]

USB_CTL2

TP110

TP108

TPI_SYNC

CI_IREQ#

TPO_SYNC

FE_DEMOD1_TS_DATA[2]

TPI_CLK

FE_DEMOD1_TS_VAL

C108
0.1uF

EMMC_RST

TP114

TP101

EB_ADDR[4]

VDD3V3

TP142

/TU_RESET1

EB_ADDR[8]

EMMC_DATA[1]

EB_ADDR[11]

TP131

R104

4.7K

OPT

R118
3.3K

I2C_SCL3

R141
1K

L/DIM0_MOSI

CI_WAIT#

R112

33

VDD3V3

MODEL_OPT_12

AMP_RESET_N

TP127

R120

33

L/D

EB_DATA[2]

OPCTRL3

TP138

EMMC_CLK

FE_DEMOD1_TS_DATA[4]

EB_ADDR[7]

R119

33

L/D

C104
4.7uF
10V

EB_ADDR[11]

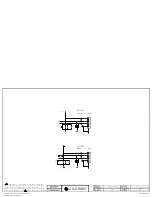
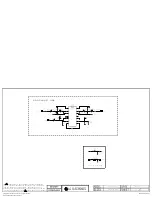
IC100

AT24C256C-SSHL-T

NVRAM_ATMEL

3

A2

2

A1

4

GND

1

A0

5

SDA

6

SCL

7

WP

8

VCC

LED_PWM1

R125

4.7K

TP148

R124
10K

NON_L/D

R140
10K

NON_JP

R100

4.7K

OPT

FE_DEMOD1_TS_SYNC

EB_DATA[3]

SMARTCARD_RST/SD_EMMC_DATA[2]

TPO_VAL

CI_CD2#

L/DIM0_VS

EB_ADDR[4]

I2C_SDA2

TP123

EB_DATA[5]

USB_DM1

CI_REG#

EB_ADDR[3]

LED_PWM1

TPI_VAL

TP130

SMARTCARD_CLK/SD_EMMC_DATA[0]

TP117

CI_IOWR#

CI_IREQ#

EB_ADDR[2]

R106
10K

PCM_5V_CTL

EB_ADDR[0]

TP134

XTAL_OUT

TP139

CI_OE#

R109
1.8K

TU_M/W

CI_OE#

I2C_SCL1

EPHY_TDP

EB_ADDR[12]

EB_ADDR[1]

VDD3V3

SMARTCARD_PWR_SEL/SD_EMMC_DATA[1]

R138
10K

NON_EU

TP112

SMARTCARD_CLK/SD_EMMC_DATA[0]

USB_DP2

TP149

R110
1.8K

TU_M/W

EMMC_DATA[4]

FE_DEMOD1_TS_DATA[0]

CI_IORD#

EB_DATA[7]

TP120

EB_ADDR[3]

C109
0.1uF

FE_DEMOD1_TS_DATA[1]

XTAL_IN

SOC_TX

CI_IORD#

EB_ADDR[14]

USB_CTL1

EMMC_DATA[3]

FE_DEMOD1_TS_DATA[6]

TP198

TP137

TPO_CLK

I2C_SDA4

TP124

EB_ADDR[10]

I2C_SDA3

SMARTCARD_DATA/SD_EMMC_CLK

L/DIM0_SCLK

LED_PWM0

/TU_RESET2

EB_ADDR[7]

TP143

TP121

EMMC_DATA[7]

SMARTCARD_DET/SD_EMMC_DATA[3]

R136

PWM_DIM2

22

SMARTCARD_DET/SD_EMMC_DATA[3]

R135

22

PWM_DIM2

I2C_SCL4

I2C_SDA3

TPI_VAL

EB_DATA[3]

TP140

SC_ID_SOC

EB_ADDR[2]

CI_IOWR#

TPO_DATA[0-7]

EB_ADDR[6]

SMARTCARD_DATA/SD_EMMC_CLK

CI_WE#

TP107

+3.3V_NORMAL

R130
4.7K

OPT

C106

1uF

10V

SMARTCARD_VCC/SD_EMMC_CMD

EB_ADDR[8]

EPHY_TDN

EMMC_DATA[0]

R122
10K

NON_L/D

SMARTCARD_VCC/SD_EMMC_CMD

EB_ADDR[5]

R134
1K

PWM2_PULL_DOWN_1K

TP133

EB_DATA[1]

+3.3V_NORMAL

R199
1K

EB_DATA[1]

EB_ADDR[1]

I2C_SDA4

TP118

EMMC_DATA[5]

R113
3.3K

EB_ADDR[10]

R121

33

L/D

TP105

R105
10K

OPT

+3.3V_NORMAL

C112

0.1uF

C105
0.1uF
16V

R137
10K

OPT

R128

22

SOC_RESET

R115
1.8K

R116
1.8K

IC100-*1

BR24G256FJ-3

NVRAM_ROHM

3

A2

2

A1

4

GND

1

A0

5

SDA

6

SCL

7

WP

8

VCC

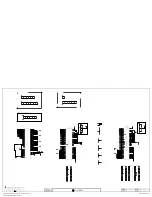
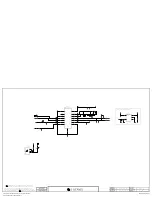
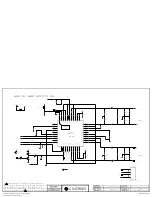
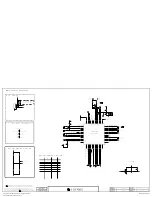
IC101

LGE5221(A5LRA0)

DEV

OSDA0

AE26

OSCL0

AH26

XTALI

B28

XTALO

B27

AVDD33_REG_STB

J22

VCC3IO_EMMC

J1

AVDD33_RGB_STB

H24

AVSS33_RGB

K21

AVDD33_PLL_STB

J23

AVDD10_LDO

U25

AVDD10_ELDO

Y26

USB_DP_P0

B12

USB_DM_P0

A12

USB_DP_P1

C13

USB_DM_P1

D13

USB_DP_P2

D14

USB_DM_P2

C14

USB_DP_P3

AD28

USB_DM_P3

AD27

AVDD33_USB

F23

U0TX

T25

U0RX

T24

POWE__B

J2

POOE__B

N7

POCE1__B

M7

POCE0__B

L7

PDD7

P3

PDD6

N1

PDD5

N2

PDD4

N4

PDD3

M3

PDD2

L1

PDD1

N6

PDD0

P6

PARB__B

N5

PACLE

L3

PAALE

K3

EMMC_CLK

P4

EMMC_RST

P7

OPWRSB

R26

ORESETB

L25

OIRI

L26

FSRC_WR

AH27

TXVP_0

AB27

TXVN_0

AB26

RXVP_1

AC25

RXVN_1

AC26

PHYLED1

AA25

PHYLED0

AA26

REXT

AB28

AVDD33_ETH

AB25

IC101

LGE5221(A5LRA0)

DEV

CI_A0

D2

CI_A1

D1

CI_A2

C3

CI_A3

C1

CI_A4

C2

CI_A5

B1

CI_A6

A1

CI_A7

A2

CI_A8

C5

CI_A9

B5

CI_A10

D6

CI_A11

A5

CI_A12

A3

CI_A13

D5

CI_A14

E4

CI_MCLKI

B4

CI_MIVAL

H5

CI_MISTRT

D4

CI_MDI0

D3

CI_MDI1

E5

CI_MDI2

F5

CI_MDI3

H6

CI_MDI4

H4

CI_MDI5

A4

CI_MDI6

B3

CI_MDI7

C4

CI_D0

E1

CI_D1

E2

CI_D2

G3

CI_D3

D9

CI_D4

B9

CI_D5

B8

CI_D6

B7

CI_D7

D7

CI_MDO0

E3

CI_MDO1

F3

CI_MDO2

G2

CI_MDO3

A9

CI_MDO4

A8

CI_MDO5

A7

CI_MDO6

C7

CI_MDO7

C6

OPCTRL0

P26

OPCTRL1

P25

OPCTRL2

P24

OPCTRL3

N24

OPCTRL4

M24

OPCTRL5

M23

OPCTRL6

M22

OPCTRL7

K23

OPCTRL8

L23

OPCTRL9

E20

OPCTRL10

D20

OPCTRL11

G18

OPCTRL12

F18

DEMOD_RST

E13

DEMOD_TSCLK

F13

DEMOD_TSDATA0

F12

DEMOD_TSSYNC

F11

DEMOD_TSVAL

G13

CI_INT

D10

CI_TSCLK

D12

CI_TSDATA0

E11

CI_TSSYNC

F4

CI_TSVAL

E12

CI_RST

B2

PVR_TSCLK

E10

PVR_TSVAL

A11

PVR_TSSYNC

F10

PVR_TSDATA0

B11

PVR_TSDATA1

C9

SPI_CLK1

G1

SPI_CLK

C11

SPI_DATA

D11

SPI_CLE

C10

OPWM2

AE25

OPWM1

AG26

OPWM0

AF26

SD_D0

K4

SD_D1

L5

SD_D2

L4

SD_D3

L6

SD_CMD

K5

SD_CLK

H1

VCC3IO_SD

H2

LED_PWM0

R22

LED_PWM1

R24

GPIO42

J6

GPIO43

J7

GPIO44

G11

GPIO45

H11

GPIO46

H12

GPIO47

G12

ADIN0_SRV

K24

ADIN1_SRV

L24

ADIN2_SRV

J24

ADIN3_SRV

E28

ADIN4_SRV

F25

ADIN5_SRV

F26

ADIN6_SRV

H25

ADIN7_SRV

H26

2014.11.01

1

MAIN1

A5LR_Bring_Up

Near SoC

0

0

ICE mode + 24M + serial boot

Near SoC

OPCTRL3

0

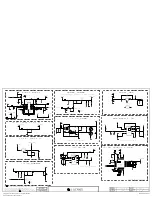
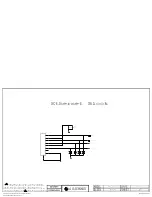
NVRAM

I2C_1 : AMP, L/D, NVM, TCON
I2C_2 : TUNER
I2C_3 : MICOM
I2C_4 : S/Demod,T2/Demod, LNB

1

ICE moce + 24M + ROM to 60bit ECC Nand boot

CI_VS1#

Write Protection

- Low  : Normal Operation

- High : Write Protection

0

LED_PWM0

0

1

0

X-TAL

I2C

ICE moce + 24M + ROM to eMMC boot from
eMMC pins(share pins w/s NAND)

STRAPPING

0

LED_PWM1

Copyright © 2015 LG Electronics Inc. All rights reserved. 
Only for training and service purposes

LGE Internal Use Only

Содержание 55LF5950

Страница 1: ...ODEL 55LF5950 55LF5950 UB CAUTION BEFORE SERVICING THE CHASSIS READ THE SAFETY PRECAUTIONS IN THIS MANUAL LED TV SERVICE MANUAL North Latin America http aic lgservice com Europe Africa http eic lgservice com Asia Oceania http biz lgservice com Internal Use Only ...

Страница 2: ...ights reserved Only for training and service purposes CONTENTS CONTENTS 2 SAFETY PRECAUTIONS 3 SERVICING PRECAUTIONS 4 SPECIFICATION 6 ADJUSTMENT INSTRUCTION 8 BLOCK DIAGRAM 16 EXPLODED VIEW 20 SCHEMATIC CIRCUIT DIAGRAM APPENDIX TROUBLE SHOOTING GUIDE APPENDIX ...

Страница 3: ...inals etc to be sure the set is safe to operate without damage of electrical shock Leakage Current Cold Check Antenna Cold Check With the instrument AC plug removed from AC source connect an electrical jumper across the two AC plug prongs Place the AC switch in the on position connect one lead of ohm meter to the AC plug prongs tied together and touch other ohm meter lead in turn to each exposed m...

Страница 4: ...lectrostatic charge on your body by touching a known earth ground Alter natively obtain and wear a commercially available discharging wrist strap device which should be removed to prevent poten tial shock reasons prior to applying power to the unit under test 2 After removing an electrical assembly equipped with ES devices place the assembly on a conductive surface such as aluminum foil to prevent...

Страница 5: ...he solder joints of the two original leads If they are not shiny reheat them and if necessary apply additional solder Fuse and Conventional Resistor Removal Replacement 1 Clip each fuse or resistor lead at top of the circuit board hollow stake 2 Securely crimp the leads of replacement component around notch at stake top 3 Solder the connections CAUTION Maintain original spacing between the replace...

Страница 6: ... number in accordance with BOM 5 The receiver must be operated for about 5 minutes prior to the adjustment 3 Test method 1 Performance LGE TV test method followed 2 Demanded other specification Safety UL CSA IEC specification EMC FCC ICES IEC specification Wireless WirelessHD Specification Option 4 General Specification No Item Specification Remark 1 Market North America 2 Receiving System ATSC NT...

Страница 7: ...1 640 350 31 468 70 09 25 17 EGA X 2 720 400 31 469 70 08 28 32 DOS O 3 640 480 31 469 59 94 25 17 VESA VGA O 4 800 600 37 879 60 31 40 00 VESA SVGA O 5 1024 768 48 363 60 00 65 00 VESA XGA O 6 1152 864 54 348 60 053 80 002 VESA O 7 1360 768 47 712 60 015 85 50 VESA WXGA X 8 1280 1024 63 981 60 020 108 00 VESA SXGA O 9 1920 1080 67 5 60 148 5 HDTV 1080P O DTV 1 640 480 31 469 59 94 25 175 SDTV 480...

Страница 8: ...longer especially where W B scale is strong Digital pattern 13ch and or Cross hatch pattern 09ch there can some afterimage in the black level area 3 Adjustment items 3 2 Main PCBA Adjustments 1 ADC adjustment OTP Component 2 EDID downloads for HDMI 3 2 Final assembly adjustment 1 White Balance adjustment 2 RS 232C functionality check 3 Factory Option setting per destination 4 Shipment mode setting...

Страница 9: ...cable are not need Adjust remocon 4 4 3 EDID DATA 4 4 3 1 2D_8bit_PCM US _ xvYCC off HDMI EDID 2D_8bit_PCM US _xvYCC off Reference HDMI1 HDMI3 In the data of EDID bellows may be different by S W or Input mode ⓐ Product ID HEX EDID Table DDC Function 0001 0100 Analog 0001 0100 Digital ⓑ Serial No Controlled on production line ⓒ Month Year Controlled on production line ex Monthly 01 01 Year 2015 19 ...

Страница 10: ...s fixed at 192 and the other two is lowered to find the desired value 3 Adj condition normal temperature Surrounding Temperature 25 5 C Warm up time About 5 Min Surrounding Humidity 20 80 Before White balance adjustment Keep power on status don t power off 5 1 1 2 Adj condition and cautionary items 1 Lighting condition in surrounding area surrounding lighting should be lower 10 lux Try to isolate ...

Страница 11: ...e within 10cm of the surface 3 Press ADJ key EZ adjust using adj R C à 9 White Balance then press the cursor to the right KEY When KEY is pressed 206 Gray internal pattern will be displayed 4 Adjust Cool modes i Fix the one of R G B gain to 192 default data and decrease the others If G gain is adjusted over 172 and R and B gain less than 192 Adjust is O K ii If G gain is less than 172 Increase G g...

Страница 12: ...n is done using KEY 5 2 3 Tool Option inspection Press Adj key on the Adj R C then select Tool option Tool option can be reconstructed by Software 5 2 4 Area Option Area Area Option USA 22282 CANADA 22411 MEXICO 22540 5 3 Magic Motion remote controller Check 5 3 1 Test equipment RF remote controller for check IR KEY CODE remote controller Check AA battery before test A recommendation is that a tes...

Страница 13: ...or on the front of set with your hands hold it for 6 seconds Step 4 Check the Sensor Data on the screen make certain that Data is below 10 If Data isn t below 10 in 6 seconds Eye Q sensor would be bad You should change Eye Q sensor Step 5 Uncover your hands from Eye Q sensor hold it for 6 seconds Step 6 Check Back Light xxx on the screen check data increase You should change Eye Q sensor 5 7 Ship ...

Страница 14: ... and SIGNAL CABLE GND Hi pot Test POWER CORD GND and LIVE NEUTRAL 4 LEAKAGE CURRENT At 0 5mArms 8 USB S W Download optional Service only 1 Put the USB Stick to the USB socket 2 Automatically detecting update file in USB Stick If your downloaded program version in USB Stick is lower than that of TV set it didn t work Otherwise USB data is automatically detected 3 Show the message Copying files from...

Страница 15: ...G CH12 LED CH14 2 Adj Computer During auto adj RS 232C protocol is needed 3 Adjust Remocon 4 Video Signal Generator MSPG 925F 720p 216 Gray Model 217 Pattern 78 9 1 3 Adjustment 1 Set TV in Adj mode using POWER ON 2 Zero Calibrate the probe of Color Analyzer then place it on the center of LCD module within 10cm of the surface 3 Press ADJ key EZ adjust using adj R C 6 White Balance then press the c...

Страница 16: ...ital Demod IF Analog Demod Tuner I2C_2 Sub Micom R5F100GEAFB I2C 3 IR KEY IR KEY I2C HDMI MUX LVDS USB SPDIF OUT ETHERNET USB1 USB2 OCP 1 5A OCP 1 5A S I D E HDMI1 HDMI2 ARC SIDE R E A R OPTIC LAN SYSTEM EEPROM 256Kb 51P eMMC 5 0 4GB DDR3 1600 X 16 512MB X 1EA 256MBx1EA I2C 1 X_TAL 24MHz WIFI SUB ASSY USB_WIFI IF jpG P_TS P_TS Rear Tuner SPDIF OUT ARC OPTIC ...

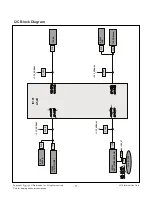
Страница 17: ...nd service purposes 33Ω 3 3V_NORMAL 3 3KΩ TUNER 3 3KΩ 3 3V_NORMAL B6 B6 B6 B6 33Ω 3 3V_NORMAL 3 3KΩ IC5600 NTP7515 AMP B6 B6 100 Ω B6 B6 TUNER Demod 3 3KΩ 3 3V_NORMAL 33Ω IC101 A5LR IC3000 R5F100GEAFB MICOM IC100 NVRAM 33Ω 33Ω IC6900 LNB IR KEY EYE 100Ω 3 3KΩ B B6 B B6 3 5V_ST I2C Block Diagram ...

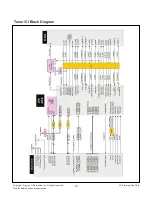
Страница 18: ... 18 LGE Internal Use Only Copyright LG Electronics Inc All rights reserved Only for training and service purposes Tuner CI Block Diagram ...

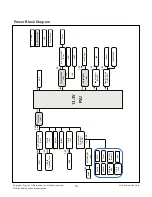
Страница 19: ...106EFJ 6A A5LR_Core LNB Switch Cir TR FET LNB Panel Vcc Switch Cir TR FET Panel AZ1117EH_ADJ 1A TJ2132 2A EmmC TUNER D_Demod_Core IR KEY Micom Z only A5LR Tuner AMP Earphone AMP NVRAM OPTIC JACK SCART OPAMP EmmC Scart Out Buffer IC DC DC Converter LDO 3 4V 3 4V 5V 1 2V 13V 13V OCP_AP2191WG 1 6A 1 8V 1 2V TJ2132 2A DDR 1 5V 0 6A 0 3A 1A 0 5A 2 4A 0 72A 1 8A 0 45A 0 63A 2 86A 0 3A 1 5A 1 5A 0 5A 1 5...

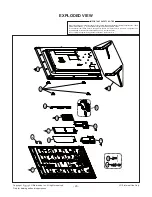
Страница 20: ...d characteristics These parts are identified by in the Schematic Diagram and EXPLODED VIEW It is essential that these special safety parts should be replaced with the same components as recommended in this manual to prevent Shock Fire or other Hazards Do not modify the original design without permission of manufacturer IMPORTANT SAFETY NOTICE 900 200 400 410 540 521 530 820 120 121 LV1 A2 A10 Set ...

Страница 21: ...R 14 USB_CTL1 EMMC_DATA 3 FE_DEMOD1_TS_DATA 6 TP198 TP137 TPO_CLK I2C_SDA4 TP124 EB_ADDR 10 I2C_SDA3 SMARTCARD_DATA SD_EMMC_CLK L DIM0_SCLK LED_PWM0 TU_RESET2 EB_ADDR 7 TP143 TP121 EMMC_DATA 7 SMARTCARD_DET SD_EMMC_DATA 3 R136 PWM_DIM2 22 SMARTCARD_DET SD_EMMC_DATA 3 R135 22 PWM_DIM2 I2C_SCL4 I2C_SDA3 TPI_VAL EB_DATA 3 TP140 SC_ID_SOC EB_ADDR 2 CI_IOWR TPO_DATA 0 7 EB_ADDR 6 SMARTCARD_DATA SD_EMMC...

Страница 22: ... K25 PR0P J26 Y0P K27 SOY0 K28 VDACX_OUT G27 AVDD33_VIDEO_STB H23 AVSS33_XTAL J20 AVSS33_DEMOD K20 HDMI_0_RX_0 A17 HDMI_0_RX_0B B17 HDMI_0_RX_1 A16 HDMI_0_RX_1B B16 HDMI_0_RX_2 A15 HDMI_0_RX_2B B15 HDMI_0_RX_C C17 HDMI_0_RX_CB D17 HDMI_1_RX_0 A20 HDMI_1_RX_0B B20 HDMI_1_RX_1 A19 HDMI_1_RX_1B B19 HDMI_1_RX_2 C18 HDMI_1_RX_2B D18 HDMI_1_RX_C C21 HDMI_1_RX_CB B21 HDMI_2_RX_0 W26 HDMI_2_RX_0B W25 HDMI...

Страница 23: ...A1 AE8 RBA2 AC7 RCS V4 RCSD W4 RRAS AA5 RCAS AA6 RWE AC4 RODT W5 RCKE W6 RRESET U6 RCLK0 AA4 RCLK0B Y4 DDRVREF_A1 U5 DDRVREF_A2 AE13 ARTP W9 ARTN W8 MEMTP Y8 MEMTN Y9 TP_HPCPLL AC20 TN_HPCPLL AD20 DDRV_1 R4 DDRV_2 T4 DDRV_3 R5 DDRV_4 T5 DDRV_5 R6 DDRV_6 T6 DDRV_7 R7 DDRV_8 T7 DDRV_9 R8 DDRV_10 V8 DDRV_11 R9 DDRV_12 T9 DDRV_13 U9 DDRV_14 V9 DDRV_15 AB12 DDRVA T8 RDQM0 AA3 RDQS0 Y2 RDQS0B Y1 RDQ0 U3...

Страница 24: ...3 Q2301 MMBT3904 NXP NPN_NXP E B C R2328 5 1K 1 3 4V_ST R2330 10K C2304 22uF 10V C2334 10uF 25V C2329 22uF 10V C2300 10uF 10V C2313 2700pF 50V C2333 10uF 25V C2310 10uF 10V L2300 UBW2012 121F 5V_USB_1 POWER_DET R2312 4 7K OPT C2342 10uF 25V L2310 120 ohm ZD2300 2 5V OPT PWM_DIM2 C2335 0 1uF 25V R2345 10K OPT 13V C2311 1uF 10V R2302 100 USB_CTL1 ZD2303 2 5V OPT C2349 22uF 16V C2344 0 1uF 25V USB_OC...

Страница 25: ...005 1K SOC_TX EDID_WP IC3000 R5F100GEAFB 30 1 P60 SCLA0 2 P61 SDAA0 3 P62 4 P63 5 P31 TI03 TO03 INTP4 6 P75 KR5 INTP9 SCK01 SCL01 7 P74 KR4 INTP8 SI01 SDA01 8 P73 KR3 SO01 9 P72 KR2 SO21 10 P71 KR1 SI21 SDA21 11 P70 KR0 SCK21 SCL21 12 P30 INTP3 RTC1HZ SCK11 SCL11 13 P50 INTP1 SI11 SDA11 14 P51 INTP2 SO11 15 P17 TI02 TO02 16 P16 TI01 TO01 INTP5 17 P15 PCLBUZ1 SCK20 SCL20 18 P14 RXD2 SI20 SDA20 19 P...

Страница 26: ... D1 1 D2 17 GND 9 D0 8 D0_GND 3 D2 16 DDC_DATA 7 D0 6 D1 15 DDC_CLK VDD3V3_HDMI DDC_SDA_3 5V_NORMAL VDD3V3 VA3203 ESD_HDMI HDMI_ARC VA3209 ESD_HDMI R3216 82 C3205 1uF 25V 5V_NORMAL R3214 47K R3215 47K R3217 180 5V_HDMI_3 Q3201 MMBT3904 NXP E B C R3202 1K 1 16W 5 R3203 1K 1 16W 5 R3204 4 7K R3209 33 HDMI_EXT_EDID Q3202 MMBT3904 NXP HDMI_EXT_EDID E B C DDC_SDA_2 DDC_SCL_2 AR3207 47K 1 16W R3207 4 7K...

Страница 27: ...K HP_ROUT JK3402 PEJ034 01 HP_JACK 6B T_TERMINAL2 7B B_TERMINAL2 5 T_SPRING 4 R_SPRING 3 E_SPRING R3408 1K R3407 10K TP3401 HP_ROUT RIN1 HP_DET COMP1_Pr VA3404 5 6V VA3405 5 5V R3413 1K INT_HP_OUT VA3401 5 5V COMP1 AV1 DVI_R_IN HP_LOUT COMP1_Pb VA3406 5 6V COMP1_Y AV1 JK3401 PPJ245N2 01 Shield_COMP 5A GN YL O SPRING 6A GN YL E LUG 4A GN YL CONTACT 5B BL O SPRING 7C RD1 E LUG S 5C RD1 O SPRING 4C R...

Страница 28: ... 3 4V_ST R4009 10K 5 C4002 100pF 50V R4012 100 3 4V_WIFI R4011 100 C4000 0 1uF 16V OPT R4014 33 3 4V_ST D4000 RCLAMP0502BA OPT EYE_SCL R4015 30K OPT R4007 0 IC4000 AO R123C7G LG IR_PROTO G GND V VS O OUT IR C4010 0 1uF IC4001 AP2191WG 7 3 FLG 2 GND 4 EN 1 OUT 5 IN C4008 0 1uF OPT R4010 10K 5 R4002 100 KEY1 WIFI_DM KEY2 3 4V_ST R4003 47 1 10W 5 IR_PROTO IR R4008 0 R4000 330 1 16W 5 IR_PROTO 3 4V_ST...

Страница 29: ...ETIC C4301 10uF 10V OPT R4303 2 2 R4302 2 2 R4301 2 2 R4300 2 2 D4303 RCLAMP0502BA D4302 RCLAMP0502BA C4303 22uF 10V C4300 10uF 10V OPT JK4301 3AU04S 305 ZC LG 1 2 3 4 5 USB_DM1 5V_USB_2 C4302 22uF 10V USB_DP1 USB_DP2 5V_USB_1 ZD4301 5V USB_ESD_SD05 JK4300 3AU04S 305 ZC LG 1 2 3 4 5 ZD4300 5V USB_ESD_SD05 USB_DM2 C4305 22uF 10V C4304 22uF 10V A5LR_Bring_Up 2014 11 01 43 USB USB2 MAX 1 5A USB1 MAX ...

Страница 30: ... THE CRITICAL COMPONENTS IN THE SYMBOL MARK OF THE SCHEMETIC C5000 0 1uF 16V D5002 5 5V LAN_ESD D5001 5 5V LAN_ESD C5001 0 01uF 50V JK5000 RJ45VT 01SN002 1 1 2 2 3 3 4 4 5 5 6 6 7 7 8 8 9 9 D5000 5 5V LAN_ESD EPHY_RDN EPHY_RDP EPHY_TDN EPHY_TDP D5003 5 5V LAN_ESD Ethernet Block A5LR_Bring_Up 2014 11 01 50 ETHERNET Copyright 2015 LG Electronics Inc All rights reserved Only for training and service ...

Страница 31: ...OWER_DET C5614 390pF 50V P5600 WAFER ANGLE 1 2 3 4 13V_AMP L5601 BLM18PG121SN1D L5604 NRS6045T100MMGK 10 0uH C5603 1000pF 50V AMP_MUTE_MICOM C5616 1uF 10V Q5600 MMBT3904 NXP AMP_MUTE_MICOM_NXP_TR E B C SPK_R C5611 22000pF 50V AUD_LRCH C5615 390pF 50V WOOFER_MUTE SPK_L 3 3V_NORMAL I2C_SCL1 R5606 3 3 1 10W R5603 100 R5613 4 7K AUD_LRCK R5611 4 7K C5618 0 47uF 50V IC5600 NTP7515 3 NC_2 2 VDD_PLL 4 GN...

Страница 32: ...R6105 33K 1 EXT_HP_OUT C6108 0 1uF 16V EXT_HP_OUT C6105 10pF 50V EXT_HP_OUT C6101 180pF EXT_HP_OUT C6106 1uF 10V EXT_HP_OUT C6107 180pF EXT_HP_OUT HP_LOUT_AMP 3 3V_NORMAL C6104 1uF 10V EXT_HP_OUT HP_ROUT C6109 1uF 10V EXT_HP_OUT C6100 1uF 10V EXT_HP_OUT C6102 1uF 10V EXT_HP_OUT R6106 10K EXT_HP_OUT HP_ROUT_SOC R6102 43K 1 EXT_HP_OUT SIDE_HP_MUTE 3 3V_NORMAL IC6100 TPA6138A2 EXT_HP_OUT 3 OUTR 2 INR...

Страница 33: ...pF 50V OPT 3 3V_TU I2C_SCL4 3 3V_TUNER FE_DEMOD1_TS_VAL R6509 33 TU_M W I2C_SCL2_TU I2C_SDA2 TU_SIF_TU FE_DEMOD1_TS_DATA 1 LNB_OUT FE_DEMOD1_TS_DATA 2 FE_DEMOD1_TS_DATA 3 R6505 100 TU_M W IF_P_TU I2C_SCL4_TU FE_DEMOD1_TS_ERROR C6510 0 1uF TU_M W R6510 200 TU_ALL_2178B C6508 0 1uF 16V TU_M W I2C_SCL2 I2C_SDA2_TU C6504 33pF TU_ALL_IntDemod FE_DEMOD1_TS_CLK IF_AGC IF_N_TU FE_DEMOD1_TS_DATA 1 3 3V_TUN...

Страница 34: ...B 8 GND 9 EP GND R6706 1 10 5K TU_M W_1 1V R6402 1 0 TU_H M_CN AJ R6402 22 TU_H M_KR US BR CO TW C6402 1000pF 630V TU_H M W R6401 22 TU_H M_BR CO TW C6409 1000pF 630V TU_H M W C6401 1000pF 630V TU_H M_BR CO TW CN R6401 1 0 TU_CN C6410 1000pF 630V TU_H M W R6403 0 TU_H M_KR US AJ CN TU_GND_A TU_GND_B TDJH G301D TU6401 1 TU_H_AJ 47 SHIELD 6 IF P 7 IF N 8 SIF 9 CVBS 1 3 3V 2 NC_1 3 IF_AGC 4 SCL_RF 5 ...

Страница 35: ...LVDS_SEL_HIGH TXBCLKN L7200 UBW2012 121F AUO_SHARP TXB1P TXA4P 3 3V_NORMAL TXB3N TXB4N TXACLKN TXB1N TXB0N R7203 10K BIT_SEL_LOW I2C_SCL1 TXB2P TXA0P R7201 0 VCOM TXACLKP TXB2N TXB4P TXA0N TXA3P TXA4N R7200 0 VCOM TXA2P P7201 10031HR 30 HD_LVDS 1 2 3 4 5 6 7 8 9 10 11 12 13 14 15 16 17 18 19 20 21 22 23 24 25 26 27 28 29 30 31 R7205 3 3K OPT VCOM_SDA VCOM_SCL R7206 10K OPT PANEL_VCC VCOM_SDA VCOM_...

Страница 36: ...6 N11 NC_97 N12 NC_98 N13 NC_99 N14 NC_100 P1 NC_101 P2 NC_102 P8 NC_103 P9 NC_104 P11 NC_105 P12 NC_106 P13 NC_107 P14 EMMC_CMD_BALL DAT3 EMMC_CLK C8105 2 2uF 10V EMMC_CMD_BALL AR8101 47 1 16W DAT5 DVDD18_EMMC DAT5 EMMC_RESET_BALL DAT7 DAT4 C8104 0 1uF 16V C8106 1uF 10V DVDD18_EMMC EMMC_VDDI C8102 0 1uF 16V EMMC_RST DAT6 DAT7 3 3V_EMMC DAT4 AR8104 10K 1 16W OPT R8100 10K OPT EMMC_CMD EMMC_CLK_BAL...

Страница 37: ...1uF RS232C 3 4V_ST VA11200 ADUC 20S 02 010L 20V OPT C11201 0 1uF RS232C R11200 100 RS232C R11201 100 RS232C RIN1 VA11201 20V ADUC 20S 02 010L OPT SOC_TX SOC_RX IC11200 MAX3232CDR EAN41348201 RS232C 3 C1 2 V 4 C2 1 C1 6 V 5 C2 7 DOUT2 8 RIN2 9 ROUT2 10 DIN2 11 DIN1 12 ROUT1 13 RIN1 14 DOUT1 15 GND 16 VCC C11203 0 1uF RS232C JP11204 JP11203 JP11201 JP11202 RS 232C Control INTERFACE A5LR_Bring_Up 201...

Страница 38: ......
Страница 39: ...2015 LED LCD TV Repair guide Applicable Model LA50H LF59 U Copyright 2015 LG Electronics Inc All rights reserved Only for training and service purposes LGE Internal Use Only ...

Страница 40: ...r No power 6 7 Off when on off while viewing power auto on off 7 8 C Audio error No audio Normal video 8 9 Wrecked audio discontinuation noise 9 10 D Function error Normal Motion Remote Controller operating error 10 11 External device recognition error 11 12 E Noise Circuit noise mechanical noise 12 13 F Exterior error Exterior defect 13 First of all Check whether there is SVC Bulletin in GCSC Sys...

Страница 41: ...ersion and White Balance value before replacing the Main Board Replace Main Board Re enter White Balance value Precaution Established date Standard Repair Process Revised date 1 13 LCD TV Error symptom A Video error No video Normal audio A5 A4 First of all Check whether all of cables between board is inserted properly or not Main B D Power B D LVDS EPI Cable Speaker Cable IR Wi Fi combo cable Main...

Страница 42: ... D Y Replace Power Board and repair parts N End Standard Repair Process A Video error No video No audio A5 Established date Revised date 2 13 LCD TV Error symptom 2015 04 23 2015 04 23 Copyright 2015 LG Electronics Inc All rights reserved Only for training and service purposes LGE Internal Use Only ...

Страница 43: ...oldering Normal Picture Y N Y Close Y Close By using Digital signal level meter By using Diagnostics menu on OSD Menu Quick Channels Signal Test Signal strength Normal over 50 Signal Quality Normal over 50 Normal Picture Y Contact with signal distributor or broadcaster Cable or Air N Normal Picture Y Close N A7 Standard Repair Process Established date Revised date 3 13 LCD TV Error symptom 2015 04...

Страница 44: ...e and cable Y External device Cable normal HDMI error Check external device and cable Replace Main B D Replace Main B D N N A Video error Color error A8 N Y End Replace module Request repair for external device cable Color error Check Test pattern A12 Standard Repair Process Established date Revised date 4 13 LCD TV Error symptom 2015 04 23 2015 04 23 Copyright 2015 LG Electronics Inc All rights r...

Страница 45: ...nnecting Jig pattern Generator Set top Box etc N Y Replace Main B D Screen normal Check screen condition by input External Input Component HDMI Request repair for external device Component error HDMI Connect other external device and cable Check normal operation of External Input Component and HDMI by connecting Jig pattern Generator Set top Box etc Replace Main B D Screen normal N Y Check S W Ver...

Страница 46: ...utput of Power B D N Y Normal voltage Replace Main B D Y OK Replace Main B D N Y Normal Check ST BY Voltage D13V Replace Power B D N Y Normal voltage Replace Power B D Y A17 A18 A5 Standard Repair Process Established date Revised date 6 13 LCD TV Error symptom Stand By Red or No color Close 2015 04 23 A18 2015 04 23 Copyright 2015 LG Electronics Inc All rights reserved Only for training and servic...

Страница 47: ...CONTROL POWEROFF_OFFTIMER Power off by OFF TIMER POWEROFF_SLEEPTIMER Power off by SLEEP TIMER POWEROFF_INSTOP Power off by INSTOP KEY POWEROFF_AUTOOFF Power off by AUTO OFF POWEROFF_ONTIMER Power off by ON TIMER POWEROFF_RS232C Power off by RS232C POWEROFF_RESREC Power off by Reservated Record POWEROFF_RECEND Power off by End of Recording POWEROFF_SWDOWN Power off by S W Download POWEROFF_UNKNOWN ...

Страница 48: ...ck Speaker disconnection N Y Connect Speaker to Main cable Replace MAIN Board End C Audio error No audio Normal video A24 A25 Disconnection Established date Revised date 8 13 LCD TV Error symptom Standard Repair Process 2015 04 23 2015 04 23 Copyright 2015 LG Electronics Inc All rights reserved Only for training and service purposes LGE Internal Use Only ...

Страница 49: ... and check other external device N Y Normal audio Check and fix external device Replace Power B D N Y Normal voltage Check input signal RF External Input signal Signal normal When RF signal is not received Request repair to external cable ANT provider Y Check A13V Voltage Replace Main B D In case of External Input signal error Check and fix external device Replace Main B D N End Established date R...

Страница 50: ...dard Repair Process Established date Revised date 10 13 LCD TV Error symptom 2015 04 23 Y Y N 2 Motion Remote control operating error Check Motion R C itself Operation Normal operating Y Check R C Operating When turn off light in room Check Replace Baterry of R C Check Repair Cable connection Connector solder Normal operating Check 3 5V_WIFI On Main B D A29 Normal Voltage Close N Check 13V on Powe...

Страница 51: ...evice cable HDMI Optical Recognition error Replace Main B D Replace Main B D Fix in accordance with technical information D Function error External device recognition error Established date Revised date 11 13 LCD TV Error symptom Standard Repair Process 2015 04 23 2015 04 23 Copyright 2015 LG Electronics Inc All rights reserved Only for training and service purposes LGE Internal Use Only ...

Страница 52: ...ntroller Remote controller damage Stand dent Replace stand F Exterior defect Exterior defect Established date Revised date 13 13 LCD TV Error symptom Standard Repair Process 2015 04 23 2015 04 23 Copyright 2015 LG Electronics Inc All rights reserved Only for training and service purposes LGE Internal Use Only ...

Страница 53: ...hown in the solution manual For models without any fix information provide the description OR Mechanical noise is a natural phenomenon and apply the 1st level description When the customer does not agree apply the process by stage Describe the basis of the description in Part related to noise in the Owners Manual E Noise Circuit noise mechanical noise Established date Revised date 12 13 LCD TV Err...

Страница 54: ...ion diagram A8 10 Tuner Checking Part A9 11 Check Link Cable LVDS EPI reconnection condition 12 Adjustment Test pattern ADJ Key A12 13 A Video error_Vertical Horizontal bar residual image light spot LCD TV connection diagram A8 14 Check Link Cable LVDS EPI reconnection condition 15 Adjustment Test pattern ADJ Key A12 16 Appendix Defected Type caused by T Con Inverter Module Exchange T Con Board 1 ...

Страница 55: ...ng POWER BOARD PIN voltage checking method A18 28 C Audio error_No audio Normal video Checking method in menu when there is no audio A24 29 Voltage and speaker checking method when there is no audio A25 30 C Audio error_Wrecked audio discontinuation Voltage and speaker checking method in case of audio error A25 31 D Function error_ No response in remote controller Normal Remote controller operatio...

Страница 56: ...D TV Entry method 1 Press the ADJ button on the remote controller for adjustment 2 Enter into White Balance of item 10 3 After recording the R G B GAIN Cut value of Color Temp Cool Medium Warm re enter the value after replacing the MAIN BOARD 2015 04 23 2015 04 23 Copyright 2015 LG Electronics Inc All rights reserved Only for training and service purposes LGE Internal Use Only ...

Страница 57: ...om Content LCD TV Check the DC D13V A13V 12 Pin Power Board Main Board 공통 SMAW200 H12S5K 1 Power on 2 PDIM 2 3 GND 4 D13V 5 D13V 6 D13V 7 A13V 8 A13V 9 GND 10 GND 11 DRV_ON 12 PDIM 1 Power Board Shape is different of models 2015 04 23 2015 04 23 Copyright 2015 LG Electronics Inc All rights reserved Only for training and service purposes LGE Internal Use Only ...

Страница 58: ...dard Repair Process Detail Technical Manual TUNER input signal strength checking method A Video error_Video error video lag stop ALL MODELS A6 Error symptom Content LCD TV Established date Revised date 2015 04 23 2015 04 23 Copyright 2015 LG Electronics Inc All rights reserved Only for training and service purposes LGE Internal Use Only ...

Страница 59: ...king method for remote controller for adjustment Press the IN START with the remote controller for adjustment Version ALL MODELS A7 Established date Revised date Error symptom Content LCD TV 2015 04 23 2015 04 23 Copyright 2015 LG Electronics Inc All rights reserved Only for training and service purposes LGE Internal Use Only ...

Страница 60: ...esidual image light spot As the part connecting to the external input check the screen condition by signal A8 Established date Revised date Error symptom Content LCD TV ALL MODELS 2015 04 23 2015 04 23 Copyright 2015 LG Electronics Inc All rights reserved Only for training and service purposes LGE Internal Use Only ...

Страница 61: ...wer supply finally replace the MAIN BOARD Standard Repair Process Detail Technical Manual TUNER checking part A Video error_Video error video lag stop ALL MODELS A9 Established date Revised date Error symptom Content LCD TV 2015 04 23 2015 04 23 Copyright 2015 LG Electronics Inc All rights reserved Only for training and service purposes LGE Internal Use Only ...

Страница 62: ...g the ADJ Key Checking item 1 Defective pixel 2 Residual image 3 Module error ADD BAR SCAN BAR 4 Video error Classification of MODULE or Main B D A12 Established date Revised date Error symptom Content LCD TV 2015 04 23 2015 04 23 Copyright 2015 LG Electronics Inc All rights reserved Only for training and service purposes LGE Internal Use Only ...

Страница 63: ...older defect CNT Broken Solder defect CNT Broken Solder defect CNT Broken Abnormal Power Section Solder defect Short Crack Abnormal Power Section Solder defect Short Crack Appendix Exchange T Con Board 1 A 1 5 Copyright 2015 LG Electronics Inc All rights reserved Only for training and service purposes LGE Internal Use Only ...

Страница 64: ...r Section Solder defect Short Crack Fuse Open Abnormal power section Noise GRADATION GRADATION Abnormal Display Appendix Exchange T Con Board 2 A 2 5 Copyright 2015 LG Electronics Inc All rights reserved Only for training and service purposes LGE Internal Use Only ...

Страница 65: ... Exchange LED driver Board PSU No Light Dim Light Dim Light Dim Light No picture Sound Ok A 3 5 Copyright 2015 LG Electronics Inc All rights reserved Only for training and service purposes LGE Internal Use Only ...

Страница 66: ...ess damage Crosstalk Crosstalk Press damage Panel Mura Light leakage Press damage Un repairable Cases In this case please exchange the module A 4 5 Copyright 2015 LG Electronics Inc All rights reserved Only for training and service purposes LGE Internal Use Only ...

Страница 67: ...Source TAB IC Defect Horizontal Block Gate TAB IC Defect Horizontal line Gate TAB IC Defect Gate TAB IC Defect Horizontal Block Gate TAB IC Defect Appendix Exchange Module itself 2 Un repairable Cases In this case please exchange the module A 5 5 Copyright 2015 LG Electronics Inc All rights reserved Only for training and service purposes LGE Internal Use Only ...

Страница 68: ... A17 Established date Revised date Error symptom Content LCD TV 2015 04 23 Be careful LF59 Models have a Standby Light Control UI ST BY condition On Power ON condition Off 2015 04 23 Copyright 2015 LG Electronics Inc All rights reserved Only for training and service purposes LGE Internal Use Only ...

Страница 69: ...Check power input voltage and ST BY Voltage B Power error _No power A18 Established date Revised date Error symptom Content LCD TV When st by only D13V is normally on Output 9 5 9 9V 2015 04 23 Check the DC D13V A13V Power on Power Board Shape is different of models 2015 04 23 Copyright 2015 LG Electronics Inc All rights reserved Only for training and service purposes LGE Internal Use Only ...

Страница 70: ...rd Repair Process Detail Technical Manual POWER OFF MODE checking method B Power error _Off when on off whiling viewing ALL MODELS A22 Established date Revised date Error symptom Content LCD TV 2015 04 23 2015 04 23 Copyright 2015 LG Electronics Inc All rights reserved Only for training and service purposes LGE Internal Use Only ...

Страница 71: ...nu Standard Repair Process Detail Technical Manual Checking method in menu when there is no audio C Audio error_No audio Normal video ALL MODELS A24 Established date Revised date Error symptom Content LCD TV 2015 04 23 2015 04 23 Copyright 2015 LG Electronics Inc All rights reserved Only for training and service purposes LGE Internal Use Only ...

Страница 72: ...the cable and check the connector Connect the tester RX1 to the speaker terminal and if you hear the Chik Chik sound when you touch the GND and output terminal the speaker is normal Standard Repair Process Detail Technical Manual Voltage and speaker checking method when there is no audio C Audio error_No audio Normal video ALL MODELS A25 Established date Revised date Error symptom Content LCD TV 2...

Страница 73: ...dard Repair Process Detail Technical Manual Normal Remote controller operation checking method D Function error_ No response in remote controller ALL MODELS A27 Established date Revised date Error symptom Content LCD TV P4000 1 GND 2 3 4V_WIFI 3 M_RESET 4 USB_DM 5 GND 6 USB_DP 7 SDA 8 KEY1 9 SCL 10 KEY2 11 IR 12 3 5V_ST 13 LED_R 14 GND 2015 04 23 2015 04 23 Copyright 2015 LG Electronics Inc All ri...

Страница 74: ...on the terminal 2 4 Check the B T version value Standard Repair Process Detail Technical Manual Motion Remote controller operation checking method D Function error_ No response in remote controller ALL MODELS A29 Established date Revised date Error symptom Content LCD TV 2015 04 23 2015 04 23 Copyright 2015 LG Electronics Inc All rights reserved Only for training and service purposes LGE Internal ...

Отзывы: